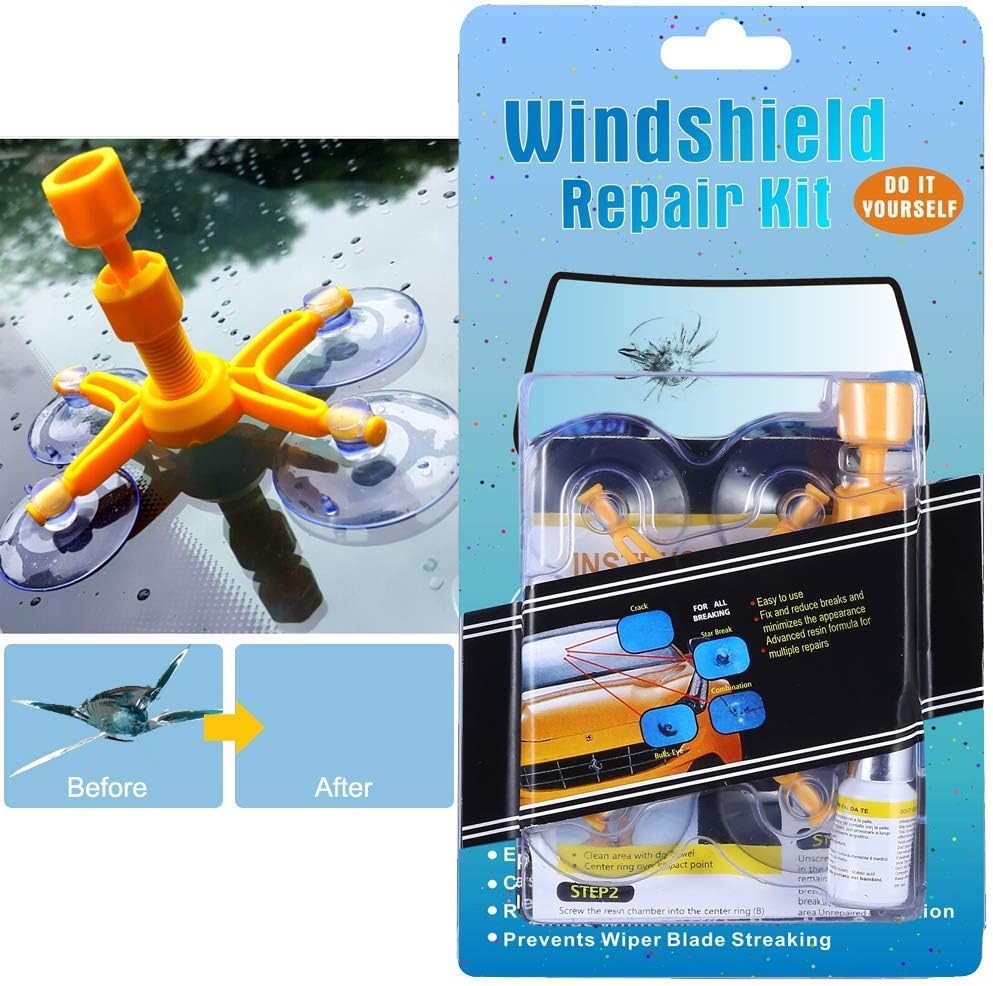
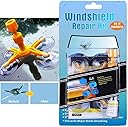


Do-It-Yourself Auto Windshield Crack Repair Kit – Windshield Repair Kit for Car Windscreen, Glass Rock Chip, Bulls Eye, Star, Half Moon Repair
Product ID: 115674746
| Manufacturer | Randalfy |
| Brand | Randalfy |
| Item Weight | 2.46 ounces |
| Package Dimensions | 9.69 x 6.46 x 0.91 inches |
| Item model number | 13 |
| Manufacturer Part Number | Randalfy |
I**
Easy to use and worth the money
Product was very easy to use. It's made of sturdy plastic with a metal insert. Suction cups are easily adjusted and have hold the assembly in place very well. Instructions were clearly written and illustrated in the manual. On my windshield the chip was close to the bottom edge, which made checking that chamber opening was positioned correctly a bit hard. For that you need to look from inside of the car, and it's hard to do if the chip is close to the dash. So I used a small mirror to get a better view. I think I overdid it with the amount of resin for the small bullseye chip I had in my windshield so a bunch of it spilled out of the chamber, but clean up was easy. After 20 minutes if curing in the sun the chip was no longer visible.
K**R
Clear directions and easy to use
The directions were clear and easy to understand. I had a small star shaped chip and after following directions, including a second application of the resin, I was satisfied with the results. I can still barely see the spot on the inside of the window but not on the outside.
D**K
Caused increased crack!
Epoxy wouldn’t dry within 10 minutes...would not fill crack or small chip properly. Also by following instructions an slight pressure on inside caused the crack to lengthen and suction caused with pressure caused more cracks.Now I have to get a new windshield. The way I see it, this is junk. Will not recommend.
L**D
Works alright, bit of a learning curve!
It took me a while to get good at fixing the chips. There is a learning curve to using this. If you have just one little spot to fix, you might want to get the one-time-use suction type to fix it, but if you have multiple little chips and little flakes and such this is a great alternative. Again, there is a learning curve, the first couple cracks you fix will probably not be perfect, but as you get better about using it (learning how much to tighten the plunger to force the resin in without blowing out the seal) the better the results. Also, if you have just tiny little chips, like the size of a match stick, the fastest way to fix them is to take the resin in this kit and a toothpick to it. You put a drop on the chip, tap and swirl with the toothpick in the divot to get all the air out and then cover with a small piece of the curing plastic (cut those big strips into nickle sized pieces). I live in Arizona, and i get maybe 30 little dings a months driving around, so once a week I go out and just spend an hour fixing all the little bits of damage so that when I drive into the sun my windshield doesn't look like a disco ball. I'll definitely buy another kit once I run out. Oh, also i noticed that after it cures and you razorblade the excess material off it leaves a noticeable mark, just polish it with some automotive scratch remover compound and it will disappear.
P**D
Did not Work
Product did not function as designed. Very disappointed.
L**A
It's Almost a Miracle
I got this chip in my windshield approximately three and a half seconds after I paid off my car, almost two years early. To say that I was salty would be an understatement. I called the shop to see how much to fix it. They wanted 60 bucks, which I suppose isn't terrible really, but they also wanted my car for eight to ten hours. I have two little kids, so that wasn't going to happen any time soon.I discovered this kit while just randomly looking around on Google. This kind of thing is most definitely not "my thing," but I decided to order it anyway. I mean, I couldn't make it any worse, right? It was already broken, and for less than ten bucks it was certainly worth a shot. I watched the video several times while I was still in the house, and then I brought it up on my phone and took it out to the garage with me. It turned out to be really easy. Trust me when I say this, if I can do this, you can totally do this!!I've attached four pictures. The first two (assuming the upload in the correct order) are of the chip - viewed from the outside and viewed from the inside. The second two are from after the fix - also viewed from the outside and viewed from the inside. I did a darned fine job, if I do say so myself. I *know* where that chip was, and even I can't see the repair.It's like magic!
E**N
It didn't work on old chip.
I have a chip that is about 8 years old and at one time was fixed but it never looked good. I tried this product and it didn't help at all. Maybe because it was an old chip? Instructions were easy to follow and product was complete.
V**S
Worth a try.
This was a bit difficult to use for a first timer, these photos are from after the repair it was a little worse before. I think I could do better now that I have the experience since I'm a hands on person. I like the idea of it, I just wish the instructions where more clear and detailed.What I learned. Make sure you have lots of rags, if the suction cups get glue on them wipe it immediately with a damp cloth or it won't want to stick again. Make sure the initial screw down tube is snug and don't be afraid to add more glue than it says. Rather to much than not enough, because going back to add more just didn't work for me. I'm hopping this will give me a few extra months before replacing my windshield, it does look a little better than it did, but it's definitely not a fix all for me with my chips as I have some cracks that didn't fill. For a chip or moon shape this is probably ideal. Over all I'm happy and will likely try it again should the need arise.
A**I
SAVES TIME & MONEY.......YOU CAN DO IT BY YOUR SELF EASILY.....ACTUALLY SUPER EASY
I really like this product which is very effective and can be easily done by single person. It saves time and money without any side effects. I just follow the instructions and also watched some videos before starting the process which helps me a lot. This product is very good in terms of cost, time and procedure. Better to do it before it spread and damage the entire windshield. I was surprised with the result and will recommend others as well. With this repair, we don't need expensive professional repair. I forgot to take the picture before repair but I posted after repair picture. It’s very difficult to figure it out and when you touch the damage area, you will not feel the damage as before but it is very smooth and just feels it’s never been damage. Hopefully it will last long and will prevent further cracking in windshield. Overall, Very Satisfied with this product. Highly Recommended.
A**A
I recommend, nice and cool!!!all
Nice!
S**S
Déception avec le kit de réparation de fissures pour pare-brise Randalfy
En tant que propriétaire d'un véhicule, j'ai récemment fait l'acquisition du kit de réparation de fissures pour pare-brise Randalfy Do-It-Yourself, espérant pouvoir résoudre rapidement et efficacement les petits dégâts sur mon pare-brise. Malheureusement, mon expérience avec ce produit a été une déception totale.Premièrement, les instructions fournies étaient confuses et mal traduites, ce qui a rendu l'utilisation du kit beaucoup plus difficile que nécessaire. De plus, les outils inclus semblaient de qualité médiocre, ce qui a grandement affecté l'efficacité globale du processus de réparation.Le résultat final était loin d'être satisfaisant. Les fissures sur mon pare-brise n'ont pas été correctement réparées, et la visibilité n'a pas été améliorée. J'ai l'impression d'avoir gaspillé du temps et de l'argent sur un produit qui n'a pas tenu ses promesses.En conclusion, je déconseille fortement le kit de réparation de fissures pour pare-brise Randalfy. Il ne fournit pas les résultats annoncés, et l'expérience d'utilisation laisse beaucoup à désirer.Je regrette mon achat et je recherche maintenant une alternative plus fiable pour résoudre le problème de fissures sur mon pare-brise.
H**S
make sure that your window is clean using alcohol
because external services are costly and slow, i desided to try this product and found it easy to use as recommended, buit make sure your window glass section is cleaned with alcohol or myself i used some lock de-iser product!!
V**U
DIY windshield repair like a professional
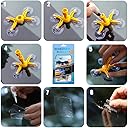
The kit is easy to use. The result is no different from a professional repair. I repaired 2 half moon cracks on 2 cars and you can hardly see the inner damage after the fix other than the tiny nick on the surface of the windshield. you can still see a fine line from a certain angle but it's the same result you can get from a professional windshield repair shop. Tips on using the kit:1. After dropping resin into the chamber view from inside the car to make sure there is enough resin to fully cover the opening of the crack leading into the inner layer.2. After tightening the pressure driver, from inside the car use a lighter to heat up ( instead of a hot air gun or hair blower as the instruction says) the cracked area in order to expand and force the trapped air out. I learned this trick from a windshield repair shop when having mine fixed long ago.3. Remove the pressure driver from the resin chamber you will hear a hissing sound generated by the air (expelled from the crack by the heat of the lighter in step 2) escaping the chamber.4. View from inside the car if the opening of the crack is still fully covered by resin (some resin was sucked into the crack in step 2 and 3). If not add more resin. Repeat step 1 thru 3 as many times as needed (in my case I did the cycle 5 or 6 times) until you hear no more hissing sound (or very little) when removing the pressure driver. At this point you should see the crack actually becomes unnoticeable.
Trustpilot
3 weeks ago
5 days ago