We remain fully operational. Our teams are working around the clock to ensure your deliveries continue safely.

DOWNLOAD THE APP


Copyright © 2025 Desertcart Holdings Limited
DOWNLOAD THE APP


Buy anything from 5,000+ international stores. One checkout price. No surprise fees. Join 2M+ shoppers on Desertcart.
Desertcart purchases this item on your behalf and handles shipping, customs, and support to Romania.
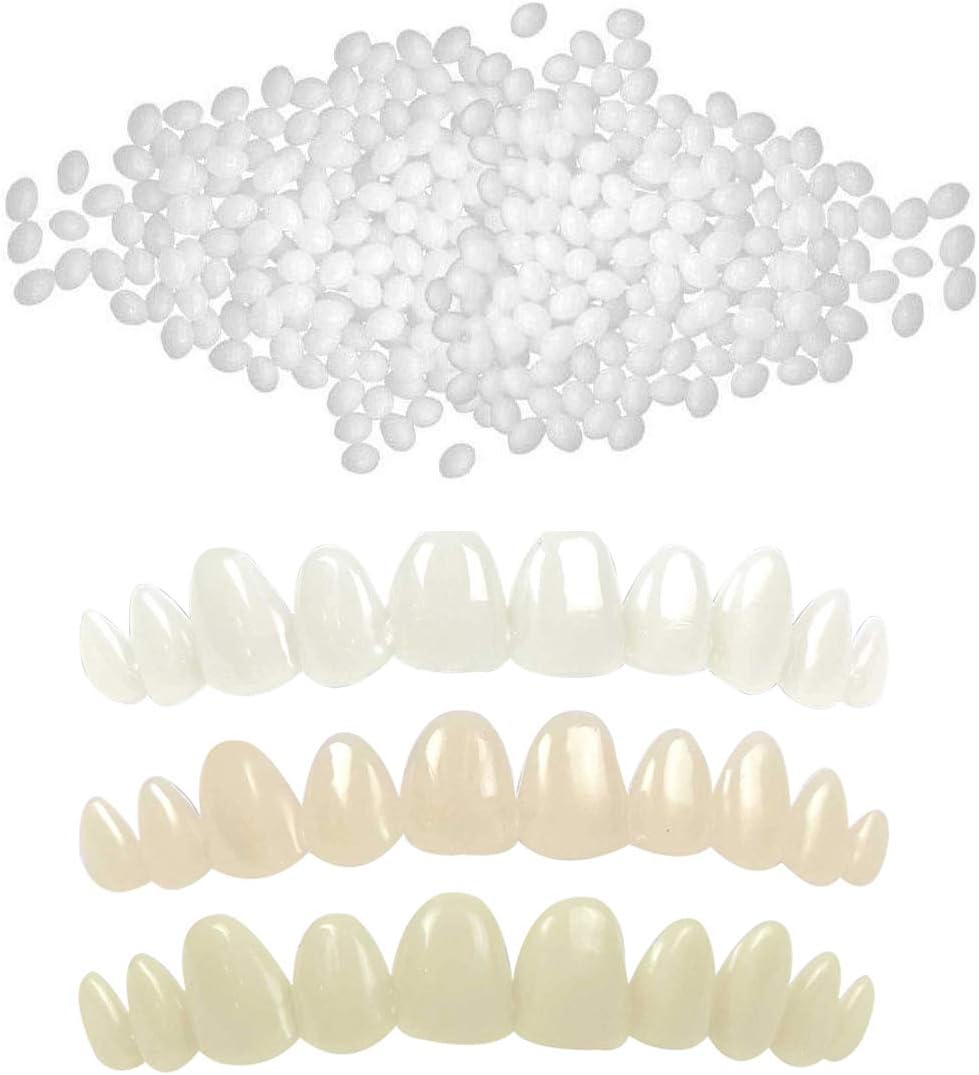
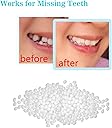
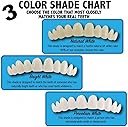
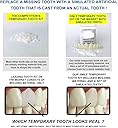
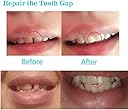
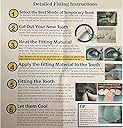
How It Works: Step 1: Select the best shade and shape The kit includes 3 shading options so that you can select the color that most closely matches your neighboring teeth. There are also several sizes and shapes on each row so that you can select the tooth that most closely resembles the look of your missing tooth. Step 2: Remove the selected tooth from the row Once the best tooth is selected, the tooth is removed from the row of teeth with a pair of scissors. At this point, the single tooth can be held into the place of the missing tooth to see how it will fit. If the tooth needs adjusted, you can use the included scissors and file to size and shape the tooth as needed. Step 3: Apply the fitting material to the back of the tooth The tooth is securely held in place with the thermal fitting beads. The beads become very soft when heated in hot water. The softened material is applied to the back of the temporary tooth and then the tooth is inserted into the space left by your missing tooth. Step 4: Fit the temporary tooth into place The temporary tooth is inserted into the place of the missing tooth. The temporary tooth is wedged into the place of the missing tooth and the softened material is pressed against the adjacent teeth and also fills in the indents on the backside of the surrounding teeth. When the material cools and hardens after a few minutes, the tooth should stay securely in place. If the tooth feels loose, the fitting material can be re-heated and the tooth can be refit as many times as needed until it stays securely in place.
Trustpilot
5 days ago
2 months ago