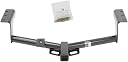
๐ Tow Boldly, Tow Confidently โ The Hitch That Means Business
The Draw-Tite 75235 Class 3 Trailer Hitch is a custom-engineered, heavy-duty towing solution designed exclusively for 2006-2018 Toyota RAV4 models. Crafted from solid all-welded alloy steel with a corrosion-resistant powder coat finish, it supports up to 4,500 lbs gross trailer weight and 675 lbs tongue weight. Tested beyond industry standards and backed by a lifetime limited warranty, this 2-inch receiver hitch offers professional-grade strength and versatility for all your towing and cargo needs.


| ASIN | B01B6P2LK4 |
| Automotive Fit Type | Vehicle Specific Fit |
| Best Sellers Rank | #514,748 in Automotive ( See Top 100 in Automotive ) #1,320 in Towing Hitch Receivers |
| Brand | Draw-Tite |
| Brand Name | Draw-Tite |
| Compatible with Vehicle Type | Sport-Utility-Vehicles, Trailer, Truck, Van |
| Customer Reviews | 4.5 out of 5 stars 1,579 Reviews |
| Finish Type | Powder Coated |
| Global Trade Identification Number | 00742512752359 |
| Included Components | Draw-Tite Trailer Hitch Class III, 2 in. Receiver, Compatible with Select Jeep Liberty |
| Item Type Name | towing-receivers |
| Item Weight | 39.2 pounds |
| Manufacturer | Draw-Tite |
| Manufacturer Part Number | 75235 |
| Manufacturer Warranty Description | Limited Lifetime Warranty |
| Material | Alloy Steel |
| Material Type | Alloy Steel |
| Maximum Towing Capacity | 4500 pounds |
| Model Number | 75235 |
| Number of Items | 1 |
| Pull Force | 4500 pounds |
| UPC | 742512752359 |
| Unit Count | 1 Count |
| Vehicle Service Type | Sport-Utility-Vehicles, Trailer, Truck, Van |
D**Y
Nicely packaged and great build quality
I originally purchased a Curt hitch but returned it because it shipped without a box or padding and it was all dented and scratched. I was a little hesitant when ordering the Drawtite but was pleasantly surprised at how well packaged it was. It arrived in a sturdy box, and all the ends had thick foam to protect it. I was able to install it by myself with the help of using a floor jack. All the holes lined up as well, which I was initially worried about.
S**E
Great Item, Reasonable Price
The install was quick and easy for my 2008 V6 4WD Rav4. Alignment was good, the welds look sturdy and it should do exactly what it's designed to do. I was a little confused that it came with only 5 bolts but 6 holes, but I didn't realize that only 5 of the 6 lined up with the factory holes. As others have said, if you're installing it on an older vehicle like mine, get a M12 x 1.25 tap to re-thread the holes in the chassis. Also, the hole above the muffler may difficult to reach without a low-profile handle (I used an 8mm wrench) or some kind of extension for a drill.
T**B
A solid hitch
Fits my Rav4 perfectly. I had to look up some YouTube tutorials on how to install it (U-haul has a great one). It took some muscle to put it on, but the result is super sturdy and reliable.
P**T
Installed on 2018 Rav4. My experience.
I installed this on a 2018 Rav4. Here is my experience. The instructions said it should take 20 minutes. In reality, it could have, but this is no fault of the receiver hitch itself. The issue was with the car. Took me at least 2 hours. After removing the plastic cover on the driver side and the bracket, the threads were in perfect condition. However, since the passenger side holes aren't covered, the threads were rusted and the bolts would not start. I ended up having to buy a M12x1.25 taper tap to chase the threads and clean them out. After this, the threads started. The biggest issue with installation is the holes on the passenger side are right above the muffler. I removed it from the isolator right at the muffler and the isolator further up the tail pipe. I then was able to adequately get at the bolts. Use soapy water to remove the isolators. I did this in my garage laying on my back. Have a 2nd person hold up the hitch while you get the bolts started on one side. It took all my strength to get the bolts to 76 ft-lbs while laying under the car.
B**N
Perfect - except a confusing pin hole size
Went on very easy, perfect bolt hole alignment. Took just over 30 minutes for two guys who actually spent more time looking for sockets than time spent under the car. (My bolts were 18mm, while the instructions said needed 17 and 19mm sockets, part of the extra looking time, but no rating reduction.) Did not do any electrical, just the hitch. First using for a cargo carrier and then will add a rear bike rack. Did not remove the two muffler rubber hangers. Just dropped the muffler a few inches by removing one metal pin from the back most rubber hanger. No grease or spray, just a screwdriver and a little prying. Tilted the hitch up and loosely threaded one bolt to hold in place, then attached left side. Very solid and well finished. It did come unpackaged, but it was in good shape, and the bolts were taped into the receiver. No complaints on that score. One note, and the reason I subtracted one star... this is a 2" receiver, but the drilled hole is a smaller, 1/2" pin size, like you would find on a 1-1/4" receiver. I'm a little confused by this. My cargo carrier is 2" and has a 5/8" pin, and all the 2" ball hitches I've seen have a 5/8" pin. I'm going to call this a mistake, because it means I need to drill another pin hole in my cargo carrier, or drill a 5/8" pin hole in the receiver - which is very heavy gauge steel, so I'm opting to modify the carrier first, and put off the other drilling until I look at an adapter for a bike carrier, and then decide. Again, love the hitch. Very quality build and heavy gauge, nice finish. Perfect alignment and fit. But, now I've got to deal with the pin mismatch.
R**R
Can be done as a DiY.
I now have a bike hitch. This can be installed by a total noob with the right tools especially a Muffler hanger removal wrench. I didnโt even have to lift the rear. I had to enlist the help of my son to get the first bolt in. After the first bolt, installation went quick. Torqueing can be challenging but once torqued, the Hitch is rock solid and has ample clearance on my stock wheels.
J**R
Sturdy hitch, looks nice and clean, and installs easily. Great value.
The hitch installed quite nicely - looks and works great. The installation instructions include everything you need to know. I was skeptical about removing the exhaust rod mentioned in the instructions (not the rubber hanger, itโs a different bracket), but once youโre under the vehicle you can see that it serves no real purpose on the vehicle itself. I suspect it was just a factory lift point that isnโt necessary after assembly. The rubber exhaust hanger was still quite pliable, and even though I had one to use, I could have easily popped it off without a removal tool. I did have trouble starting the bolts on the passenger side due to corrosion (which I didnโt expect on such a clean and garage kept vehicle) but as another reviewer suggested, cutting a little notch at the tip of the threads with a cut-off wheel makes them work like a thread chaser, and they cleaned up the threads nicely. This is a really straightforward DIY project, and I suspect the only issues you might encounter would be related to the vehicle itself (re: rusty threads or stiff exhaust hangers). If youโre familiar with automotive work, already have the proper tools (torque wrench included) I wouldnโt hesitate at all to give it a try. It took me less than an hour, and I was being unnecessarily slow and careful. Iโm well pleased.
L**E
Be sure to have a big sledge hammer handy!
This hitch is quite sturdy which makes it all the more problematic when it doesn't fit ... I mean not even close to fitting. The bolt holes were more than 1-1/2" off, which means not even close in an installation of a sturdy hitch. I'm going back to Curt from now on. The picture shows the hitch after 15-20 solid hits with my 8ib sledge. My wife had to hold the other end down to keep from moving too much. Another 15 solid blows and several fit checks later, it was "close enough." Now I'm waiting for the paint to dry that I had to apply to the cosmetic "damage" I did with the sledge hammer. To save $5 by manufacturing in Mexico instead of somewhere else where quality control might exist, Draw - Tite made the poor decision to manufacture their hitches where QC isn't up to the task. And now my labor has been used to correct Drwa-Tite sloppy manufacturing. It is really not the workers or even Mexico, as Mexican workers create some quality products, e.g. Toyota's made in Mexico. This lack of quality is on the shoulders of Draw-Tite production mismanagement. And that falls on the shoulders of Draw-tite upper management. I worked for a company that did manufacturing of quality electronic components in Mexico, so I know quality products can be manufactured in Mexico. Draw-Tite just doesn't know how or is too lazy to try.
G**R
Perfect Fitting Rugged Hitch
Bought for 2017 Toyota RAV 4 and it fit great. Bolt holes line up perfectly and was able to install without removing exhaust with a bit of effort. Before installing I did a bit of prep work. First, In order to help installation, I backed the car up on a set of portable ramps and this gives a bit of extra room to work plus makes it easy to lift the right side of the mount up under the exhaust. Second, I removed the plastic panel on the left hand side. Third I unhooked the rear most exhaust hanger and tied the exhaust to the side some to help access the bolt holes. Next I removed the tow hook on left side. Then I chased out all the bolt holes with a tap. Following that I lifted up the mount up under the exhaust on the right side and threaded in a bolt to hold it there. Next I lifted it on the left side and threaded in a bolt to hold it in place. I then reinstalled the tow hook, put all the bolts in place and torqued it all down. Finally I cut a notch in the plastic panel and remounted it. A few notes. You can only pull the exhaust a small amount out of the way and enough to get at the bolts but access is still a bit tight. I had to use a U-Joint socket extension to tighten bolts on right side and was tight work getting a tap in there to clean out thread holes. Cleaning out the thread holes before hand, though not necessary, help makes for easier installation but just be careful to not cross thread, use wrong size tap or take off too much or you will strip the threads. While the RAV4 only requires a Class 1 hitch, this Class 2 hitch didn't really cost more and seems to be a very solid unit when mounted in place.
M**M
Good product at good prices
Installed on my 2011 Toyota Rav 4, perfect fit and good quality,hooked to a trailer with over 2 tons of material many times
R**F
Well made and fits.
This fits my 2007 Rav4 perfectly. Installs in under 30 minutes. I have ratcheting box end wrenches and small torque wrench so didnโt even have to remove muffler support. My โ07 has NO RUST so just used wire pipe cleaner to remove dust from mount pipes. Also used Loctite never seize on bolts.
M**Y
A solid piece of metal
This hitch is made from solid chunks of steel and should handle anything I currently intend to throw at it. Installation was pretty easy. Some people don't like to drop the exhaust off the hangers, but it only takes a minute or two and makes more room for your tools. Five bolt attachment. The packaging was OK, but there were a couple of small dings in the paint during shipping. About my only recommendation for after market hitch makers is to create options to fully utilise the towing capacity of the vehicles. In the case of the RAV4, some have the optional tow package with extra mounting points dropping from the rear of the frame (is it the rear bumper - you know, the real bumper, not the plastic cladding?) Anyway, install time could be as low as 20 minutes if the threads in the frame are clean, more if you (like me) need to clean them a bit.
W**A
Works perfect, packaging not the best.
Hitch installs and functions exactly the way it was intended. The instructions didn't match 100%, but it was very close and easy to figure out. When I received the hitch, there was only tape and "packaging" on the receiver part of this unit. All other edges were exposed. Since they were exposed, the paint was chipped off from the parts that made contact with rough surfaces. This is pretty heavy so, understandingly, it's going to be shoved around. I had to spray paint the places that bare metal was exposed or else rust would show up. It was pretty easy to paint and I had rust preventative paint on hand. Overall, this is a good price, looks good, and works exactly as expected.
Trustpilot
3 weeks ago
2 months ago