❄️ Keep your cool and save big with RadiantGUARD Xtreme!
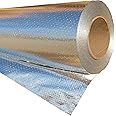
RadiantGUARD Xtreme Heavy Duty Attic Foil is a 1000 sq ft, double reflective aluminum radiant barrier that blocks 95% of radiant heat gain and loss, reducing attic temperatures by up to 30°F. Certified to exceed ASTM C1313 standards with a Class A fire rating, this 28-pound industrial-strength roll is perforated for breathability, tear-resistant, and safe to install without special protective gear. Designed for easy DIY application, it helps lower utility bills year-round while meeting all major building codes.
| Product Dimensions | 48"L x 6"W |
| Global Trade Identification Number | 00852166008518 |
| Manufacturer | RadiantGUARD |
| UPC | 852166008518 |
| Part Number | RG-X-1000-B |
| Item Weight | 26 pounds |
| Country of Origin | USA |
| Item model number | RG-X-1000-B |
| Is Discontinued By Manufacturer | No |
| Size | 1000 sf (48-inch by 250-feet) |
| Color | Silver |
| Shape | Round |
| Item Package Quantity | 1 |
| Batteries Included? | No |
| Batteries Required? | No |
L**O
It works!
Added this to my attic to hopefully keep my furnace from freezing up on extreme heat days and to save money on ac bills. It’s thick, durable and more easily installed with a helper. It lowered the temp by 10 degrees measured with laser pointer type of device on barrier covered sections vs none. It was hard to install in some areas due to my furnace being in the way, no real floor in most sections and I did it alone.
D**.
This foil is robust and resists ripping/tearing. Easy to cut to size and to staple to rafters.
This review is for Radiant Barrier Insulation Roll RadiantGUARD Xtreme Heavy Duty Foil Insulation Roll, 1000 sq ft | 48-inch by 250-feet Perforated Breathable Reflective Insulation Roll.The roll of Radiant Barrier foil was delivered on-time, complete and as described by the seller. I have no prior experience with installation of reflective foil in attics and I cannot attest to efficacy or relative merits of different brands. I purchased this roll after doing some online research and with the hope of reducing AC costs; my home is exposed to the extremes of south Florida weather and I know that the attic becomes unbearably hot in the summer months. I spent several hours yesterday installing this heavy duty foil by stapling to the underside of the roof rafters; I estimate that I have completed about 1/8 of the total area I will have to cover. I am pleased with how well this RadiantGUARD Xtremefoild handles. It is more robust than I expected; it does not readily rip or tear but does cut to size easily with a utility knife or scissors. Given my favorable experience with this product, I have today placed an order for a second roll which I know will be needed to complete the project. I am trusting that my investment will be recouped through lower utility bills.
G**Y
Can feel a difference
Instantly can feel a difference in heat radiating through the roof. Its like going from standing under a heat lamp while in a furnace in the attic to just being in a furnace. Its still super hot up there, but this does its job well.
S**S
Glad I spent a little extra to get the tough stuff
The material is tough, even more so than I thought it would be. As with most foil type materials, watch out for the edges, it's very easy to get a papercut type cut on your fingers if you slide along the edge.So far I've installed the barrier over 35-40% of the heated/cooled areas of my house. It seems to be making a difference, but I can't say for sure how much yet. AC was first kicking on at 11a, and now it seems to be after 12p.You can see in the two pictures I included that I recorded a temperature difference of 20 degrees from foil to no foil, in the same location. That was taken at 3:17p on a section of the roof that faces WNW.I'm in Tampa, so it gets pretty hot, and the sun is intense. On the bottom chord of the roof trusses I am now seeing about 107 during the peak of the day, when the roof decking is between 130-140. Before I put up any of the foil I would see the bottom chord at 115-122 in the same conditions.I just ordered a few wireless temperature sensors, so I will install one on the W and E sides of the house, and then above the garage, which has had no radiant barrier installed. The data should give a better idea of what's going on. . . I'll report back after.I've been doing the install a little at a time as a one person job. While the spool holder would be great with a more open attic (started on the storage side of the attic), I have been measuring then cutting 4-10 ft sections then taking them up the ladder. Once the spool got lighter I just took the whole thing up and have been unrolling as I go along. The 4-10 ft lengths still seem to be the best to work with.Another thing. . . Going up to install this made me notice several areas where my insulation was pulled back, or had fallen down, so great time to fix that. I also noticed how badly a few areas are lacking in the blown in insulation, so I will definitely be going back to add more of that as well.
T**S
Product does what it says
Great stuff! You can feel the difference in heat coming through the roof into the attic. I stapled mine to the rafters. It's a process and would have been easier with 2 people.
R**E
made a big differance
Good product
J**P
Very effective
We haven't gotten it all installed yet, mostly because it is already too hot in the attic here in southern NM and my kids and I started out not knowing what we are doing, but we are refining our technique as we go.For those in a similar situation, I have a few recommendations. Do not take the whole roll up in the attic. Go up, measure the length of sheet you'll need, and add 6-12 inches. Go back down and cut that measurement. Take it up and install with a staple gun to the rafters, not directly to the roof. Once you have done that, you'll be able to see if your measurement for the first sheet was appropriate for your space. Figure out how many sheets of that size you are likely to need, go back down, and cut that many. Work on the big spaces first, the ones where you won't need to make a bunch of cuts for pipes or trusses. Then, go back and fill in the gaps, overlapping the sheets by an inch or two. Then secure those overlaps with aluminum tape. Work one section of the attic at a time so all measurements are the same at time of cutting and you don't confuse which section of the attic goes with which sheet.I found it essential for 2-3 of us to work together, one holding the unstained sheet taut and the other stapling. I installed the first sheet by myself, and while it worked and wasn't a total disaster, it also was incredibly hard to manage it all at the same time and that piece of the barrier looks like it was installed by a drunken monkey. It is still effective, though, and only plumbers and electricians will ever see it, so that doesn't really matter. Where we have installed it, so far ther is a 15-20° difference between where the barrier is installed and the plain roof, which is fantastic!Remember to leave a few inches gap at the top and bottom for air flow/ventilation and don't cover your vents or turbine openings.I expect this to save me a lot of money in summer and winter ver the rest of my time in this house. It is difficult for me to install as a fat, out of shape, 50 year old woman, but the difficulty is well worth it if it saves me hundreds of dollars in energy each year.
Trustpilot
1 week ago
1 month ago