Hock KB100 Block Plane Kit
Product ID: 18622523
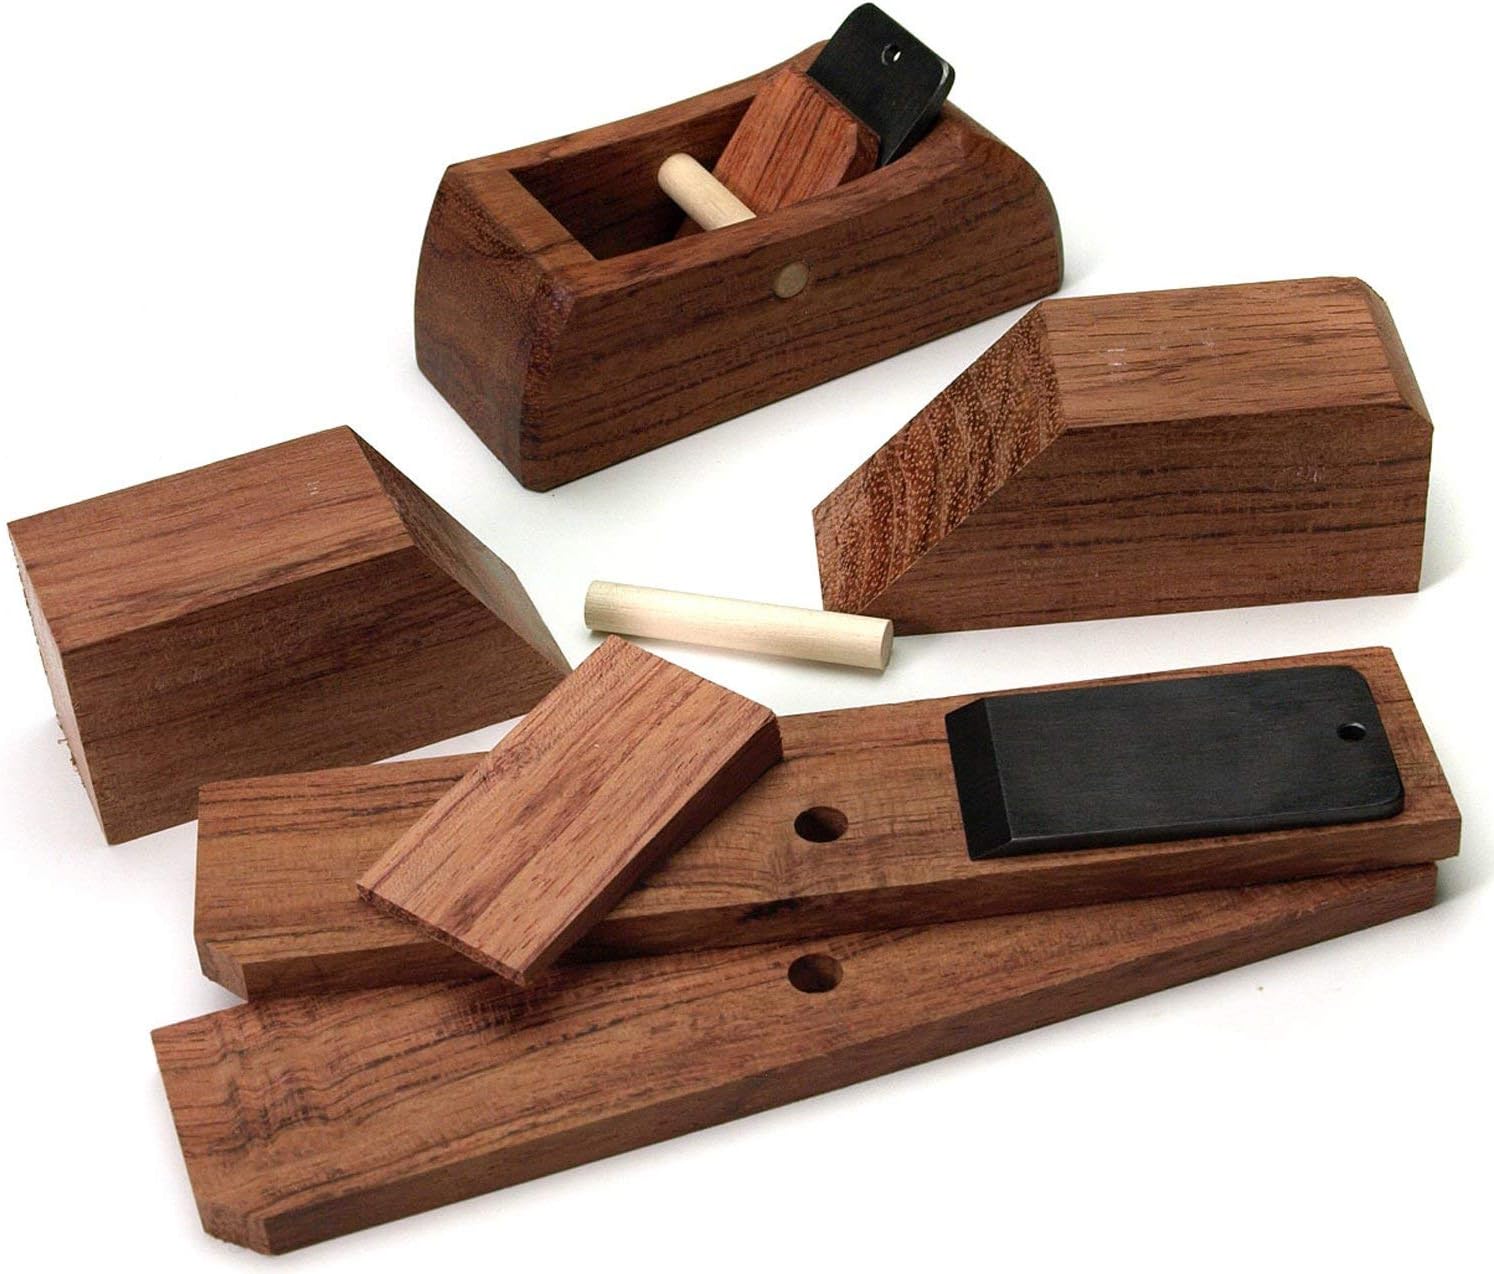
This is Ron Hocks small version of his ever-popular Krenov-style wooden plane kitThis handy Block Plane comes with a 1 in. wide blade, ends up 5 3/4 in. long and trims down to 5 in or less depending on your needs The plane in the photo is just 3 1/2 in. long -- a very convenient size for an apron pocket.
M**T
Fast to build, easy to use!
Tools absolutely needed: clamps with pieces of wood to evenly distribute pressure and not mar the planer, drill, 1/8" bit, glue, piece of sandpaper, a way to cut or saw the 1/8" dial pegs, ruler, hammer, paper towel.This is all I used and in two hours I was creating thin and even curly shavings that were almost transparent and leaving a smooth finish on the workpiece.Things to add to your experience but not really necessary to be able to make a functioning plane: file, blade sharpener stone or other method, finish such as boiled linseed oil (blo); a "good" saw off some sort to trim front and back end off-table saw would be easiest; chisel or flat screwdriver to scrape any globs of glue off.Take your time fitting the pieces flush, feeling with your fingers that the bottom of the plans is smooth. Do this with clamps lightly applied. Make sure to also measure and have the opening to the exact width specified: the blade by itself should just barely NOT fall out of the bottom of the plane-after the glue dries you'll sandpaper or file the opening little by little until the blade can barely poke through. I used two wood clamps with a c-clamp in the center. Drill and pop in the pegs and then glue up. I used a piece of tape on the drill bit as a depth gauge. Since you must do with the clamps on I couldn't use my drill press, just a hand drill.I didn't sharpen the blade or shape the wedge: I just popped them in and tapped until the blade just barely poked through: you can CAREFULLY feel it with your finger but barely see it protruding: I ran over an edge of clamped board and got a fantastic curl! That's it!Take lots of time on clamping: adjust the bottom so you feel no more ridges and then double check the width of the opening. The bottom of the plane is what rides on the workpiece so it needs to be square and smooth. Repeat many times until perfect, tighten the clamps and check that the blade doesn't fall out the bottom (without the wedge). Then drill and glue is easy. I spent more time clamping than waiting for the glue to dry. I used three clamps so I could space them out and allow access for the drill. You have to drill with the clamps tight, if you use big clamps they'll get in the way of the drill. I ran the drill in and around to open the holes up more but I still had to hammer the peg dowels in (a wooden mallet would be best for this).Look at the sides and make sure to pick nice looking outsides. On of my sides had lots of ridges from sawing chatter, I made sure that it got glued to the inside and hidden.A file is easier to open the throat with than sandpaper. File or sand a little and drop the blade in without the wedge, repeat until it barely pushes through. Do this over a table so the blade doesn't fall onto the ground. Go slow!There are other steps in the instructions that will make the plane look and work even better: cutting off the end to get rid of the peg dowels (I took time to sand the ends of mine so they looked like nice dot inlays like on the neck of a guitar so I'm leaving mine, also I wanted the longest plane possible). They also say to shape the wedge but don't explain how or why-I tap the wedge to get thicker shavings and tap the back of the actual plane block to back the blade out for thinner.I will eventually sand the bottom of the plane on a flat surface, but I've already radically smoothed a few pieces of lumber without doing so yet. I also bought boiled linseed oil for finishing (boiled dries quickly, raw takes longer to dry but is food quality and people use it to treat wood bowls, for holding food, that they make on lathes).Sharpening: my blade came really sharp and my shavings are thin like what comes off those plastic block pencil sharpeners with the razor blades in them! Nearly transparent veneer strips that curl up and are awesome. I have various sharpener stones and wheels but haven't used them yet.The big pin that the blade and wedge go under is bent a little from the pressure. This may mean my wedge is in to deep but it's a pleasure to use so I'm leaving it as is for now. With the blade sticking out so little I can barely see it I get a satisfying smooth glide and curled shaving. It's very relaxing turning boards into thin veneer-like strips. I showed some to a very experienced woodworker and the were impressed even before I told them I assembled the tool that made them myself.This was a surprisingly easy project that still forced me to take my time. It was over too fast but using the plane is even more fun. Next I'm going to buy just a blade and try cutting the rest of the pieces myself. Some people even make their own blades from pieces of broken band or tablesaw blades!Mike from Detroit
P**N
If I could give it 10 stars I would
I needed a block plane for a project I'm working on so I ran down to the local big box store and picked one up for about $30. I'm not a master woodworker or anything like that so this is a learning experience. After two tries, a few hours of wasted effort, and more research here's my conclusion: cheap planes are generally useless. Those $30 big box store planes are so lousy that they will put you off ever trying to use a plane again. Planes are just too hard, you will think.Enter the Hock Block Plane Kit. It's easy to put together and tune up. And adjusting the blade is simple once you get the hang of it. Here's the real bonus, Hock specializes in making high quality blades. So if you buy this and spend a bit of time learning how to use it you will end up with a superb plane. It's 95% about the blade and 5% about the plane's mouth. This kit gets both of those items right.
W**.
A Perfect Start
I've always been interested in making a wood plane and had some rough ideas on where to start. There are a couple of good books and videos available, yet I found myself not wanting to deal with obtaining the wood and preparing it. I know a decent amount about plane construction and the physics of what makes a plane work, yet that doesn't always translate into making a finished product. So while researching plane blades not only for plane construction, but also for replacing an iron on my old Stanley jointer, I came to Ron Hock's web page. I knew that Hock was known for his sharpening book and blog, and also for his quality plane irons. I wasn't quite as familiar with his plane building kits, however. The block plane kit immediately caught my eye, firstly because I needed a block plane and secondly because Hock's website has a video detailing the construction of the block plane from start to finish. The price was reasonable so I ordered it from Amazon.The plane arrived very quickly, which was a surprise because I'm in PA and I knew it was shipping from California. The kit contains two sides, a front, back, a cross dowel, and a small dowel which you cut into short pieces to use for allignment, and of course the Hock iron. All that is needed for construction is a saw to cut the small dowel, a drill and 1/8" bit, some glue, a few clamps, some sandpaper sheets and a flat work surface, and some wax and mineral spirits. I brought a piece of plywood to my computer desk to use as a work surface and watched the video on the website as I constructed the plane. The instructions were pretty straight forward but so was the video. I followed the instructions on the video and within 10 minutes I had the plane basically together, glued and clamped. While the glue was drying I flattened and honed the plane iron using water stones. The plane iron honed beautifully. I was a little worried because the guy on the video recommends hollow grinding using a powered grinder, though he says that any system would work. I don't like hollow grinding or powered grinding at all for that matter. So I was pleasantly surprised with the ease that I had a nice and sharp plane iron in such a quick time, less than 15 minutes, and I am not an expert sharpener.After the glue dried I opened the mouth per the video instructions and trimmed the wedge using a smoothing plane and cut it to length with a backsaw. With that finished I trued the sole of the plane using sheets of sandpaper on my table saw wing. I started at 80 grit and worked up to 220. The video recommends using just the 220 but I wanted to be thorough. I will say that after the initial lining up and glue up the plane bottom was basically flat. The parts come pre milled and in good condition. So the sanding was just a final touch up. After, I trimmed the plane down to size and shaped it to my liking, which really puts a personal touch on the tool. For finish I coated it with two coatings of linseed oil. The bubinga finished beautifully and the plane looks absolutely great and even store bought. I was even surprised with the ease of adjusting the iron. This being my first wood plane, I've heard that adjusting wooden plane irons can be a little tricky, but in just a few minutes I had the plane going between heavier shavings and nearly transparent ones with just a few taps with a tack hammer.I cannot recommmend this tool more for someone looking to try a making a wood plane. It was a fun project and resulted in a true working tool, in only about 2 hours including dry time, and the cost cannot be beat. I am looking forward to trying Hock's Krenov style plane and then moving on to making one from scratch. Again, I highly recommend giving it a try if tool making is a hobby. A true 5 star item.
W**R
Great little kit! Very glad I bought it!
Great little kit! I'm really enjoying putting it together, and am quite impressed with the quality of all of the components. The wooden parts look really nice, and definitely live up to the company's advertising of having been precisely milled. The plane's iron came with a hollow grind, but wasn't fully honed. (Which their web site makes clear.) As far as honing goes: a few minutes here and there got it nicely sharp. I only used a $10 four-sided, diamond-coated, 200-to-600 grit sharpening block from Harbor Freight tools, and a $15 honing guide from a local hardware store, but even so it quickly got sharp enough to shave off arm hairs. (Conclusion: really nice blades, made of great metal!) I can see why the Hock company has the really good reputation they do, for plane irons and such. Well worth the money, and then some!
Trustpilot
1 week ago
3 days ago