![WYVERN AUDIO [2pcs] Hi End RCA Male Plug Adapter Audio Phono Gold Plated Solder Connector Wv-hfr2in1](https://m.media-amazon.com/images/I/61hs5zWACSL.jpg)


🎶 Elevate Your Sound Game!
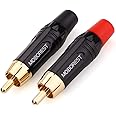
The WYVERN AUDIO Hi End RCA Male Plug Adapter is a premium audio solution featuring gold-plated solder connectors for superior sound quality. Measuring 4.7cm in length with a 6.4mm hole diameter, these eco-friendly adapters come in a convenient 2-pack, ensuring you have the perfect connection for all your audio devices.
J**S
High Quality Heavyweight, Metal Male RCA (Single Ended) solder-on connectors that work well.
After reading negative and neutral comments left here, it seems that inexperience or lack of proper solder tools/ soldering skills cause most all of the issues reported. While it's not rocket science, there is a major difference in quality between twist-on replacement connectors and the better solder-on type replacements. Soldered replacements are far and away better than the twist on type. Twist-on types will not provide optimal connections on either the outer ground/shield or center / signal wire. Twist on types rely on pressure to make the connection, while solder-on type use the metal and solder for a proper mechanical connection.. Chances of twist on type failing due to corrosion, vibration, pulling on the cable far higher. Well soldered connections can't be beat no matter how well a twist on replacement connector holds on to the outer insulation.To do the job right you need a few things prior to installing. A good solder iron or solder station is vital, it doesn't have to be expensive, a 30-40 watt unit with a proper tip will work perfectly. Next some good rosin core solder containing lead and tin is vital, lead free connections are nothing but trouble in the long run. A good pair of strippers with crimping ring built in , the normal type with 3 size solder lug crimp, cutter, ignition terminals, and 10-22 AWG strippers are perfect. An assortment of heat shrink tube helps out, as does a small project holder or desktop vice, something to hold the connector while soldering.Stripping minimum outer and inner jacket is the trick, too much or not enough causes all sorts of issues, from stray wires touching or too large once soldered to get the screw-on cover on when done. Set the wire to be soldered next to the connector disassembly then measure where you need to carefully trim the jacket back to expose the shielded/ground and inner lead. You don't need much, just enough to solder to the center and outer frame. Remember to install the screw on cover, insulation cinch, and shrink tube before any soldering is attempted. You will want to use shrink tube over the inner 'Frame' where the ground solders to, making sure that the soldered wires are well soldered, and there is no excess wire or solder anywhere. Too much could keep the cover from screwing o or cause the 2 leads inside to touch and short as the cable is handled when installed.Heat shrInk tubing should be large enough to slid down over the connectors metal grounding frame up to where the threaded part ends. Make sure it's where you want it before heating, it is part of the mechanical connection that makes the cable to connector joint solid and secure. Smaller diameter cables may benefit from a second piece of heat shrink over the first, making the overall diameter thick enough to be secured by the connectors cable cinch. Once the outer cover is installed this tightens the cable cinch, completing the mechanical connection and providing excellent strain relief. An inch or less of heat shrink can be allowed to exit the connector cover, providing additional mechanical strain relief for the connection, cable and connector.Take your time, measure twice and cut once, or measure as many times as needed. I make small cuts with an Exacto knife or the wire strippers, working my way to the proper amount of stripped wiring needed for proper soldering. It helps a lot if you tin the ground support and center pin with solder first before soldering wires to the connector. You will only need a little solder and heat to solder the wiring this way. The end of the ground lug that is crimped to hold the cable jacket secure is made into a perfect circle using the wire stripper tool mentioned above. Once the terminals are interlinking and the jacket is being held secure, you can solder the 'teeth' together, that way the cable will never come loose from the connectors. Proper heat and not too much solder it the key to the best results. For small stuff I use my portable Stahl solder station instead of my big Hakko benchtop unit. The Stahl costs about 25$ delivered and has sufficient wattage and adjustment to do this job and many others with the heat set to about 370*. You can't beat this solder station whether you are a hobbyist or hard core electronics guy.It reads like a lot when breaking it down here, but in practice, once the iron is warmed up, you should be done and listening to your new connectors well within an hour, it takes me about 1/2 hour to set up and get everything ready then install them. As far as quality, I've purchased several of these a multiple times over the last year +. The gold and metal stays in good condition and doesn't tarnish the way many of my more expensive audiophile cable ends do. They cinch the jack when plugged in without being too tight when the need to remove them arises, providing proper pressure for a secure connection. The Technics 1210 Mk5G I installed the first pair on had low capacitance cabling installed, once the new connectors were installed, the overall capacitance dropped for both channels to approx 65 picofarads end to end when measured. 50-400pf total is typically what you want to see when measuring for a moving magnet or high output moving coil cartridge, depending on the cart itself and what sounds best. Too much capacitance the high frequencies roll off into the mud. Too little capacitance, the sound tends to be overly bright shrill and sibilant. In this case, the lower capacitance helped the sound quality. A good connection is essential for good sound, no matter what you care connecting and these connectors get the job done.If you are into making your own budget cables, these single ended (RCA) male connectors work as good as those used on cables costing hundreds. It's the quality of wire in the cable being used and the soldered connection that gets the job done. My OEM connector was shorting to shield/ground just enough to impact sound quality as well as decrease the volume on the right channel. Problem solved after installing these connectors. I find it is best to replace them in matched pairs instead of just one at a time.
C**Y
Good quality, easy to install
Needed to repair a broken subwoofer cable- the cable itself was installed through a wall, down into the basement, then back up on the other side of the room. Rather than pull a new cable, I was able to cut the damaged jack off and install this one. Overall, the jack is quite solidly built, primarily out of metal, and feels like a quality component. It took all of a minute to complete the repair. This is not a cheapie plastic jack, and holds the RCA plug quite well. Things to keep in mind: You do have to solder the center conductor into the jack- this is incredibly easy, even if you do not regularly solder (I fall into this category). But if you do not have access to a soldering iron, look elsewhere for a jack that uses a screw to connect the wire. This jack is also designed for high-quality cables; the opening is rather wide to accommodate thicker wires. In my application, this was perfect as the wire in question is quite heavy-duty. It will work with thinner cables, but you may have a loose fit. There are probably very few people for whom this item is necessary, but if you need to make a custom length cable, or need to repair an existing cable, this is an excellent choice.
P**N
Nice replacement RCA plugs
Installed these phono RCA plugs on an old turntable that needed new connectors. The new connectors are clean, attractive, and functional.The connector disassembles in two sections. The gold plug unscrews from the rest of the assembly. The gray base unscrews into two pieces just below the colored ring designator. You unscrew the gold connector and either loosen or unscrew the gray assemblies, then push your wire through the gray pieces. The gold connector is then soldered to the cable. The center conductor is the line wire and the other connection is for the shielded ground. Very straight forward. Anyone with basic soldering skills can do this. Once the wires are soldered, the assemblies just screw together. When the two gray pieces screw together, they tighten around the entire wire, forming a nice, solid connection to the entire wire.Just remember to place the gray portion of the plug on the wire BEFORE soldering the gold connector. If you don't, you'll have to cut off the soldered wires, install the gray pieces, then redo all your solder joints again.Nice product... I definitely recommend it.
S**X
Well designed
These plugs have three pieces, resulting in a design far superior to the usual RCA plug that often leaves the cable conductors susceptible to fatigue and fraying. The three parts consist of: 1) The connector and cable solder points, 2) a threaded insulating shell, and 3) a threaded rear shell that firmly tightens a grasping strain relief on the cable, leaving the soldered attachments unaffected. My package of two had color coded bands for easy identification, red for one and white for the other.
M**T
As described.
Worked great. Took a minute or two to figure out the best way to secure the sheathing so the solder points weren’t the only thing holding the wire. The “neck” at the end has two sides. When your done soldering push one side down tight then overlap the other and work your tool around the whole thing lightly a few times to get it snug on the outer sheath.
Trustpilot
1 day ago
2 weeks ago
![[2pcs] Hi End RCA Male Plug Adapter Audio Phono Gold Plated Solder Connector Wv-hfr2in1](https://images-na.ssl-images-amazon.com/images/I/61hs5zWACSL._AC_UL116_SR116,116_.jpg)