🎉 Elevate Your Outdoors with KILZ—Where Style Meets Durability!
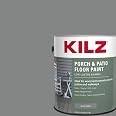
KILZ Over Armor Textured Wood/Concrete Coating is a premium, 100% acrylic resurfacer designed to rejuvenate weathered wood and concrete surfaces. With a coverage of approximately 75 square feet per gallon, it effectively bridges cracks and hides imperfections, providing a slip-resistant finish. Ideal for decks, patios, and more, this product is mildew resistant and dries quickly, ensuring your outdoor spaces look their best in no time.
| Colour | Gray |
| Brand | KILZ |
| Surface Recommendation | Wood, Composite, Concrete Floors |
| Material | 100% Acrylic |
| Model Name | L395711 |
| Size | 1 Gallon (Pack of 1) |
| Item dimensions L x W x H | 16.8 x 16.8 x 19.4 Centimeters |
| Item Weight | 5.59 kg |
| Finish Type | Flat, Textured |
| Style | Textured |
| Recommended Uses For Product | exterior |
| Coverage | 75 sq. ft. |
| Special Feature | Mildew Resistant |
| Compatible Material | Wood, Composite |
| Liquid Volume | 1 Gallons |
| Paint Type | Oil, Spray |
| Package Information | Tin |
| Manufacturer | KILZ |
| Global Trade Identification Number | 00051652007589 |
| UPC | 051652007589 |
| Item model number | L395711 |
| Product Dimensions | 16.84 x 16.84 x 19.43 cm; 5.59 kg |
| ASIN | B06XPYYLT6 |
L**N
Good product
It's working very well. Easy handle with brushes. Coverage of loose old paint and old wood surface very well. Seems like can last forever!
F**C
Thick going on, but dried quickly and protects my porch from water damage
PROS:-Provides heavy protection to some water-damaged areas; will hopefully prolong the life of my porch by at least a few years-Textured surface makes it safer to walk on in bad weather-Fills most cracksCONS:-Thick- difficult to paint. (see my tips below)-Color choices are not my favorite (I used Chocolate, which looked like poop going on and looks redder than the trim paint elsewhere on the house)My front porch was starting to need some serious attention in several areas largely from rain/weather damage. I have tongue-and-groove flooring that's about 10 years old, and I'm not confident that the builder did a proper job installing it. To complicate things, stone siding was built over it and mortared over the edges of several boards; rainwater has dripped down this stone wall and caused some wood damage at the joints. I repaired the damaged places with a special wood restoration kit & putty, then sanded the surface down and cleaned it. Finally it was time to paint. I watched videos online for some good tips. Even after reading reviews I wasn't prepared for how thick it was. I managed to paint a small L-shaped porch (~126 square feet) with a single coat in about 2-3 hours. You're not supposed to apply it within 24 hours of precipitation, but we got rain THE NIGHT after I painted. I woke in the middle of the night and panicked when I heard the downpour outside. Fortunately, it dried in time and looked amazing the following day. I only completed this project 2-3 weeks ago; I will post a follow-up if the paint doesn't stand up.PAINTING TIPS:-I used a 2-3" brush to lay a stripe of paint NEAR the stone-faced edge of my house. I went back with a detail brush (1" art brush) to delicately cut in around the mortared edges. I basically just dragged paint from the thick stripe carefully to the edges. In spots where mortar/stone was exposed to rain I carried the paint over the lip of the mortar to seal this joint and prevent water from seeping into the wood. It was very difficult to cut in with the 2" brush itself because the paint was so thick.-I gave up on using a pan with the roller- the paint is too thick. Instead I used a 4" brush to drop piles of paint onto the porch, then used my 4" roller (attached to a pole) to spread and push it around. I still used the 4" brush close to the edges where I worried the roller wouldn't be able to cover, but I still rolled those spots as close to the edge as possible so the texture would be consistent.-I used the 2" and 4" brush in spots where there were cracks or other defects, because you have to drop a lot of paint into these gaps and really work it in. This was mostly at the edges that had seen the most weather. I still followed with the roller to keep a consistent texture.-Don't forget to cover the ends/sides of the wood! I put down tape and paper under these edges to protect the trim.-I used a 4" roller (sized for porch/deck/cabinets).
J**R
Great stuff but price is egrigious
Paid $144 but rec'd the product with a lading bill of only $59...The product works well and if watered down coverage is easier, finer and greater(Suggest adding water depending on how bad your surface really is...)Filled in the deck boards imperfections to save replacing themPainted over top with our bespoked "tinted" floor paint
P**
Majorly Enhanced Curb Appeal for Rental
I have a rental duplex that is probably 100 years old, (my grandparents bought it in 1940, and my parents gave it to me in 2016). The two sets of concrete steps on the front of the house were a mess with big cracks, pock marks and old peeling layers of different colored paint showing. Those steps were always the first thing I noticed about the house, and they made the whole place look bad. Talk about negative curb appeal! Since one side is between renters and the weather is nice, I decided to do something about them. I finished stripping the steps two days ago and applied the first coat of Over Armor yesterday. I managed to cover both sets of steps, five steps per set, and the sides, with one gallon. The difference is amazing. Cracks were filled and the appearance of pock marks greatly diminished. The steps look good enough that i wouldn't bother with second coat if directions didn't specify it was necessary. Today i will probably dab (rather than brush smoothly) paint on walking surfaces to enhance non slip properties. As others have said, it requires some muscle to use this. The paint paddle literally stands up in the can. Started with a 4" roller, and it was working well, but the paint was drying in the paint pan so rapidly I switched to brush only. I would NOT have been able to cover both sets of steps with one gallon if I had continued with the roller. Anyway, the property looks SO much better with those nasty steps spruced up. You can still tell the steps are ancient If you take a second look, but now they look like well maintained ancient steps!
A**Y
Great but buy more than you anticipate
My house has a front concrete patio that had been previously patched and painted so I scraped off the previous paint, patched the cracks, & sprayed with a hose to prep the service. I then applied 1-gallon of Killz Over Armor using a roller meant for concrete and other textured services attached to a long handle. (I taped off the edges and cut in those with a paintbrush prior to using the roller.)It’s canned like a paint, colored like a paint, and you use the same tools as you would for paint; however, this product is extremely thick and meant to fill in divots and imperfections in your surface so remove the idea from your mind that you will be “painting” your porch. The product is so thick that I skipped using a paint pan and just poured it straight from the can onto the porch in sections so I could use the longer roller to spread it across the surface, but not too thin. You want this to go on thick so it fills the imperfections. By doing this, 1-gallon does not go along way. I ended up buying a second and gallon to complete my project. Honestly, a third gallon would probably have given my surface a perfect finish but I wasn’t trying to take it that far.It’s reasonably priced for the improvement it provides. I do wish I came in more colors as I don’t love the slate gray with my house’s color scheme so I do plan to go over it with a colored porch and patio paint. I found it fairly easy to apply. I let the first coat set for 3-days before I applied the second coat since I had to order it again and wait for the Amazon shipping. This is much longer than necessary. I think the product says you can apply the second coat within 4 to 6 hours. I plan to give it about 24 hours before I put my porch furniture back in place. Obviously, you’ll want to make sure you put the time and effort into prepping the surface for a proper application so the product last as long as possible, and make sure you choose the right weather for proper curing. Good luck!
Trustpilot
2 months ago
1 week ago