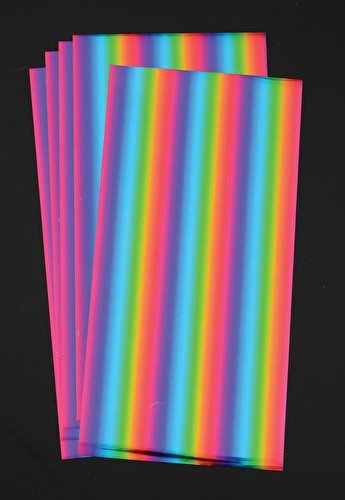

iCraft Deco Foil Specialty Transfer Sheets 6"X12" 5/Pkg-Rainbow
C**.
Costly for only 5 sheets
Honestly I nearly had a heart attack its cost £1.29 per sheet. PER SHEET. Granted it was my own fault not reading the size of it due to the excitement of needing it to finish a project. But for money value, rip off. I haven't used it yet but will be very shortly so will be able to edit to review with the details of using it.
N**E
Fit for purpose, easy to use.
The media could not be loaded. Bought these to foil the cover of some DIY wedding passport invitations. Easy to use, as you can see in the video they did the job. Upon close inspection the adhesion wasn’t 100% but I think this may be more to do with the temperature of my laminator than the foil itself. And also after a few weeks could see some flaking occurring but this is bound to happen with foil sleeking eventually anyway due to only being a transfer.
C**L
Very Good on the Whole.
Bought Gold & Silver Foil's.Got to be honest, the Gold stuck OK, but the Silver was a teeny bit patchy on the very edge of some text.Used General purpose Home Laminator & Paper sheet method & of course a Laser Printer.As I had a few copies, I was able to choose the perfect ones.
G**A
Gorgeous foil.
I have this foil in seven colours and they are all gorgeous, super shiny and smooth; the picture is pretty close to actuality. You get five sheets for your money and I reckon that is pretty good value if you use it economically. Having said that I used up three sheets learning how to use it to best effect but I do not think there is any way around that. I've made foiled stripes using double sided adhesive tape - I liked the finished effect of that; it wasn't super smooth but there weren't any missing bits and it's very straightforward to do. I tried putting down dots using the 'Quickie glue per' and it worked a bit patchily, it will be good to do rescue work on bigger areas. I've tried it with Ranger 'sticky' embossing powder (basically powdered glue that you use like embossing powder, adhering it to a sticky base then melting it with a heat gun and applying the foil quickly on top before it cools and hardens) - I found that quite difficult because I had to juggle heat gun, card and foil; the results, even with a bit of practice, were uneven but not unattractive, they had a sort of distressed look that could work well on cards. I've tried it with 'sticky' embossing powder and clear embossing powder, folded inside a sheet of tracing paper and put through a laminator, unfortunately that did not work so well because the powder smudged during the handling but where the foil adhered to the card it was super smooth and shiny. I'll update this review when I've tried both types of embossing powder melted with the heat gun and then put through the laminator with and without tracing paper.I've completed my experiments with the foils and the results I like best were when I used clear embossing powder set with the heat gun and then the card and foil put through the laminator (I have the basic Bonsaii model) inside of a folded piece of good quality tracing paper. This produced a filigree effect that I think is very attractive. Putting card and foil through without a carrier paper gave more definite outline but with a tendency to be a bit patchy.
A**R
Nice effect!
I normally do art with pen and pencil so this was a real change for me. I love this gold foil, it has a really nice finish. But you have to know what glue to use it with. I haven’t yet been able to get a bold gold piece on my paper or canvas. I used a glue stick for the photo I uploaded which leaves a lovely rustic like pattern as it doesn’t stick to all the area (this will only work on paper). For canvas I used liquid glue, which gives more or less the same effect. I am yet to try double sided sticky tape which I’m hoping will leave a nice line(s).Overall I would recommend, I loved it!
A**B
Brilliant effect, easy to use when you know how
I got this as a trial just to play with, and was really impressed with the results... after I followed some instructions online. I assumed (wrongly) that the colour side went on the printout (luckily I tested with a small project, so didn't waste much foil). It doesn't, the colour side faces up, the blank side goes on the printout. Once I worked that out it was really easy. I used a basic laminator that I got from Tesco years ago, and it did the job just fine. I did a quick, low quality doodle in Amaziograph, printed it on my laser printer, then put the foil on it - I'm amazed how much it improved the doodle! The five sheets are a nice size - I thought it didn't sound like much for the price, but actually it's a good amount, and if you're sensible and cut to size, you'll get a fair amount of projects done with it. I'll certainly be buying more of this stuff.I've knocked a star off because it could REALLY do with some instructions. There's plenty of room in the tube to roll an instruction sheet up to include as well, so space really is not an excuse for leaving them out.
L**E
Quality has reduced
I don’t know if I’m the only one to have experienced this - but I’ve used this foil on wedding invites for the past 3 years. The last couple of purchases I’ve found the adhesion awful. It’s patchy and doesn’t catch edges well at all. The attached photo is using deco foil. I foiled half of this batch, printed at the same time and foiled in the same conditions, with a cheaper foil from a London based company that I expected to be terrible but the adhesion was perfect.
S**L
For the size, not impressed
I havnt found this value for money, bigger size is better value.
Trustpilot
1 month ago
3 weeks ago