💅 Dip into brilliance—shine longer, style smarter!
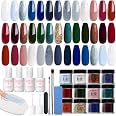
The AZUREBEAUTY Dip Powder Nail Kit offers 20 vibrant, long-lasting colors with a non-toxic formula enriched with calcium and vitamins. This 31-piece set includes all essentials for professional-quality, lamp-free nail art that stays chip-resistant and shiny for over 28 days, making it ideal for busy millennials seeking effortless, salon-grade nails at home.


K**D
Excellent Powder Dip Nail Kit – Great Results, Slight Learning Curve
I recently tried out this powder dip nail kit, and overall, I’m super impressed with the quality and results. The powders are richly pigmented, the liquids are smooth and easy to work with, and the finish looks like a professional salon job. Once applied properly, the nails are strong, glossy, and last for weeks without chipping.That said, if you’re new to dip powder nails, be prepared for a bit of a learning curve. The first time I used it, I struggled a bit with the timing and layering, but after watching a couple of tutorials and practicing, the process got much easier. The instructions included are helpful, though a bit more detail or visual guidance would make a huge difference for beginners.Still, the high quality of the materials really shines through, and once you get the hang of it, you’ll love the results. I’d definitely recommend this kit to anyone looking to save money on salon visits and do their own nails at home—it just takes a little patience and practice at first.
A**Y
Love Love Love!! did I mention that I LOVE this product?
The media could not be loaded. The photo posted in my review is to show what color result is achieved with only a SINGLE dip - I was happily surprised to find them to be pastels yet highly pigmented making for such a great coverage off of the first dip. The end result is what was achieved after dipping each nail once more making it only a total of two dips per finger on every color -including the lightest colors like yellowI not only highly recommend this product but I definitely will be a returning customer as long as I have nails on my hands lolMy nails are naturally short so to achieve the finished look I started by glueing on false tips to each nail.***The tips I prefer to use are always clear (vs white tips as white tips I find can be harder to hide under dip powders as the line of where the tip meats your natural nail can be seen through the powder unless you dip each nail repeatedly until it does not -which I find not only to be a waste of time but also a waste of the powder especially when with clear tips only two dips is needed to achieve the same result******Also clear tips in my opinion always seem to be a little thinner than standard white tips which makes them more flexible, bending just as your long natural nail would but yet thick enough to not break off****After glueing on the tips and allowing time to dry - I then lightly buffed the surface to ensure that the false tips laid flesh with my natural nails to ensure each dip would result in a smooth surface allowing for no additional filing needed after dippingAfter buffing the tips and getting them flesh with my natural nails I take a cotton ball and wipe each nail off with nail polish remover - I believe this step is not only VERY important but also this step is what makes the difference in how long your finished nails will stay on. I personally have yet to experience any of my nails popping off on their own by accident and I have done multiple sets to not only myself but my sister as well.A typical set last just about two weeks before I decide to remove them and then redo them as by that time my natural nails have grown out. Without the step of dehydrating my natural nails with the polish remover and removing any dust /oil from the buffing I don’t believe I’d be able to achieve a manicure to last 2 weeks as before including this step in the past I never was able to make it past 3 days before one popped off so I can’t emphasize enough how important that step is.Next I apply a thin base coat (one finger at a time as stated on instructions) and then quickly dip the nail into the powder as if you don’t do it quick enough-the base coat can begin to dry leaving you with an unpleasant dip result.Instantly after lifting the nail from the dip I brush off any excess back into the dip tray and then I apply a coat of activator before I move to the next finger and repeat until all 10 are complete.I then repeat that step of applying the base coat, dipping, brushing off the excess and then applying activator a second and final time to each finger.Once completed with the dipping I Lightly buff the surface of each nail making sure each nail feels smooth as a natural nail.Sometimes extra filing is necessary depending on the shape and length you want to achieve - I do this after dipping since the clear tips I choose to use are thinner than standard tips, but you could also shape the tip before dipping them, really it’s your preference and the order you choose will not effect the end result- just make sure anytime you file BEFORE you dip -you ALWAYS want to wipe each nail with a cotton ball of polish remover - I cannot stress this enoughAt this point depending on the look I’m trying to achieve I would either decorate them or if I’m going for more of a simple look I’d finish by applying a top coatIf you have the option to finish your nails with a gel top coat that requires a UV light to harden then I would suggest doing so as it only creates more strength to your nails -but I personally only use a regular polish top coat, one that’s thicker in consistency giving the affect of an authentic gel polish but dries on its own and no lamp is needed, so again it’s up to what you have available to you as well as your preferenceThe video I posted is the end result after dipping every nail into a different color - no two are the same color. I then applied a thin layer of a clear sparkly polish, to a few nails I applied some rhinestone art and then finished with a high gloss top coatHopefully this helps any one new to using dip, when i started experimenting with dip powders years ago, despite loving the end result I could never seem to get them to last as long as a manicure I got at a salon with acrylic, but over time, with a little experimenting and practice I’ve come to finally achieve the look as well as the length of time they stay on.I’ve experienced with all DIY at home manicure products on the market, including acrylic and poly gel, and out of the three- dip powder has not only been the fastest to learn how ti use as well as the fastest process when apply a whole set, but it’s also been the easiest, the less messy as well as the most affordable. (single bottle of dip powder can last you MONTHS almost a whole year if only dipping each finger twice and having them last 2 weeks before doing it again)I HIGHLY recommend for any one who’s new to the DIY at home manicure to try all the products available, personally I found it fun to experiment with them all but im sure you’ll soon learn how simple a dip manicure is compared to the other methods, as well as how much money you’ll save no longer having to spend your money on getting a set done.What it would cost me to receive a single set at the salon is more than what it cost me to buy this dip powder kit and even the tips combined.
S**E
Easy to use, decently pigmented, and many colors to choose from
**update**Third photo is another set because I broke a nail and wanted to start over. I love the kit!This is my first time purchasing an at home kit from Amazon or anywhere really. As you can see I chose more of the nude colors for my kit. I think the quality of the powder is good and decently pigmented. I used the clear powder first for builder then two dips of the color. This is the second set I’ve done with my kit. First set didn’t turn out great, mostly to user error.Personally, I did not care for the top coat. It took a while to dry (in my opinion) and I used Sally Hansen insta-dry (?) for this top coat. Not the most shiny, but it works for me.The overall kit is fairly easy to use. Takes a while to apply which I feel is probably because of the beginner stages. Not sure about the durability of the product yet because it’s only been a day. Overall I am happy with the product so far. The only reason I took a star off is because I thought the jars would be slightly bigger. Not a deal breaker and not a huge deal. You still get a bunch of colors and if you’re careful you should get multiple uses even though the jars are smaller.
J**R
Salon quality
So easy to use! I have at home no chip as well and this was way easier to use and I think looked better. No UV light was a big selling point. I liked that after 2 applications (2 different dip colors) it wasn’t overly thick like at the salon. Easy take off using a soak method. Picture of results of non dominant hand.
A**N
Absolutely thrilled!!!
Super fast and easy to use! Absolutely love the colors I got and I can’t wait to get more. I had a few errors as a newbie to dip powder but overall I am so happy!
A**R
Could be better
This could come with a few more supplies. It comes with small bottles of the base but no bond solution that the instructions tell you to use. So I feel like they didn't send everything. The colors are nice but it is hard to tell what they will look like once dry. The powders are fine and they do go on nice. Again there is only a little bit of the liquid steps (base, activator and top coat) not nearly enough for all of the powders that this comes with. They product is sturdy but the manicure only last about a week before the product begins to chip off. I am not sure if this is because I don't have the "bond" that they say to use.
C**D
Amazing!
I did a lot of searching to find the right kit and I’m so glad I chose this one. I wanted to be able to do my nails at home at a time that is convenient for me and with a product that does not destroy my nails. This kit is easier than nail polish and easier than doing gel. I was shocked that I did not need a UV light! The topcoat dries so fast - less than 60 seconds. I do recommend for going the powder container that you pour the powder in. I personally found it easier to just dip my nail into the jar and gently tap my nail to shake off the excess powder. The jars are smaller than what we see at the nail salon, but it worked just fine for me. This is money well spent!
Trustpilot
1 month ago
1 week ago