🛠️ Craft Your Circuitry with Confidence!
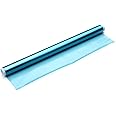
The Photosensitive Dry Film is a 30cm x 500cm (1ft x 16.5ft) solution for PCB production, designed for superior adhesion and precision in etching and hole covering. This product is perfect for professionals seeking high-quality results in their circuit board projects.
T**Y
Works if used correctly
It works. I used to do the toner transfer method in the past but it was too inconsistent. I looked for another way and found this dry film process. I used it to put a resist on an aluminum pen tube. I found a 365nm LED bulb on Amazon to expose the film. I used electro-etching to etch the image. Works perfectly.Be aware that the dry film is sandwiched in between a mat finish layer and a high gloss layer. You'll have to do some test pieces to get the process dialed in. Once you find what works, you're there.
C**Y
Meh
So far the roll is fairly wrinkled in the middle and there are 1mm spots throughout that are visibly thinner. That said, this is the first time I've used dry film photoresist so it might be very good compared to other options.
K**R
Works great. Takes some practice.
I have been using this type of film for about twenty-five years, from back when you had to buy it from an industrial supplier (2 rolls in a box and with hundreds of feet of film!) and have had all the problems listed here. A few tips from my years…The film has a half life. Don’t buy more than you will use in a year. If you start getting voids in your copper and can’t seem to fix the problem, dump it and get another roll.If you use a laser printer for the negative, print TWO copies on transparencies and stack them together. Use a single stripe of rubber cement at one end of the images to keep them together and aligned. I have never found a printer that will give sufficient density with just one copy. A clue of a too-thin mask is when you get hard to etch shadows on your boards, or pads and traces that touch each other no matter how long you etch.To get the first plastic off, hold your cut piece of film (curl up) with one edge on a hard surface, take a single edged razor blade and holding the blade vertical and flat, press down and pull on the film at a corner - a quarter inch or less is enough. Takes a bit if practice to get the pressure right without cutting, but the plastic will stretch and pull away from the green film, making it easy to pull off.I used a hobby heat gun for years, but a cheap laminator works much better these days. Carefully lay the stripped film on the copper without pressing anywhere. Once it is aligned, push down with your thumb on the edge that will enter the laminator. This will tack it into place long enough for it to be accepted by the rollers.Ordinary blacklights from the mall will work fine for exposing. I have a pair of full sized, 24” bulbs mounted to give about eight inches between bulbs and board. With a paired mask, or a real one made from X-Ray film, four or five minutes will give a super hard resist. If you are getting shadows, make your mask denser or lower the time. Three minutes is about the shortest time, although I have successfully used two minutes with a too-light mask.You can double side a board in two ways. Make one side in the normal way, but after the developing, let the resist dry and get hard, then scrub the other side and do it again. Or… Laminate both sides at once. This will work with a laminator, but will take some practice in keeping two loose pieces of film in place until squeezed and heated.Finally. Shadows, fat text, and touching pads and traces are from too much exposure or a mask that is too thin (not dark enough). Voids that become worse as times progresses is a sign of expired film. Drill the board before the processing for best results. (Drilling afterward tends to rip the small pads from the board.) Clean the copper with a Scotch Bright pad from the grocery store, not steel wool. If you use ferric chloride for etchant, do it outside or in a workshop. Any spill will stain anything instantly and can NEVER be cleaned up unless it is in a stainless steel or plastic container.Go for it. Great hobby.
B**N
Works good on aluminum
Got this to try to use as an etch resist for aluminum guitar pedal enclosure etching. Works like a charm. Finely wet sand your aluminum enclosure, clean with acetone. Cut a piece of this to the right size and peel off the back protective sheet. Apply this side down onto the aluminum surface. Press away any air bubbles. Use a clothes iron to heat press the sheet onto the aluminum until the enclosure gets too hot to hold (the lowest heat setting should do). Let it cool. Print off your design onto transparency paper using an inkjet printer. Lay it over your enclosure and put some clear acrylic over top to press the transparency as close to the film as possible. Turn on a UV light (UV nail dryer works well) over the piece for 8-10 mins. Take off the acrylic and transparency. You should now see your design in negative on the film. Peel off the outer protective layer on the film. Get a large glass or plastic bowl and fill it ~1/2 inch with NaOH based drain cleaner. The cheap, non-gel stuff works best. Slowly lower the film-side surface under the drain cleaner, waving to disperse bubbles from sticking. Check continuously to make sure the darkened film isn't dissolving, but the lighter film is. After about 2 mins, or after most of the light film has dissolved off, rinse off the NaOH and the film with tap water. You might need to use a razor to get all the film off. Your aluminum should now be etched nicely. I like to dry the enclosure with a paper towel and then spray on a clear coat to stop any further oxidizing. Good Luck!
S**Y
Got a bad batch, no "tacky" side, didn't develop well
Waste of time, waste of money.This film is supposed to have a nominally "tacky" side to help set the adhesion to the copper surface. After thoroughly scrubbing the coper with steel wool, then cleaning with rubbing alcohol, I used the 2 tape method to remove the protective film. Well, that was a fail. The film adhesive was either never applied or somehow dried up in a sealed, rolled roll. Even after applying heat and pressure, the film refused to adhere to the cooper and just fell off or pulled off when I tried removing the outer protective film. Additionally, after ten minutes in a strong UV light, the development of the film was iffy at best.
P**C
Good product, but expect some waste due to the learning process
There is a definite learning curve with this stuff, but it works as advertised when applied properly. I can go down to about 20 mil clearances using this with more confidence than a transfer method. For those without a UV exposure box, sunlight works well too - about 2 minutes needed. Note that the actual sensitizing film has a layer of protective plastic on both sides. I've found it best to remove BOTH layers before heating to adhere - a step not mentioned by many how-to videos. A hair dryer on low fan, high heat is sufficient for this step. This prevents wrinkles that occur when the photoresist and backing plastic are heated at different rates. Remove the second layer as you did the first; I find it helpful to cut the sheet to have a tab or extension about an inch past the board on one corner to assist with backing removal.
Trustpilot
2 weeks ago
1 week ago