🥞 Flip, Savor, Repeat: Your New Brunch Obsession Awaits!
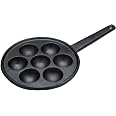
The KitchenCraft Aebleskiver Pan is a 20.5 cm cast iron cooking essential designed to make 7 delicious æbleskiver pancakes at once. With its heat-retaining properties and natural non-stick surface, this pan ensures perfectly fluffy pancakes every time. Ideal for both grilling and baking, it comes with a 12-month guarantee and a recipe to kickstart your culinary adventure.
| Brand | KitchenCraft |
| Model Number | KCDANPAN |
| Colour | Black |
| Diameter | 20.5 Centimetres |
| Capacity | 1 litres |
| Volume Capacity | 1000 Millilitres |
| Material | Cast Iron |
| Compatible Models | Gas |
| Special Features | Oven Safe, Non Stick |
| Item Weight | 800 g |
C**Y
Works wonderfully onced seasoned, heats really well
I bought this pan for its intended use - to make poffertjes, and it works really well for that, I haev not tried using it for anything else.When the pan arrived I followed the basic rules for seasoning any new cast iron pan - see below:1: cast iron or carbon steel pans that are unseasoned, arrive with an invisible manufacturers coating that temporarily stops it rusting in transit but is not edible and will not last when heated so wash the pan really well, scrub it with hot soapy water, really do scrub it all over. It is really important to scrub everything - think like with nail varnish, the nail needs to be prepped first . Then dry the pan really really well.2: take some non flavoured oil that has a high smoke level, I used rapeseed oil, and rub liberally all over, every nook and cranny - anything that is not covered will rust, and then make the whole thing rusty.3: take a disposable cloth like kitchen paper and rub the oil off - do not wash it or anything like theat, you are simply rubbing off the excess oil and with a dry cloth you cannot rub off too much. Again I would use nalvarnish as an example less is more, thin coats will notlead to balls of oils charring and causing weak spots in your seasoning, you are looking for very very thin layer, but absuoltely everywhere, it must cover everything.4: heat the oven to 180 fan or 200 non fan ( centigrade) and place the pan upside down in the oven, if you are concened place a drip tray underneat it - mine did not drip noticeably, and bake the pan upside down for 1 hour(so the bottom of the pan that would normally sit on your cooker is facing upwards)5: after 1 hour turn off the oven and let everything cool all the way down before moving the pan.this allows the thin polymer layer you have just created to set, and moving it before it is completely cooled will ruin your seasoning.6: repeat steps 2 (add oil) all the way through to 5 (let it cool) 2 more times.Then the pan is seasoned and things simply will not stick and your pan should not rust ( assuming when you wash it you are not tearing into it with a brillo pad , and that you dry it properly) for a good 10 years.I used the pan for my poffertjes ( they are dutch treat , like a cross between crumpets and pancakes) and even though I was a bit messy when adding the batter as I could not find my sauce bottle anywhere and used a spoon, none of it stuck, not even the spillages, and the pan cleaned easily by just wiping with a soft soapy cloth once, rinse and dried again.cast iron needs a little work at the beginning and then it looks after itself.If your pan ever does get rusty - do not throw it out, simply get yourself a wire brush - the sort used in metalworking, available from amazon even for a pound or so, and scrub the rust off using food oil, and the wire brush,rinse, and then follow steps 2-5 above 3 times and your cast iron pan will be as new, and ready to go again.I also bought a couple of pan handle sleeves here as well and they are just big enough for this aebleskiver pan if you don't want to use oven gloves.This pan heats really well, once it has reached the correct temperature it has done so evenly, and all my poffertjes were ready to turn in the order I poured them.poffertje tip - if you are going to make poffertjes, follow a recipe that includes yeast, without yeast, they are not poffertjes, and also get yourself some little cocktail sticks - a cocktail stick is just the very best at turning a poffertje - just poke the outside edge of the poffertje once you think it is ready to flip and the cocktail stick sticks to the batter just enough to let you flip and by the time you have flipped it has already released itself from the poffertje.The pan has 7 holes, which is more than enough for one person, possibly 2 with a battle for the last one, but as the poffertjes take just a minute to cook, you can make tonnes of them with enough batter in no time.
D**R
Very good and strong pan.
Aebelskivvers at first are quite tricky to make - initially I did the usual trick of getting the pan as hot as possible as is the norm for cooking pancakes. After the first attempt of ending up with absolutely cremated aebelskivvers I lowered the heat a lot.After lowering the heat I found it much more easier to cook the Aebelskivver and ended up with the Aebelskivver's shown in the picture.Originally I bought it for doing poffertjes with it as I have a friend in The Netherlands that showed me how to cook poffertjes on my 40th birthday at a major international scout camp. I haven't tried it yet as on pancake day I decided to give aebelskivver's a go instead, but I'm quite sure poffertjes could be cooked just as easily in this pan.The pan itself is very good - it feels like it's a proper cast iron pan, it's very heavy and it's got some great anti-stick coating on it.
A**R
Coat/Season cast iron skillet BEFORE use
My dutch pancakes came out perfect!I did read reviews about people's pancakes sticking to the skillet. It is cast iron, I strongly urge prior to using it to coat it/ season it. Soak it in hot water for 10-15 minutes, then scrub it thoroughly. Spread/coat a thin layer of vegetable oil all around before placing it upside down in the oven for an hour, then leave it to cool.When making your pancakes make sure to use a brush/cloth and dip it it a bit of oil and coat the pockets prior to putting the batter at medium heat. Do this every time you make a new batch. Hopefully this helps. Enjoy
A**E
Looked great - but had to bin it as I couldn't remove the wax coating...
Unfortunately I was unable to remove the thick wax coating on the pan and have had to bin it after several attempts..I followed the instructions and washed it well in warm soapy water before seasoning it in the oven, but it came out sticky and still covered in (now burned) wax, the sheet pan I had used in the oven had to be binned as well as I couldn't clean it and there was no description of what the wax was so I would be worried using it and getting wax on my food.When trying to scour it properly afterwards it came up rusty and still had wax on it..I have had several cast iron products and have never had one which was covered in thick wax like this one.
P**J
Ok product
The pan is good for making paniyarum (Indian dish)the only thing is the pots are bigger than the usual ones. Have been using for couple of months.
N**I
Cast iron, non-stick. works on electric hob
I reluctantly bought this product following a worrying low 3 star overall review and I wasn't sure it would work on an electric hob. The warnings was about it being sticky and rusting. As a cast iron novice, I watched videos that warn that they can rust if not oiled. Even when rusted, they can be revived. by scrubbing away the rust with wire wool.When I received mine, the surface looked rough and I was convinced it would stick. I sat on it for a few days contemplating sending it back. However, I could not see any non toxic option without coatings, not even stainless steel, not sure why. Anyway, I looked up how to season a cast iron pan. Baking it for an hour did not appeal to me. Luckily, I found a simple example on youtube, which looked doable. It involved frying the pan with oil and frying it dry to get rid of water by 'road to the farm'.So I seasoned my that way. Cooked beef and gluten free flour on an electric hob and it was great. It did not stick even on the first ever batch. I simply wiped away loosed bits inbetween batches. However, I need to practice my turning skills, my takoyakis look like flying saucers instead of a full ball!Highly recommended. Season it before use, etc and it should be fine. I will update if I have problems but I doubt it.
O**I
Terrible to use
Good got burnt quickly and had a rusty appearance after washing on first use
Trustpilot
1 month ago
1 day ago