❄️ Refresh your microwave’s soul with a spray of perfection!
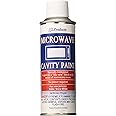
The 98QBP0302 Microwave Cavity Spray Paint delivers a pristine snow white finish designed specifically for microwave interiors. This 6-ounce aerosol can offers easy, primer-free application, covering up to 25 square feet on metal and plastic surfaces. Non-toxic and indoor-safe, it revitalizes your microwave with a durable, like-new look—perfect for professionals seeking quick, flawless kitchen upgrades.
| Brand | QB Products |
| Color | Snow White |
| Finish Type | Snow White |
| Size | 6 Ounce (Pack of 1) |
| Item Volume | 6 Fluid Ounces |
| Special Feature | Non Toxic |
| Unit Count | 6.0 Ounce |
| Paint Type | Spray |
| Specific Uses For Product | Dry Sanding |
| Surface Recommendation | Metal, Plastic |
| Indoor/Outdoor Usage | Indoor |
| Item Form | Aerosol |
| Included Components | Brush |
| Is Waterproof | False |
| Package Information | Can |
| Color Code | #FFFFFF |
| Coverage | 25 square feet |
| Water Resistance Level | Not Water Resistant |
| UPC | 717449228420 345678978900 048172010670 785497210216 |
| Global Trade Identification Number | 00048172010670 |
| Manufacturer | QB Products. |
| Part Number | 98QBP0302 |
| Item Weight | 8.4 ounces |
| Product Dimensions | 9 x 5 x 5 inches |
| Item model number | 98QBP0302 |
| Is Discontinued By Manufacturer | No |
| Finish | Snow White |
| Item Package Quantity | 1 |
| Number Of Pieces | 1 |
| Measurement System | English/Standard |
| Special Features | Non Toxic |
| Batteries Included? | No |
| Batteries Required? | No |
R**C
Excellent for interior Microwave refinishing
This works great to freshen up the microwave oven interior on my combo microwave and oven unit. I bought the Snow-White paint color. Its quite expensive to replace the entire combo microwave and baking oven unit that is 10 years old. The microwave works fine as well as the lower oven for baking.The upper interior ceiling of my microwave began to start flaking paint. Probably because we let uncovered cups of water and liquid steam up into the microwave ceiling. Then didn't do a good job of drying of the microwave moist areas with a cloth.Anyway, I read reviews and tips on Amazon of other users and followed the instructions.I turned the power off at the Breaker Panel for the task.I spent a good hour in prep work using blue painters' tape and newspapers to cover the outer areas around the microwave and oven doors to prevent overspray. I was unable to take the microwave outside as it is part of a wall unit. But I also sanded down the microwave ceiling and a couple of vent spots that were flaking. Removed any paint flakes and sanded residue. Then, I thoroughly cleaned the microwave ceiling and walls, and base level. Covered over the unit info label, microwave relay cover.Then I sprayed lightly to start in the ceiling area. Then I went ahead and spread the interior walls and bottom level too. I used light strokes and wore a ventilation mask. The Snow White color matched exactly with my microwave interior. The paint fumes are very strong.I waited about 30-45 minutes and sprayed another light coat. Then applied two more ceiling coats over the next hour afterwards. I waited about 6 hours and applied another upper ceiling coat and then one final coat after another 30-40 minutes. Then let it sit for a full 24 hours. The interior looked very good with matching and felt good by touch. A little coarseness, but nothing significant. I turned the power back on from the breaker panel. Then ran a quick 30 second test to see if the microwave was working ok. It was fine.I actually waited another full day before using the microwave for any heating or cooking items. All is well and it looks brand new inside.Now we are covering cups and containers with liquid to avoid steam and moisture from collecting inside and the ceiling. Also, doing a quick wipe down with a dry cloth on the ceiling afterwards.Its been about a month since I repainted the microwave. Everything looks good and there are no paint issues with flaking.
**S
Transforms your microwave … like new
Like any painting job, preparation is the most important thing and this microwave cavity paint is no different.My microwave/oven is built into my kitchen, so I was very careful in every aspect of this project.Turn off all power to your microwave before you start any of this activity. The next thing to do is properly cover any internal microwave spots that could collect dust or paint chips. this can be done with painters, tape, newspaper, or some other type of covering so when your painting commences, you do not have splatters and spotting where you do not want it.Now for the actual work …First, make sure that all flaking and rusted spots that are issues in your microwave are scraped and sanded. I would start with 100 to 120 grit sandpaper to remove the majority of paint from the flaking or rusted areas. From there you can work your way to 220 grit just making sure that you have sanded any rough edges to make a smooth clean transition when you paint.If your microwave is a countertop microwave, the best thing you can do when painting is do it outside or in an open air area. As I mentioned My microwave is built-in to my kitchen so I made sure that I covered all areas where any paint splatter, or overspray could occur. This cavity paint does have a very strong smell, and that must be taken into consideration. With that in mind, I did not apply this paint in heavy layers. The first layers I put on were very light layers, making sure that I covered all my sanded areas and edges. I am very specific in how I do some of these jobs so I took a number of days to apply many clean, thin layers, ultimately resulting in a clean almost factory like finish.My built in oven/microwave combination is a single unit with a replacement cost exceeding $3000. My choice in this situation was a new oven/microwave combination or a $15 can of cavity paint. I am so happy that I bought this paint and repainted my microwave as it looks and works great. I saved myself a huge expense in replacing an oven/microwave that were still in great working condition.Good luck!!
D**S
Microwave paint
This product works great and is very easy to use. It cleans well and doesn't smell like paint when you use the microwave. It has been a week since I painted the inside of the microwave, and it still looks good. I do wish it were a little shinier, but overall, it is a good product.
E**E
Product Works!
So far the paint has worked inside the microwave. I should had bought to cansIn my case for more thickness.
N**D
Love your Nuker? Give it a face lift!
Like so many others said, it's all in the prep. It's nice that the can is small, probably half the size of a regular spray can, so it's easier to maneuver inside the oven. I laid the oven on it's side so I could keep the can close to upright while spraying the top and bottom surfaces. The can came with various stickers on it for shipping, but luckily I was able to peel them and read most of the directions. I did several light coats, letting it tack up as instructed in between coats, maybe a few minutes. It did seem to dry fast. After the final coat, it has to dry 12 hours, so if you're like me and you use your micro for everything, paint in the evening so you can use it by breakfast LOL! I was a little disappointed with the final finish; it was very matte, not glossy at all. I'm concerned that it will be hard to clean food splatter from it. But at least I won't have paint chips falling onto my food any more, and lord knows what other experiments were going on with all that metal exposed! It's VERY white. Also, I taped off the labels and the screens inside with quality painters tape, removed it immediately when finished and unfortunately took off some of the original paint in the process! But I had already used the entire can so couldn't spray some into a puddle and dab it onto the newly exposed metal with a sponge. Just FYI.
Trustpilot
4 days ago
2 weeks ago