
DOWNLOAD THE APP


Customer Services
Copyright © 2025 Desertcart Holdings Limited
DOWNLOAD THE APP


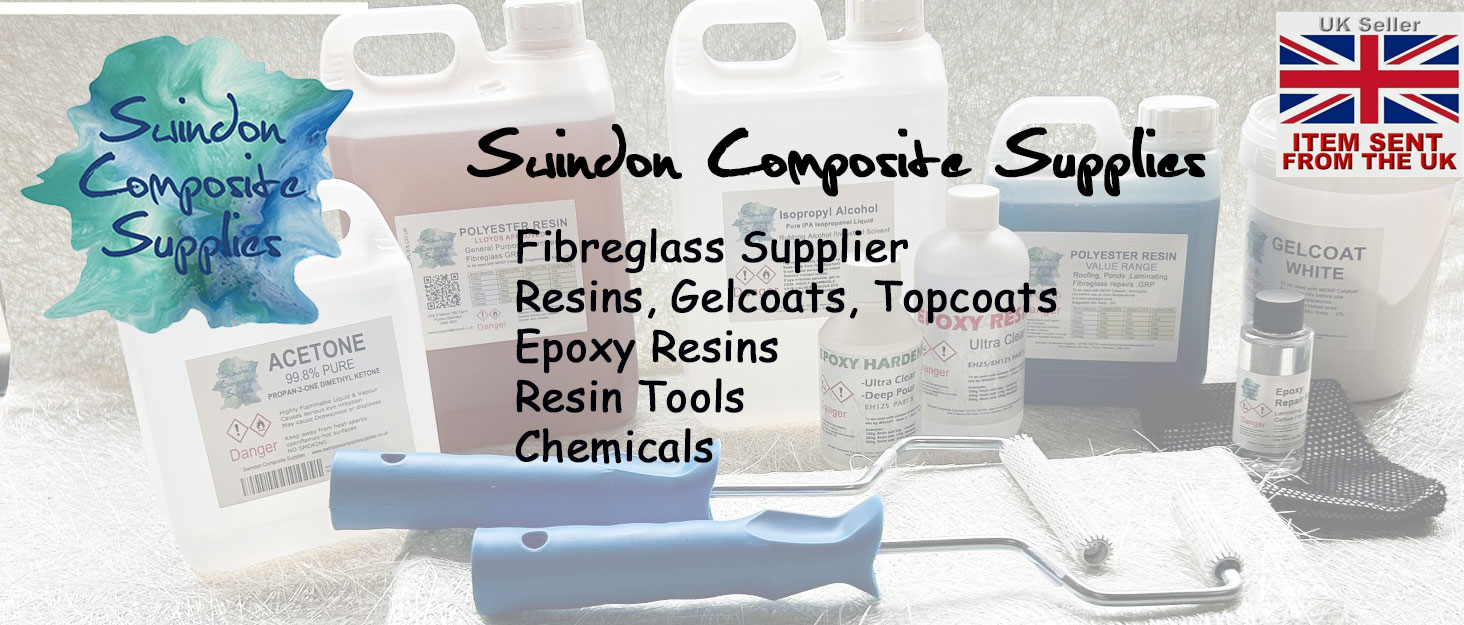
🛠️ Fix it like a boss — Carbon fibre strength, zero compromises!
The Carbon Fibre Repair Kit MK1 combines a precision-cut carbon cloth tape with a professional-grade 2-part epoxy resin, engineered for robust, long-lasting repairs on high-performance gear like fishing rods, carbon bikes, and golf clubs. Complete with sanding tools and compression tape, it ensures a sleek, durable finish that cures in 24 hours at room temperature. Ideal for millennial pros who demand strength, style, and reliability in every fix.


| ASIN | B08TFNHJ7W |
| Batteries Required? | No |
| Batteries included? | No |
| Best Sellers Rank | 14,861 in DIY & Tools ( See Top 100 in DIY & Tools ) 15 in Fabric Tape |
| Colour | Black |
| Customer Reviews | 4.4 4.4 out of 5 stars (350) |
| Date First Available | 19 Jan. 2021 |
| Included components | Carbon Fibre Cloth Tape |
| Item Package Quantity | 1 |
| Item Weight | 150 g |
| Item model number | Carb Repair kit Mk1 |
| Manufacturer | Swindon Composite Supplies™ |
| Material | Carbon Fibre Fabric tape, Epoxy Resin |
| Package Dimensions | 14.5 x 14.4 x 4.8 cm; 150 g |
| Part number | Carb repair kit Mk1 |
| Power source type | hand_powered |
| Size | Carbon Fibre Repair Kit - Mk1 - Resin and Tape |
| Special Features | Crack Resistant, Strong |
| Specific uses | Car accessory repairs, Carbon cycle repairs, Fishing Pole Repairs, Golf club Repairs, Kayak paddle Repairs |
C**.
Easy to use and good results
On the first day of taking a rather excellent 9ft travel fishing rod fishing in Scotland, my wife's right foot, unbeknown to my wife, thought that the rod would look much better in 5 pieces than 4. Unfortunately, it failed to consider the usability of the rod following this change, especially considering it was snapped halfway along the rod, and I was left with a rather useless nose picking device. After extensive consideration, I realised that 9ft is probably a little bit too long for a nose picking device, even with my monstrous beak, and decided to have a go at converting it back into a fishing rod instead. So here I ended up. The solution, it turned out, was quite simple: buy a solid carbon fibre rod for the centre. I needed 7mm x 50mm, which I superglued in place. This held the two broken pieces together. Then, I used this kit to finish the outside and provide actual strength. Yes, the carbon fibre tape immediately unravels upon cutting it. But why fight the tide? Instead, use the thread itself. So, I unravelled a piece of the tape (intentionally) and was left with around 10m (33ft) of unwoven but still very strong carbon fibre bundled thread. This I tied around the sanded and wetted (with resin) broken pieces like you see so many do on YouTube with fishing line, except it was much easier as the carbon fibre was a nice thick bundle. Finish with a pull-through knot, plenty of the epoxy resin, wrap tightly in clingfilm, leave overnight, remove the clingfilm, leave for another 12 hours to cure then sand with the sandpaper, then again with 400 grit and then 600 grit (about 4-5 minutes of sanding in total). Finally, paint on some more epoxy resin, this time don't cover, but let it air dry. This, admittedly, was a little tricky, as the stuff is rather runny and immediately wants to pool into resin blobs and stalactites if you're not continuously rotating it. I solved this by using a small jewellery turner, turning it on its side, and rotating the rod against a box, a little like a skewer on a spit roast, and it finished perfectly with no dribbles (I gave it a little blast with a heat gun to remove any air bubbles). The final result? Well, not quite 'good as new', but the newly restored 4-piece rod successfully picked up a 5kg weight without immediately reverting back to a 5-piece rod. I call that a success. It also doesn't look too bad. Fishing husband: 1, wife's foot: 1, nosepicker: 0.
M**R
Did a great repair job!!
With a cracked rear hugger, £300+ to replace so for £15 gave the repair kit a go!.. the weave is larger than what I was repairing, but as I was patching the back I wasn't concerned, there must be an art to cutting the weave, even with sharp scissors once cut it starts to fray just looking at it... Hardest part for me was holding the crack in position, not 100% closed, slightly visible once completed, but the repair went well over 3 evenings, and ended up doing two layers over the back for good measure... Once fitted back on the bike, the underside isn't seen, but looks ok anyhow 😀 Pleased with the end result, and can't see it giving way anytime soon, that said I've over 50% of materials left for a future repair if needed. Resin sets really well and clear!
B**Z
Good stuff
Spot on once figured how to use properly, my fault i should have read instructions lol
R**G
Nice kit with clear instructions.
I bought this to attempt to repair a cracked carbon fibre saddle. Everything important I needed was included. You will additionally need a pair of protective gloves - I used disposable black nitrile rubber ones which worked well. Also needed was a small plastic yogurt pot to mix the resin in, and a small electronic scale to measure out the resin and hardener at a 2:1 ratio. I had one to hand for making coffee I had bought previously for about a tenner. You ideally need one that will measure to the nearest gramme. I guess you could use an old spoon as it’s the 2:1 ratio that’s critical more than the weights. The instructions were clear and helpful and my project was completed within 30 minutes of delivery, I used a pair of mid range house hold scissors to cut the carbon fibre to size. It does fray easily! So needs some care in handling. Because the fibres are loosely woven, cutting out a complex shape is difficult as the mat will twist. I used a paper template as a pattern which made life a lot easier. I am now waiting for the repair to cure before I decide whether to add an additional layer of carbon fibre and resin. Whatever, I suspect my repair will be stronger and more fit for purpose than the original.
B**N
Good quality
Exalent value but wrong size Thank you
A**R
Strong and flexible. Good with carbon fibre sheets
Found this to be excellent when used with carbon fibre sheets to repair motorcycle fairings. Be aware this is very slow curing - days rather then minutes - but this makes it stronger, more flexible and less prone to cracking than some of the fast cure stuff. Simple to mix correctly because you just do it by weight - 2:1. Your electronic kitchen scales are fine for this. Recommended
J**R
yes
very cool
G**S
Very good
Great repair kit fast delivery and really well packed top seller will be using you again
Trustpilot
1 month ago
1 day ago