


Drive Smart, See Clearly! 🚗✨
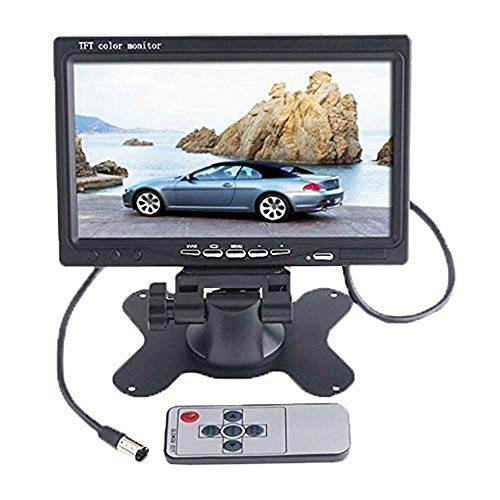
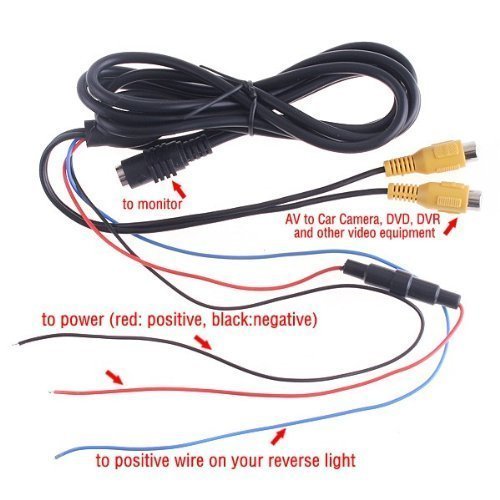
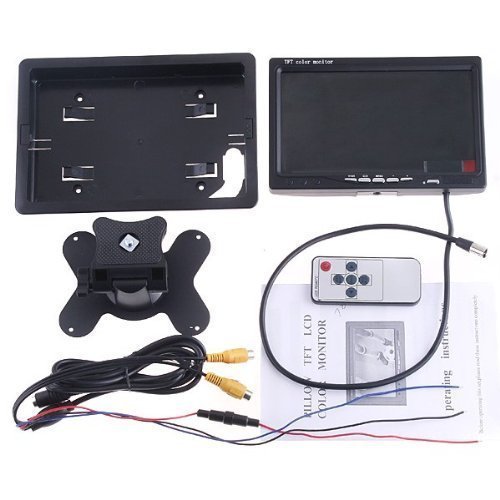
The BW 7-inch High Resolution TFT Color LCD Car Rear View Camera Monitor offers a vibrant 800x480 display, perfect for enhancing your driving experience. With two AV inputs and an IR remote control, this monitor ensures seamless connectivity and user-friendly operation. Its adjustable mount allows for optimal viewing angles, making it a must-have accessory for any car enthusiast.
| Auto Part Position | Rear |
| Are Batteries Included | No |
| Display Type | LCD |
| Compatible Devices | Car |
| Control Method | Remote |
| Screen Size | 7 Inches |
| Auto Part Orientation | Drivers Side |
| Compatible with Vehicle Type | Car |
| Connectivity Technology | Infrared |
| Additional Features | Reverse Assist |
| Video Capture Resolution | 480p |
| Mounting Type | adjustable mount |
| Item Weight | 1.3 Pounds |
| Item Dimensions D x W x H | 0.98"D x 7.6"W x 5.31"H |
| Color | Black |
H**X
Excellent for the price
I purchased this to connect with the Sony XAV-64BT Head Unit in my wife's 2004 Subaru Forester. The intended use is for our 1 year old for long drives as we can throw a dvd into the head unit and play it on the purchased monitor. The hookup was easy and running the wires through the vehicle and into the head unit was fairly easy. I connected the power through a switch I placed in the ash tray compartment (since we don't smoke)that can be closed off. I wired the power from the lead that goes to the cigarette lighter - then to the on/off switch, then to the monitor. This works beautifully as you don't have to use the remote (which works fair at best from the front seat to the back) to turn the unit off or on so there is not a blue screen when not in use - and to do so from the convenience of the drivers seat.One mistake I made in my initial setup was not connecting the ground hookup. During my trial it did not seem to make a difference in quality and I wasn't worried about something in the $30 range getting damaged from not connecting the ground wire. THIS WAS A MISTAKE... The picture was choppy any time the car was turned on. I started going through all of the wires to find the problem and grounded the unit by fastening the ground wire to the closest screw into the body of the vehicle, which just happened to be directly behind the drivers door under the plastic panel. Once I secured the ground wire the picture was very clear, that's what I got for trying to save time.As our little one is only 1 year old and backward facing I secured the outside box that the unit fits in to the rear headrest using plastic ties. Although it's not the most professional looking it doesn't look bad, it's very secure, and when we are ready to face the little guy in a forward facing car seat we I can make it more permanent if I wish too.The only negative I have on the unit is the lack of audio. When using the buttons on the unit it seems that you can turn up or down the audio, but in the directions (or lack thereof) and the wiring harness there doesn't seem to be any type of audio input, unless I missed something.
J**J
Beautiful
I modified this in order to conceal it in my car. The unit has a mounting case it snaps in to, which I tossed away. The base looks durable, but I don't want sticky on my dash. I actually took apart the screen itself, cut a hole in top of the case, and relocated the cable out of the top instead of the bottom. Getting the case apart was very difficult if you're looking to modify this thing. Be careful not to crack anything! The back of the monitor casing has a slotted steel plate that a square nut and bolt (with a triangular black plastic levers) usedto screw it onto the dash mount. I used the bolt and nut to screw it into my sun visor, with the decent looking bolt showing through the front of the visor when it's up. I had to remove the mirror on the visor to allow more room. doing this adds around 1/2-3/4 of an inch near the bottom edge of the visor when it's up. It is close enough that the "snap" of the visor kicks in and holds the weight with no problem. Use 3M stickies (or paperclips like I did) to rig the camera to not spin on the bolt. I cut and fashioned paperclips around the wire frame of the visor to hook into the heat vent holes on the back of this monitor to make it not spin. Works amazingly. I'm not even sure why there's vent holes, but if it worries you, drill or dremel more vent hols on the top. I then ran the wire (it's 1.5 - 2 feet long" up through the visor mount under the roof liner and partially down pillar A or whatnot. I then met it with the power and video cord (all one piece) from under the dash. It is now a wonderful backup camera monitor which has an additional video access for something like an adapted cellphone or dvd player (when you are parked of course!) I am thinking of adapting my cellphone to it to watch Netflix when I have to occasionally wait in my car. It has 1 male and 1 female RCA video input. The unit has a power button on the front, so wiring it to a switch or specific power line is unnecessary. Any 12v line should do. I ran this off a 12v battery in the house for testing and was able to play a Wii on it and the picture was excellent. It only has video, no sound or anything else so keep that in mind. A standard dash mount would look great, but be weary the size of this impeding your sight.
M**N
Good
Very good product
S**R
dieser Videomonitor ist einfach super
Dieser Videomonitor ist einfach super für den Preis absolut empfehlenswert, eingebaut und geht gleich richtig gut, einfache Montage und Anschluss
N**3
Dexième achat car très satisfait!!!
c'est un produit que j'utilise depuis plus de deux ans sur un véhicule utilitaire en fonction permanente, il est raccordé sur la caméra AV et AR de surveillance en temps réel et sur la caméra de recul.Donc nouvel achat pour un autre utilitaire sur la caméra de recul!Une très bonne définition et admet les procédés PAL et NTCN, c'est super!
L**A
Five Stars
Easy to set up.works good
C**R
cumple con las espectativas
Perfecto. Cumple con lo descrito. Va genial. Facil instalacion. Buena calidad de imagen.la colocacion es muy versatil, bien integrandolo en un salpicadero o cuadro de mandos, gracias al marco que incorpora, o bien con su pie articulado que permite agarrarlo por abajo o por detras. Yo personañmente, prefiero el anclaje trasero, pues queda muchl mas sujeto y con menos vivraciones. Yo lo he comprado para usarlo en maquinaria.
Trustpilot
2 months ago
2 weeks ago


