Customer Services
Copyright © 2025 Desertcart Holdings Limited
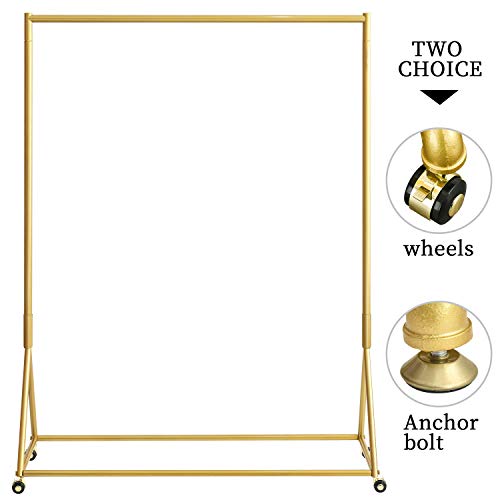

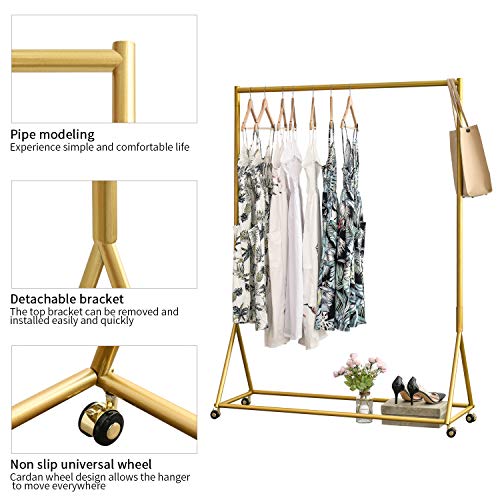


✨ Flaunt your fashion with BOSURU’s golden touch! ✨
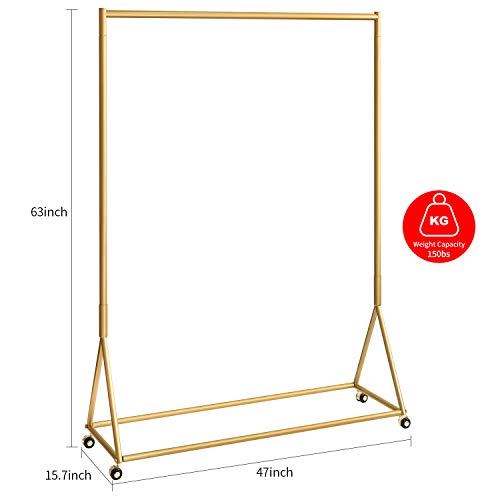
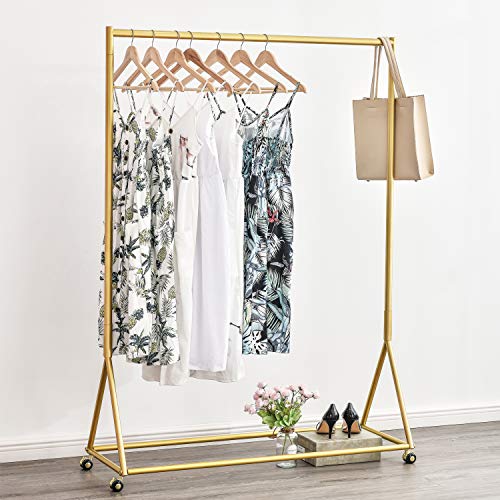
The BOSURU Gold Pipe Clothing Rack is a freestanding, heavy-duty garment rack crafted from rust-resistant metal with a stylish gold finish. Measuring 47"L x 63"H x 15.7"D, it supports up to 150 lbs, making it ideal for both home and retail use. Easy to assemble with included instructions, it combines durability and modern design to keep your clothes organized and your space looking effortlessly chic.


| ASIN | B081JSP8TV |
| Assembly Required | Yes |
| Batteries Included? | No |
| Batteries Required? | No |
| Best Sellers Rank | #319,802 in Home & Kitchen ( See Top 100 in Home & Kitchen ) #481 in Garment Racks |
| Brand | BOSURU |
| Color | Gold |
| Customer Reviews | 4.4 4.4 out of 5 stars (408) |
| Date First Available | November 15, 2019 |
| Finish | Gold |
| Finish Type | Gold |
| Frame Material | Iron |
| Furniture Finish | Gold |
| Installation Type | Free Standing |
| Item Package Quantity | 1 |
| Item Weight | 14.2 pounds |
| Load Capacity | 150 Pounds |
| Manufacturer | BOSURU |
| Material | Metal |
| Maximum Weight Recommendation | 150 Pounds |
| Mounting Type | freestanding |
| Number of Shelves | 1 |
| Part Number | 11151 |
| Product Dimensions | 15.7"D x 47"W x 63"H |
| Recommended Uses For Product | Garment |
| Size | 47"L-Gold |
| Special Feature | Durable |
| Special Features | Durable |
| Style | Heavy Duty,Modern Style,Modern,Simple |
| UPC | 793610342270 |
C**G
Sturdy & Stylish
I love this product. It is sturdy and well made. One person can assemble. *Suggestion USE twist style drywall anchors. * Do not use the ones they provide in the packing they will push back into the wall.
G**S
Product is decent, don’t use their anchor.
How to install on drywall: Use stud finder to locate the middle stud. The center mount is to be screwed into the stud in the middle, then the outside 4 mounts would be on the drywall. This is preferred because you’d rather have the middle pole get most of the stability since the 4 horizontal poles are screwed directly into it. You don’t have to worry about weight, because that’s supported from the ground (3 legs). Now pre-assembled everything, then place it against the wall with the center top mount placed against the stud. *Note* now is the time to make sure every mount and poles are turned as hand-tight as you can, this is important. With the center top mount placed against the stud in the middle of the wall, rotate the mount in a way so at least 2 screws can go directly into the stud without an anchor. It’ll be better if someone can hold the poles for you so the mounts would lay flush against the wall. A short ladder would also help unless you are a giant. Now mark the holes on the mount that’s against the stud, make sure to make a pilot hole deep/wide enough for the screw to go into the stud. The third hole on this center mount will require an anchor unless your stud is wide enough. Now while the entire assembly is flush against the wall, make sure all 3 “legs” are aligned on the ground. You can look from the top and the sides to make sure. Once you are confident they are aligned, put one screw into the mount that’s on the stud. Now you can mark the holes of all the other mounts. After you do that, use painters tape to mark the surroundings of each mount on the wall (x5) and the legs (x3). You’ll need to remove the entire assembly to drill holes for the anchors, by marking each spot with painters tape you’ll help you locate exactly where each mount needs to go. Remember after you marked each hole with a sharpie, try not to late the poles or mounts anymore. ***For dry wall anchors, buy *plastic* self-drilling anchors (which usually comes with screws). Don’t get metal once as they are too aggressive for some drywalls. It’s important to drill a small pilot hole in the center of each hole markings, followed by a bigger hole so the new plastic self-drill anchors can screw in straight. Because without a correct sized hole, you’ll likely break the anchor or have it flip on you. Another thing I did is I bought three 3” round rubber floor protectors (with edges) so that the lower round mounts won’t damage the floor. And I used Blutac to mount them onto the mounts. Blutac is great because it’s removable and it’s great against vibrations. Last part obviously is put all the anchors in, and install the entire assembly by putting the screws in, pretty much self explanatory. !!Now here’s the last tip as far as install goes, once everything is mounted and secured, gently unscrew each of the 3 bottom leg poles until all three are equally snug, this would make the entire structure more stable. Good luck! PS: If you saw my picture and wonder what those colorful silicone things are, on Amazon they are “Silicone Clothes Hanger Fixed Hook Windproof Hanger Spacer Anti-Off Hanger Fixing Ring…”, and I bought 2 packs of 24 to hang clothes in the laundry room. I need them to keep the hangers in place due to the 3 large vornado fans I use to dry clothes with.
N**S
Stylish, Super Cute & Functional - Love it
After doing an afternoon of review for a stylish clothing rack I ended up purchasing this one. I absolutely LOVE it! The directions to assemble were very simplistic drawings. However, it was very easy to assemble. The quality is excellent, and it adds such a high-quality style to my office/dressing room. I didn't add them, but there is the option to add on the included wheels. The wheels also have gold accents so they match. If you're looking to elevate a room, or feature some stylish clothing in your house/shop, this is a great purchase.
T**I
Easy to put together, sturdy, perfect.
Took me maybe 10 mins to put together, super simple and sturdy. Very happy and am considering buying a second one.
J**A
HORRIBLE EXPERIENCE
This is the second time I had to order this product , first time was missing top bars, this time I got a defective bottom pole … idk what is going on but I have not gotten the product as visually promoted in the photo at all not once!!! Gotta use decor to mask it this is crazy and I paid full price for half a product Insane
J**N
Great purchase!
Honestly for the price, I was skeptical it was going to be strong and sturdy, but it looks nice. It was easy to put together and mount to my wall. It seems very sturdy. I am happy with the quality of materials. I would recommend this purchase!
C**T
I would buy again.
I was honestly hesitant due to the mixed reviews on the item. However, I am glad I decided to move forward with purchasing. I bought two of these because I liked the look and the color was what I was needing to match my store. They were quick and easy assembly. I have them full, and I have had no issues with support. The wheels roll and lock, so far, with no issue. Overall, I would buy again, and I plan too.
C**S
Quality and very easy to build!
Quality is perfect! It holds more clothing than I originally thought it would. Great size and the gold is a really pretty color. Also really easy and quick to build.
B**N
This was easy to install and really offers a ton of space. I was really happy with the purchase, it has been almost a year and it is still perfect.
C**N
I ain’t even mad, lightweight but stable, it’s not like the Home Depot pipes but still strong as hell.
A**X
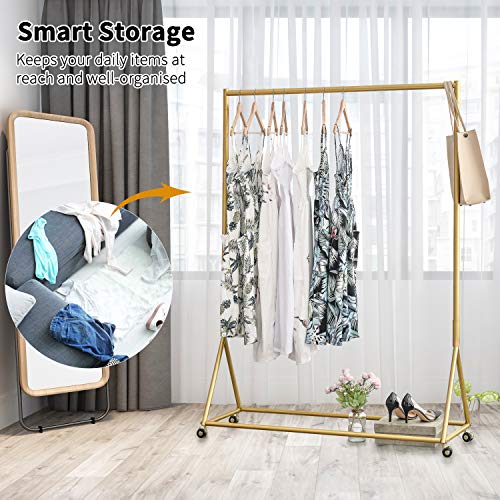
Finally had a perfect solution for all the jackets during the winter time. The jackets are all sitting on the sofa in the living room before. You can't even recognize is a sofa when the jackets cover it like a mountain. Now we finally can sit back on the sofa. Very easy to install only takes me like 20 min and hanging up all the jackets. Quality is also very good and fit. Small money does a good job.
M**E
Très solide et très joli. Le tout sera plus beau avec des contres dores
M**R
This pipe clothes rack has a great industrial design and holds clothes steadily once assembled, fitting well in my space. However, multiple pipes arrived with visible chipped paint right out of the box, making it look worn despite being new. Better quality control on the finish would make this a 5-star item—otherwise, it’s functional but disappointing aesthetically
Trustpilot
5 days ago
1 month ago