
DOWNLOAD THE APP


Customer Services
Copyright © 2025 Desertcart Holdings Limited
DOWNLOAD THE APP

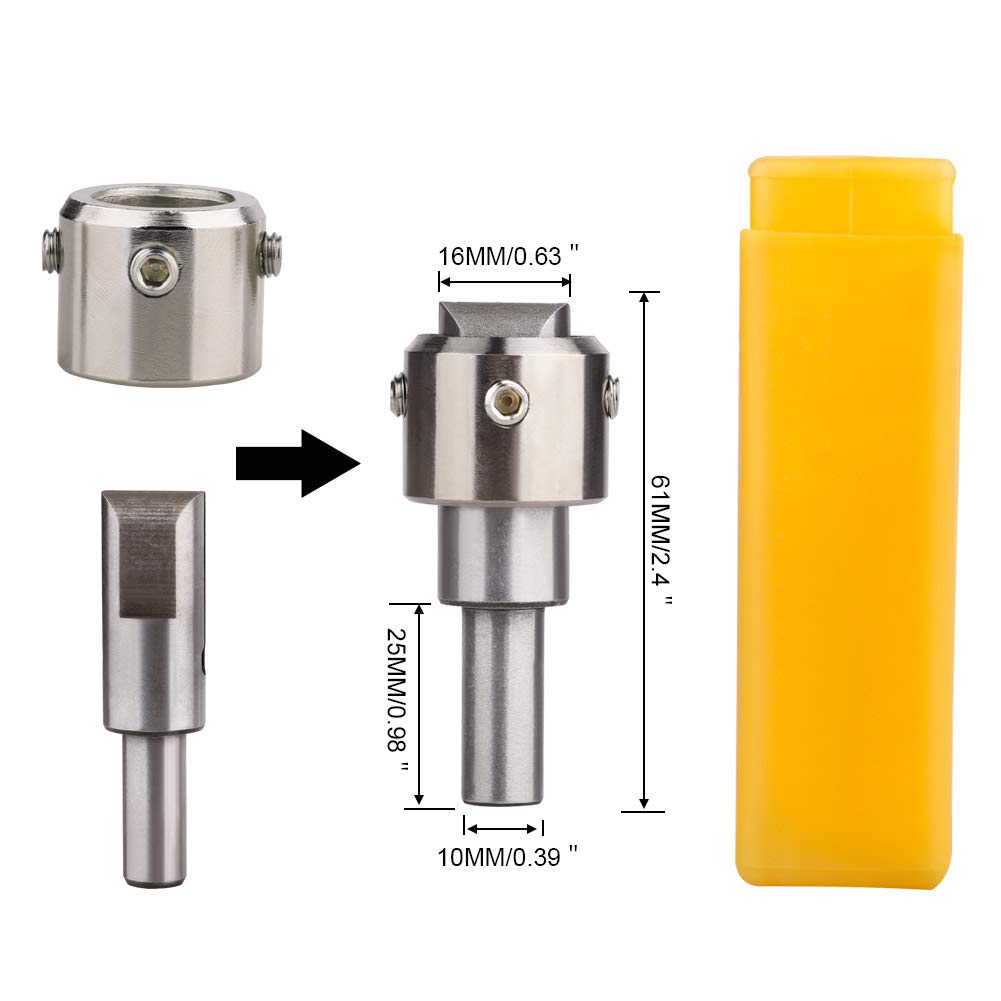


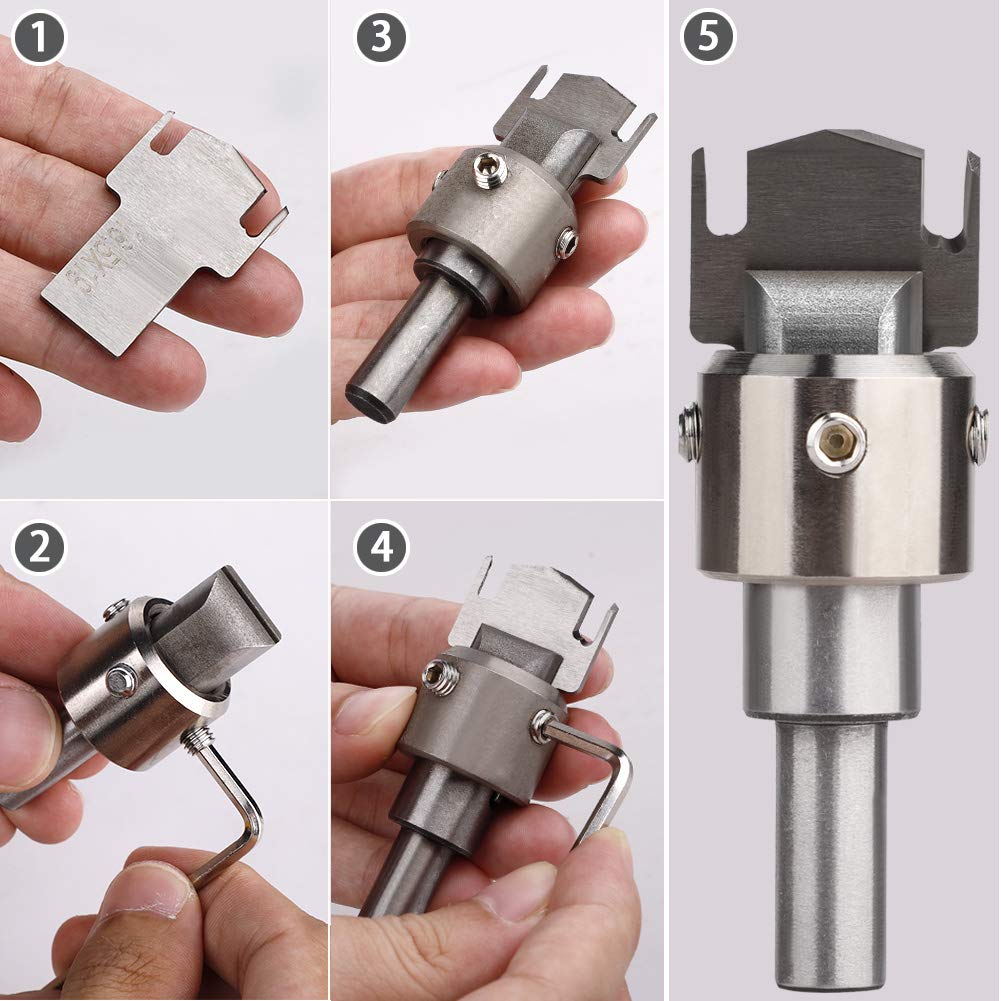
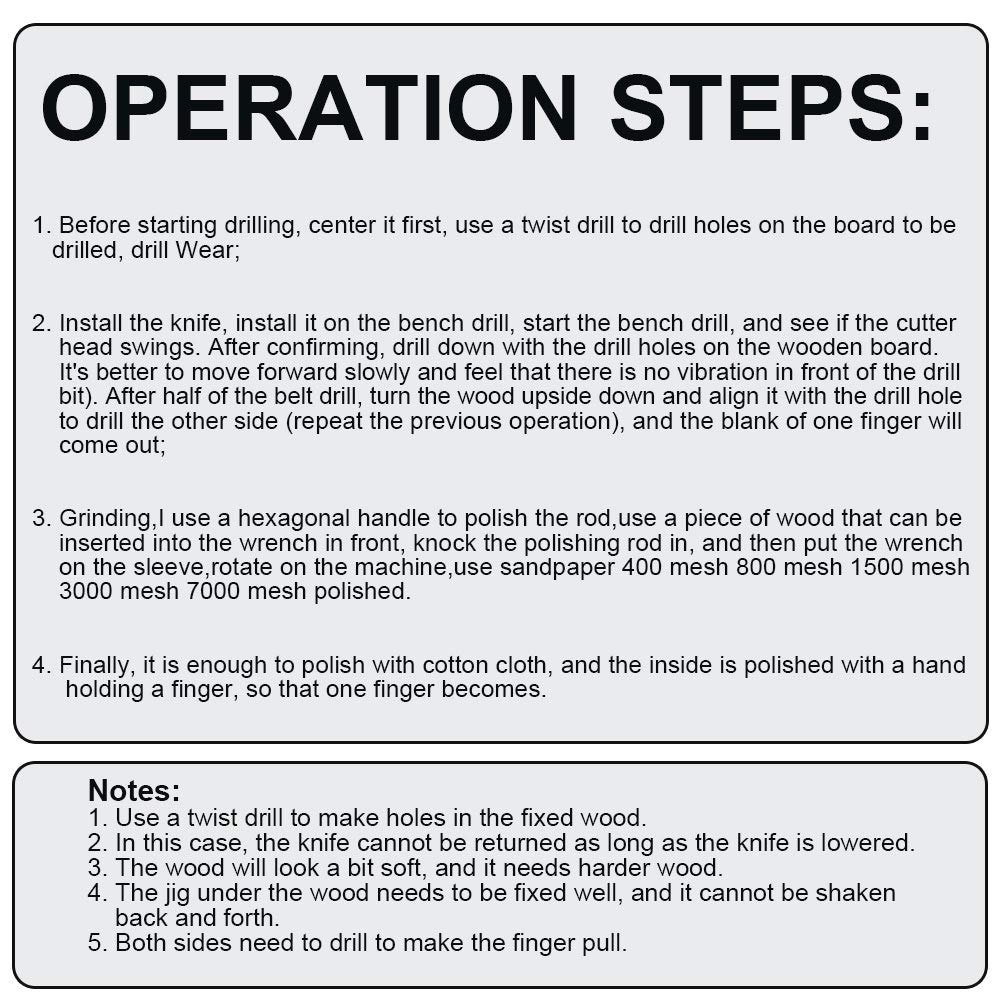
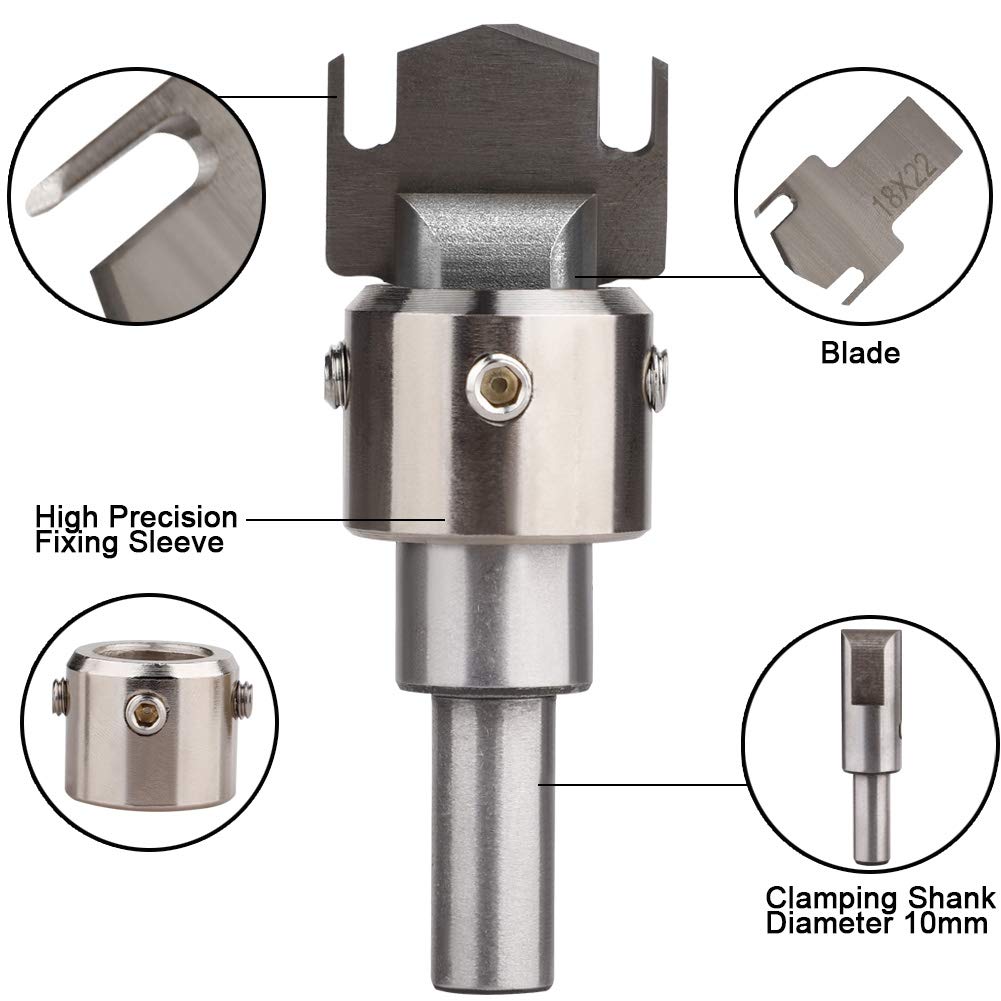
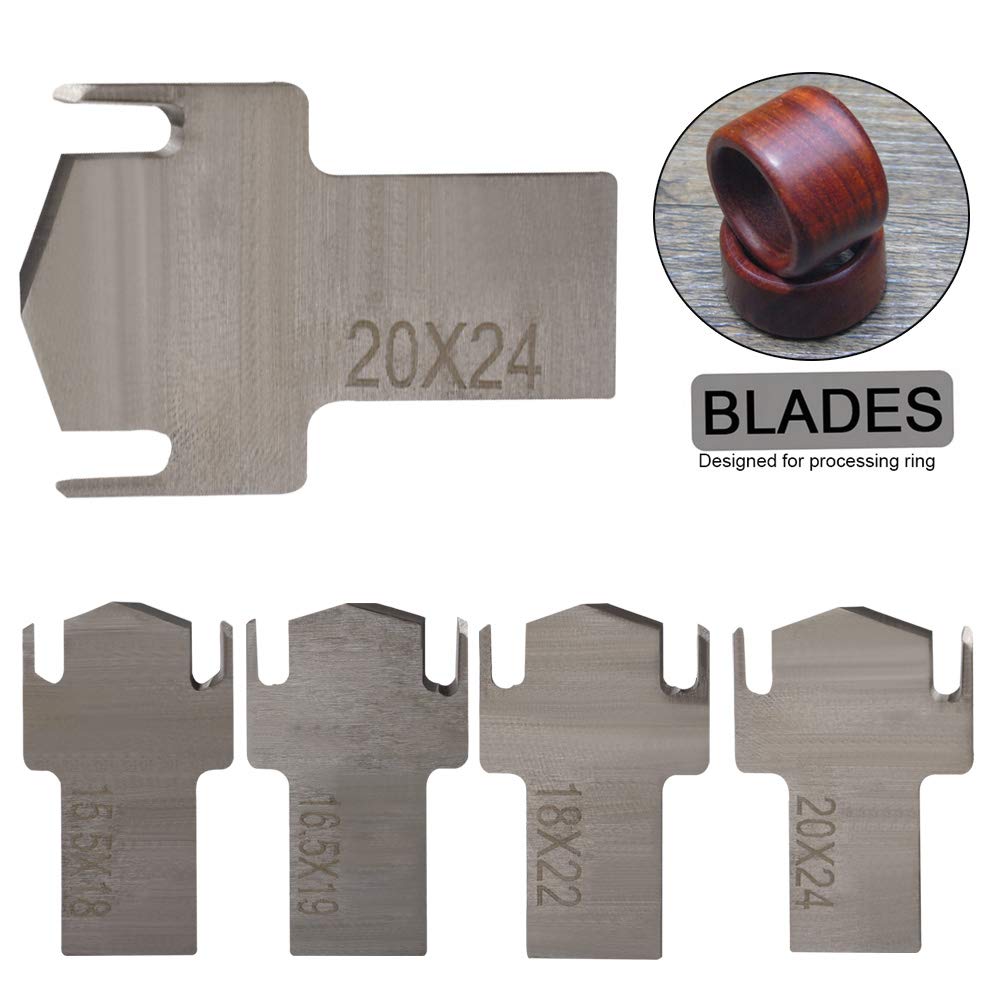
Operation steps and precautions of the ring bead knifeOperation steps: 1. Before starting drilling, center it first, use a twist drill to drill holes on the board to be drilled, drill Wear;2. Install the knife, install it on the bench drill, start the bench drill, and see if the cutter head swings. After confirming, drill down with the drill holes on the wooden board. It’s better to move forward slowly and feel that there is no vibration in front of the drill bit). After half of the belt drill, turn the wood upside down and align it with the drill hole to drill the other side (repeat the previous operation), and the blank of one finger will come out; 3. Grinding, I use a hexagonal handle to polish the rod, use a piece of wood that can be inserted into the wrench in front, knock the polishing rod in, and then put the wrench on the sleeve, rotate on the machine, use sandpaper 400 mesh 800 mesh 1500 mesh 3000 mesh 7000 mesh polished. 4. Finally, it is enough to polish with cotton cloth, and the inside is polished with a hand holding a finger, so that one finger becomes. Specifications:Material: SteelInner Diameter: 15.5mm,16.5mm,18mm,20mmOuter diameter : 18mm, 19mm, 22mm, 24mmPrecautions:1. Use a twist drill to make holes in the fixed wood. 2. In this case, the knife cannot be returned as long as the knife is lowered. 3. The wood will look a bit soft, and it needs harder wood. 4. The jig under the wood needs to be fixed well, and it cannot be shaken back and forth. 5. Both sides need to drill to make the finger pull. Package IncludingPackage included:1 x Wooden Thick Ring Maker4 x Blades
C**S
Useless tool. Don’t waste your money.
Tried multiple methods of aligning front and back drills so they meet. Through drilling a center, which the tool is nearly impossible to line up on center as the point on the tool doesn’t have a center point. Also tried using an exacto to scribe matching edges on both sides to line up the outside of the cutter on the lines, but that doesn’t work either as the cutter shifted in the holder between the back cut and front cut.They include extra set screws, which is important as the set screws that it came preassembled with strip out quite readily, being cheap components.The edge cutters broke off one of the bits while cutting some maple.A few times when I got the front and back perfectly centered and lined up, just as the bit broke through into the first cut, the ring doesn’t just fall through the bottom perfectly, but jams a bit cockeyed, and the cutter then breaks the ring you just cut.I tried multiple methods, and different wood, and never got any sort of acceptable result. Save your money and put it towards a small lathe, as this tool is entirely useless, both in quality, and being able to produce a ring.
R**L
Disappointed
You absolutely CANNOT do ANY of the objectives listed. They do not cut smoothly, evenly, or even completely through wood. I tried them with four different drills. No success.
J**R
Research
Bought this product, then newer version comes out, rather confusing
D**.
could be a lot better
The center really needs to be longer in order to allow you to use different thicknesses of wood. Kind of worried after 2 cuts the bits dull could go with bigger IDs too
T**N
Not great.
The center of the ring maker is not long enough to cut all the way through the board before it separates the ring. It also does not have a centering bit.
B**A
No
Broke on pine
D**S
Broke immediately
It broke almost immediately. Not a good product.
A**F
Soft wood only
Broke off on the first use. Must use soft soft wood.
Trustpilot
3 weeks ago
1 month ago