
DOWNLOAD THE APP


Customer Services
Copyright © 2025 Desertcart Holdings Limited
DOWNLOAD THE APP

🚗 Light Up Your Lexus, Leave Ordinary Behind!
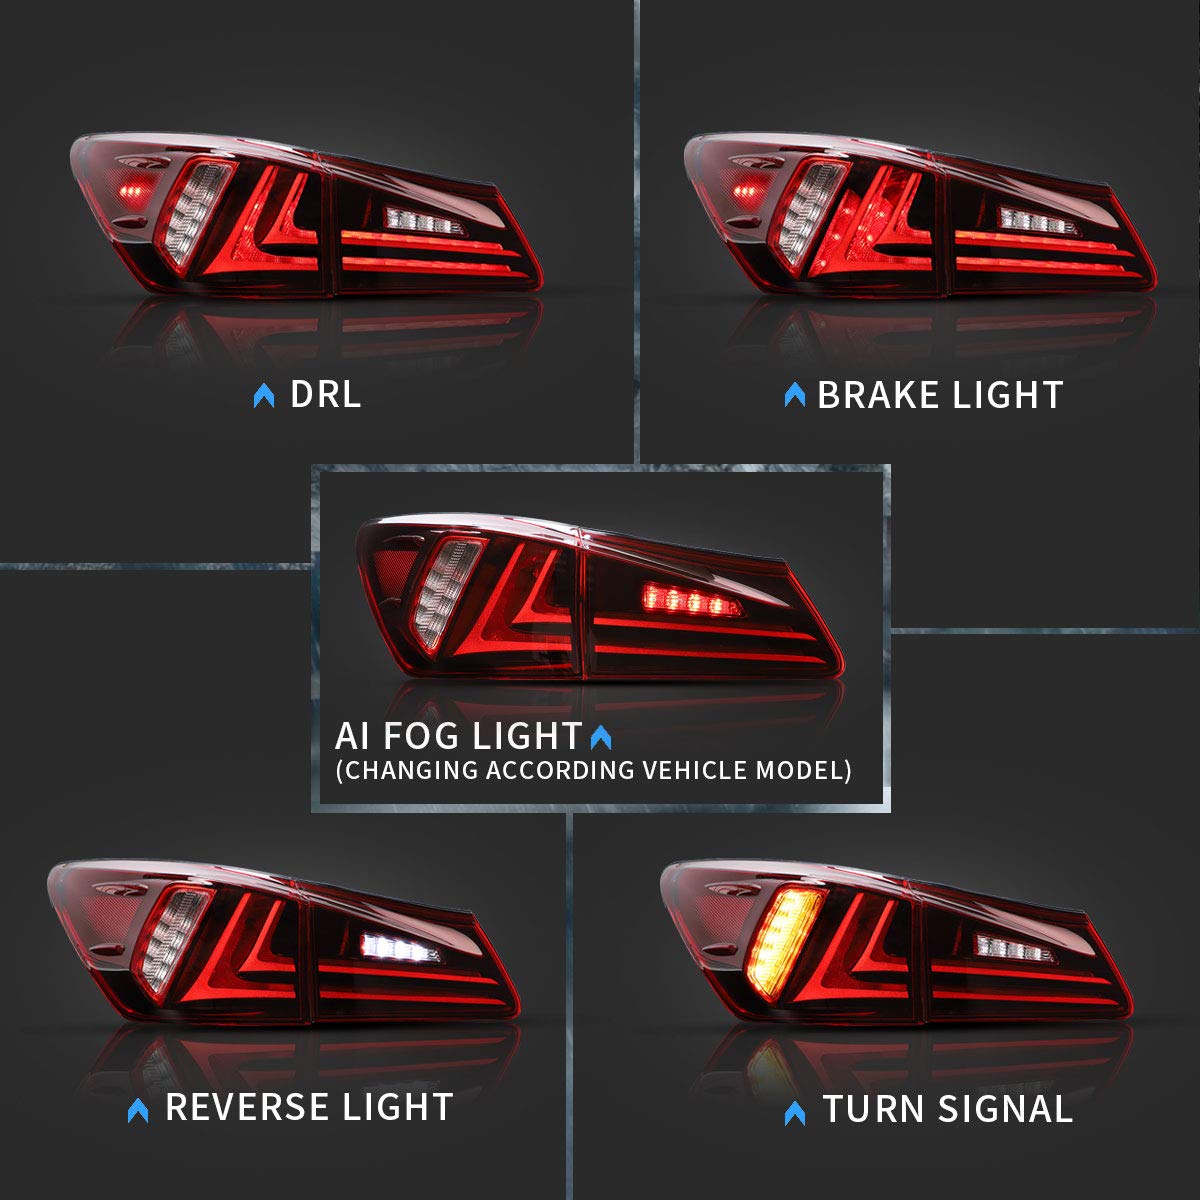
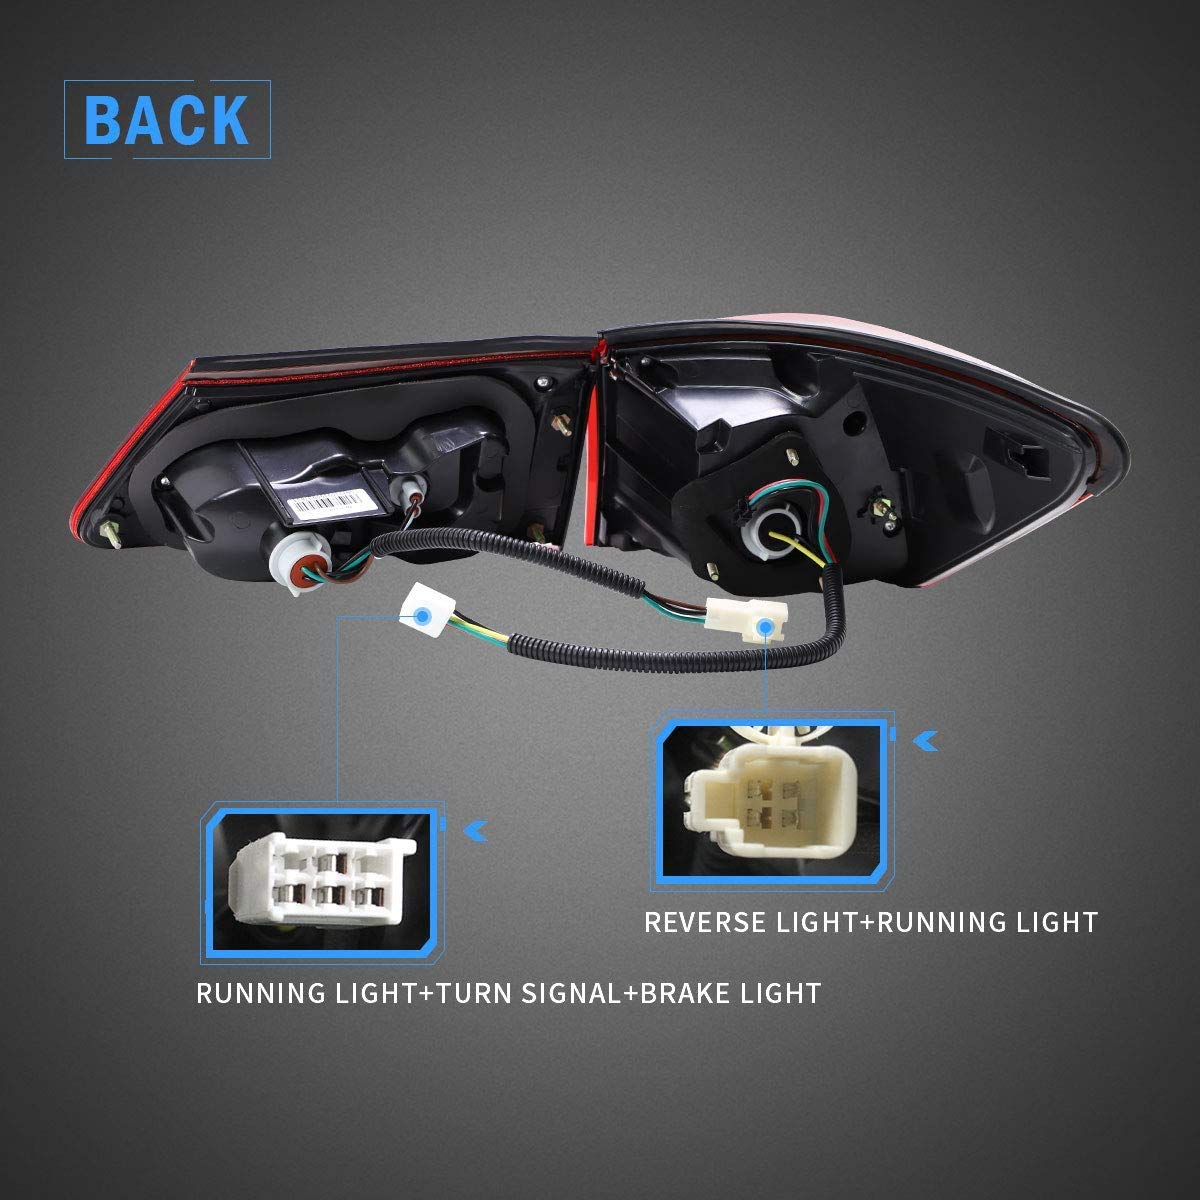
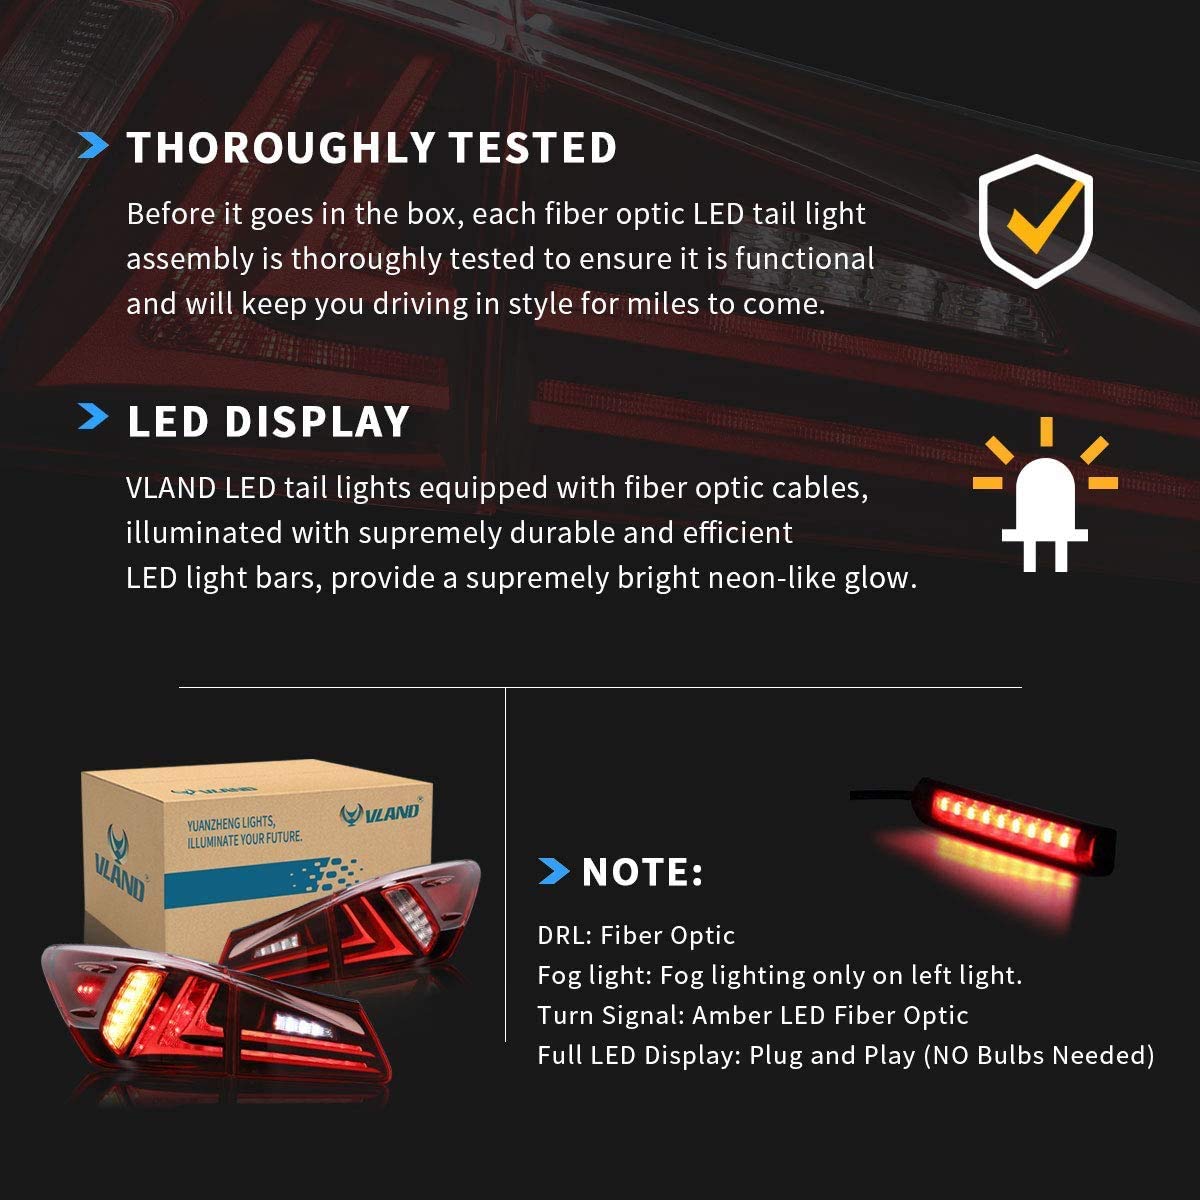
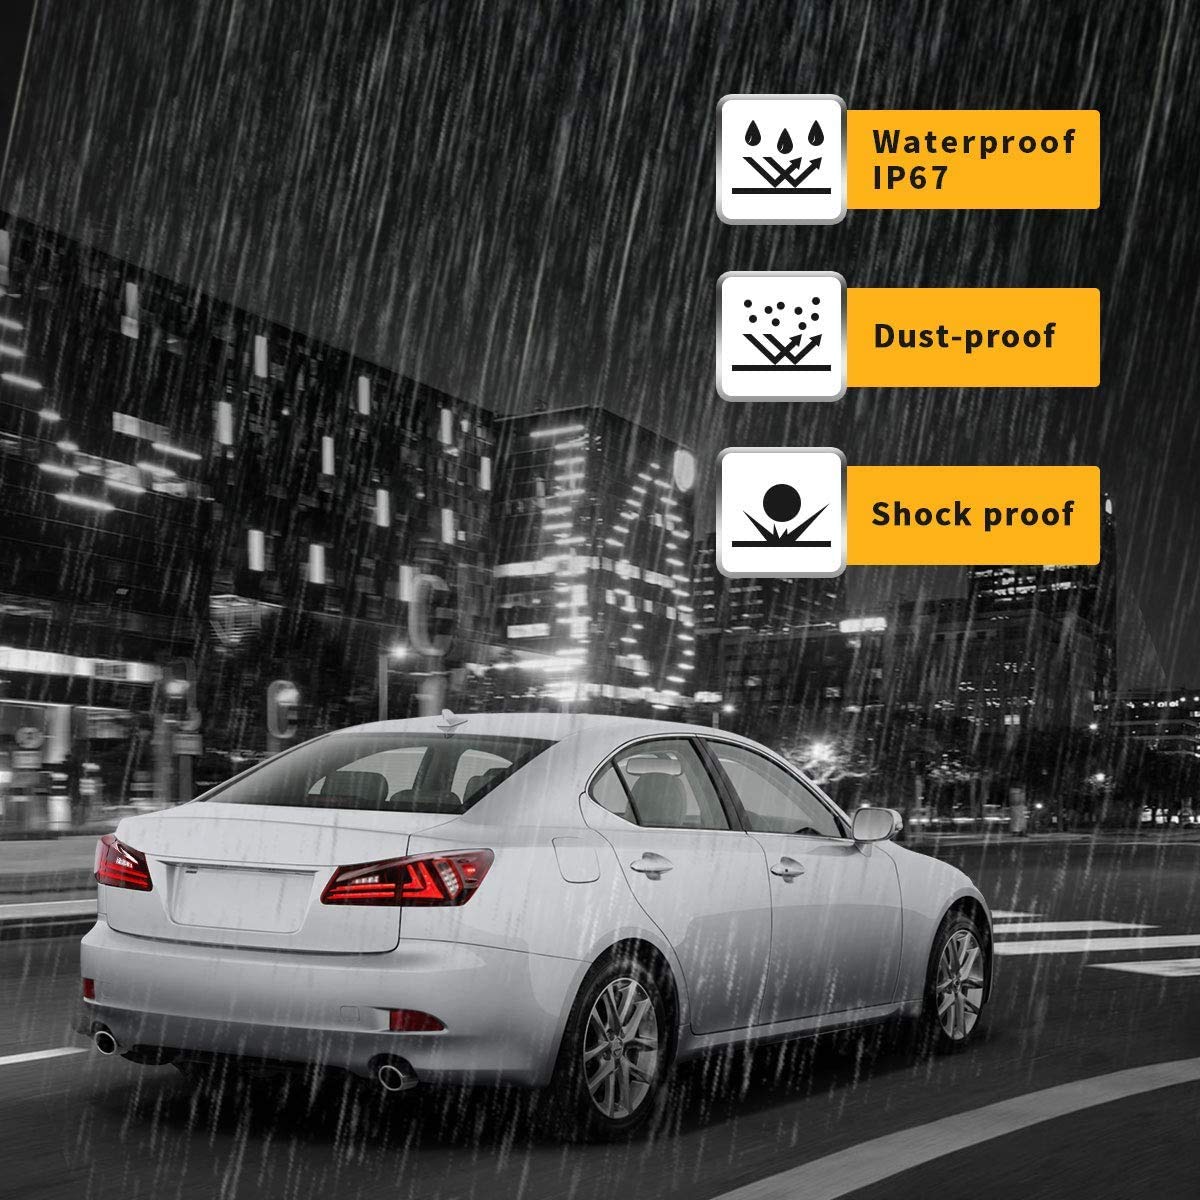
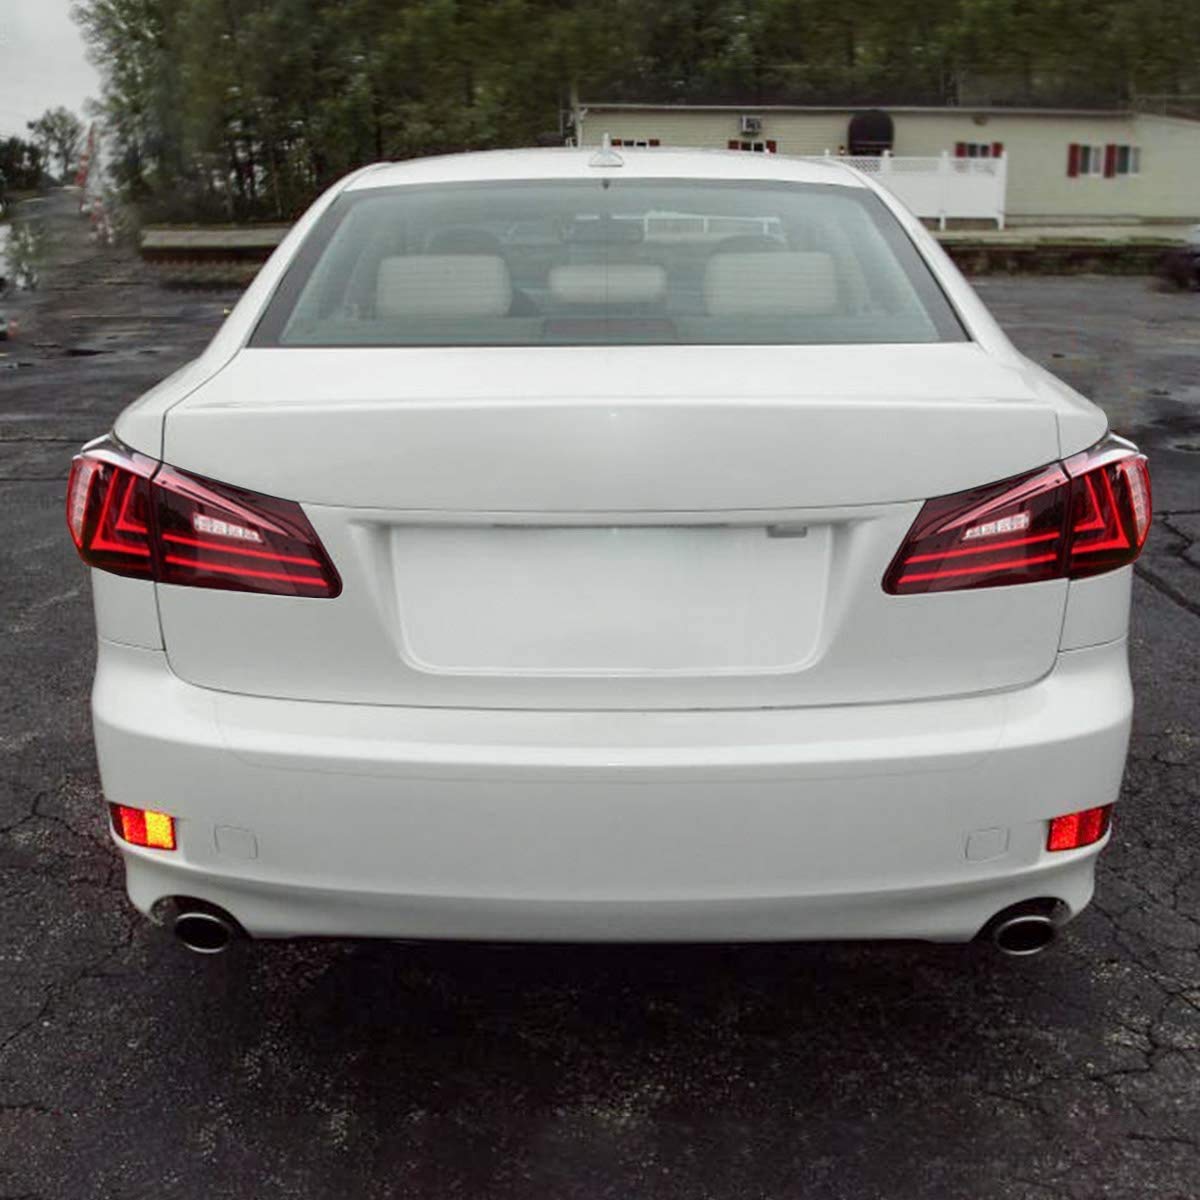
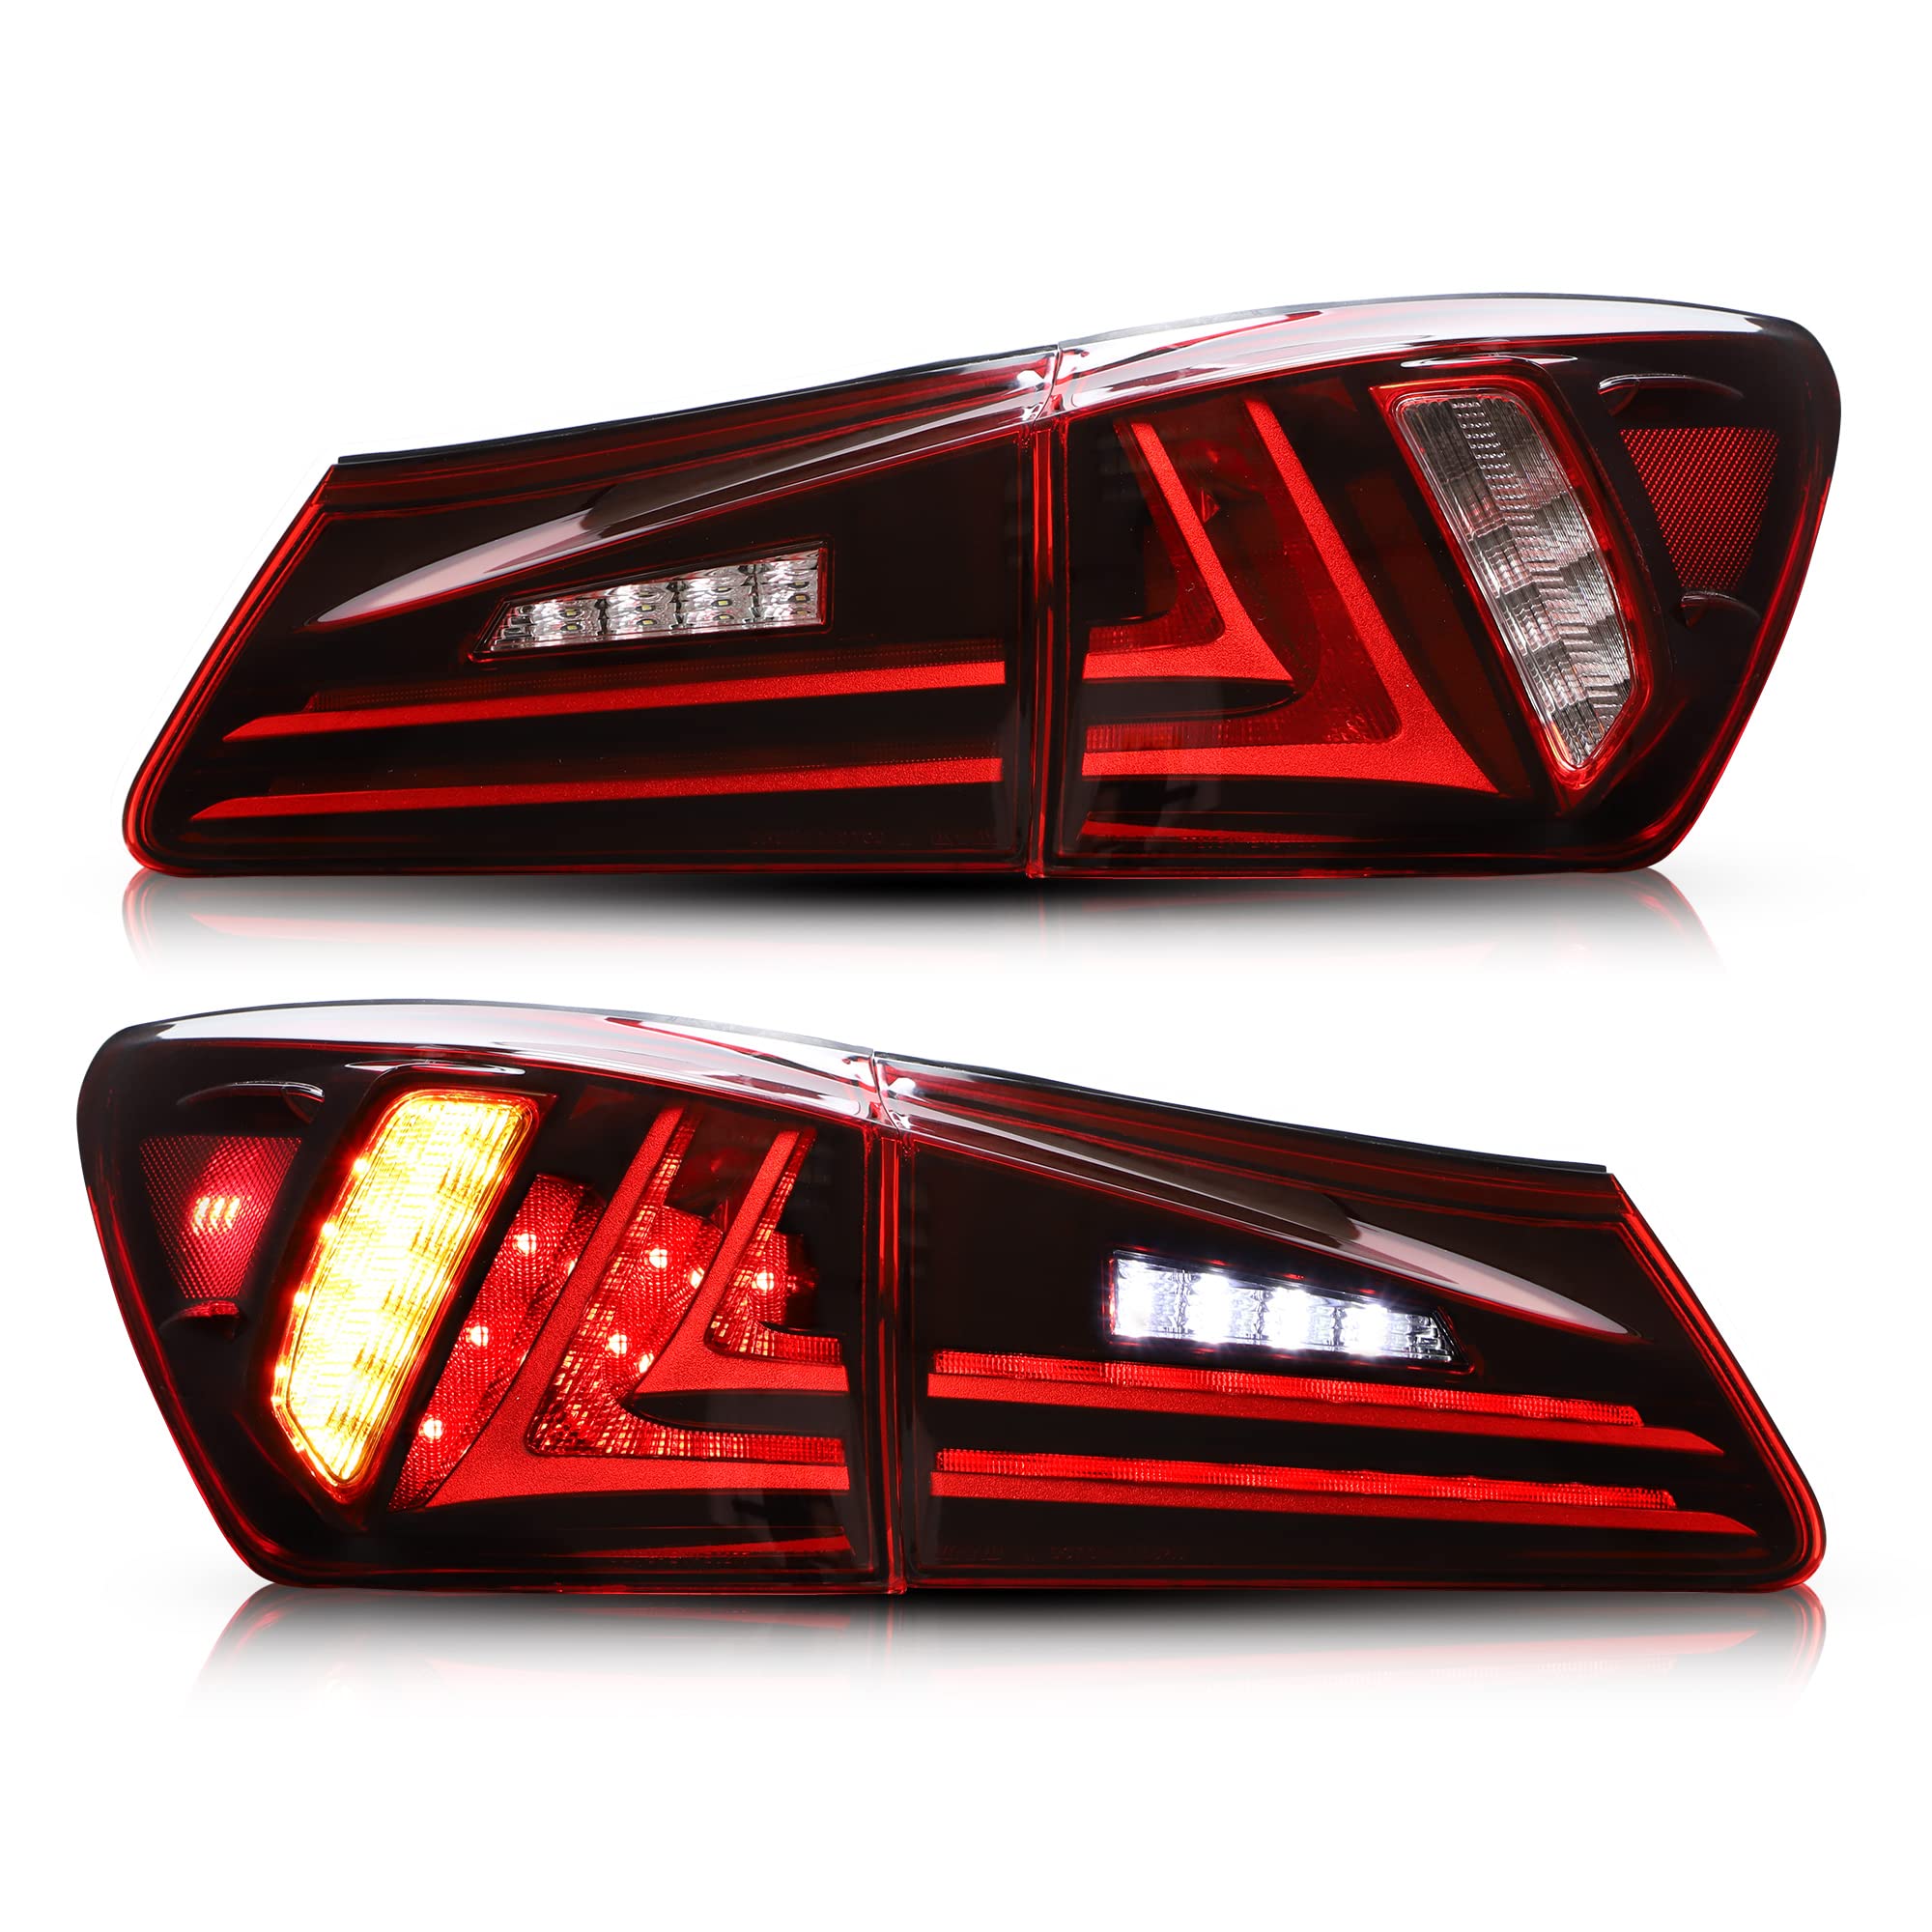
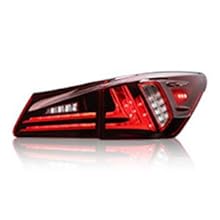
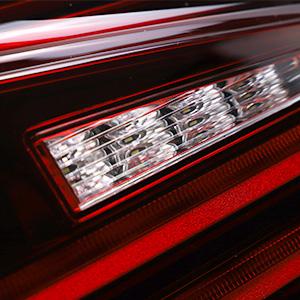
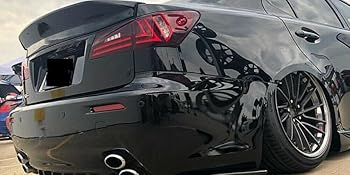
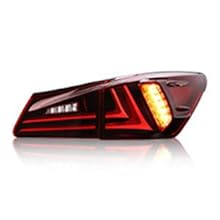
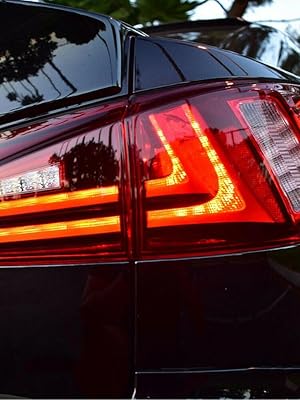
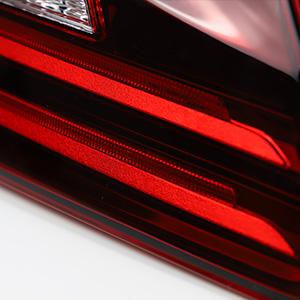
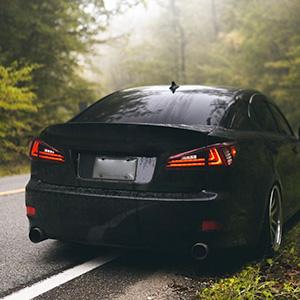
VLAND LED Tail Lights are a direct OEM replacement for select Lexus IS models (2006-2013 IS250/IS350/IS220d and 2008-2015 IS F), featuring a full LED fiber optic design with no bulbs required. These IP67 waterproof lights offer plug-and-play installation, enhanced brightness for safety, and precision fitment with OEM part number compatibility, making them the ultimate upgrade for style and function.


| ASIN | B07XH1N7HY |
| Best Sellers Rank | #157,625 in Automotive ( See Top 100 in Automotive ) #4,963 in Car Lighting Assemblies & Components |
| Brand | VLAND |
| Bulb Type | LED |
| Customer Reviews | 4.4 4.4 out of 5 stars (280) |
| Date First Available | 24 January 2020 |
| Exterior | Polished |
| Item Weight | 4.04 Kilograms |
| Item model number | YAB-IS-0277 |
| Manufacturer | VLAND |
| Manufacturer Part Number | YAB-IS-0277 |
| Model | Lexus tail lights |
| OEM Part Number | 8156353170, 8155153260, 8156153171, 8156153220, 8158153061 , 8159153061 |
| Position | Rear |
| Safety Rating | DOT Certified |
| Special Features | Waterproof |
| Voltage | 12 Volts |
| Wattage | 35 watts |
D**S
Very easy to install. Best looking tails out there for the 2is, not to mention the price of them. Very satisfied with my purchase.
J**A
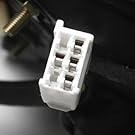
Installation: 👍🏽👍🏽 Plug & Play: 👍🏽👍🏽 Quality: 👍🏽👍🏽 Seals: 👍🏽👍🏽 I am not a fan of aftermarket headlights nor tail-lights. They are usually low quality and soon after break or condensation kicks in. However, these are a nice upgrade for my 2008 IS-F. They were pretty easy to install and the plugs fit in with no issues. The opening trunk lights harness even has the clip to attach it to the body of the trunk so no rattle noises coming from the back of the car. The seals between the tail-lights and the car (attaches to lights) are identical to OEM quality. Caution: when removing your OEMs there should be some small rubber gaskets that go between the body every tail-light screw and the body of the car to protect the finish and avoid metal on metal contact. Be careful taking these off and just place them on the VLand lights. You’ll also have to use your OEM nuts to bolt these on. Other than that, it’s pretty straight forward. I Just installed them today and will update further down the road to keep everyone informed on durability. Update: when placed in reverse the LEDs are pretty bright and allow better viewing on the NAV screen 👍🏽👍🏽
J**M
Visually one of the best upgrades I've seen to bring the car up a decade! I've been waiting a while to write this to be sure they work, stay dry in heavy rain, and last. So far, a great addition! Some install notes- the fuse box that you need to insert the jumper fuse into is listed as "on the driver's side". I initially thought it was the fuse box inside the car on the driver side and was pulling my hair out trying to figure how to get a wire through the firewall. Good news, it's under the hood just behind the driver side headlight. You will have to cut a small notch in the fuse cover so that it still closes after you install the fuse jumper and lead the wire out of the box. Also, these lights will NEED to be adjusted once installed, but getting to the gear to actually adjust it using a socket or wrench is IMPOSSIBLE! I managed to adjust it using a flathead screw driver and tediously pushing the gear in the direction to raise the beams. It takes forever to get them where they need to be, as they come out of the box facing directly down in front of the car. Be patient and take your time. It's worth it! Once adjusted properly they are way brighter than the factory HIDs. I adjusted them at night against my garage door and then drove it to ensure they were up high enough without blasting oncoming cars. From looking at the previously posted reviews, no one ever posted a picture of the "Gap" between the headlight assembly and the fender. I provided a pic of the gap and the adjuster gear on this review. Hope it helps in your decision to proceed with it and what you'll need to do to install them. Removing the bumper is a must to get to the mounting screws but there is a great video on YouTube that shows all the steps and bolts you'll need to get at to get it off. (Video was for another headlight product but the info was great). Pics also provided with after the install, including changed out amber fog lamp LEDs. I think the trouble people have posted about flickering and dimness may result in trying to replace factory Halogen Bulb assemblies. This review was for a 2010 IS250 with factory HIDs and the AFS system. The instructions provided also show which fuse to remove after installing the headlight to turn off the AFS warning light that will come on once it doesn't see it's original factory assemblies present. Very happy with the look and functionality with these lights!!
A**A
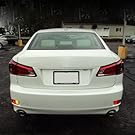
One of my tail lights went out. I decided to change the lens and give it a more modern look. I found a video on YouTube and had the proper tools so I changed them myself and I think they look great. My car looks 10 years younger
T**Y
Fits perfect plug in play set up
Trustpilot
3 days ago
2 months ago