
DOWNLOAD THE APP


Customer Services
Copyright © 2025 Desertcart Holdings Limited
DOWNLOAD THE APP
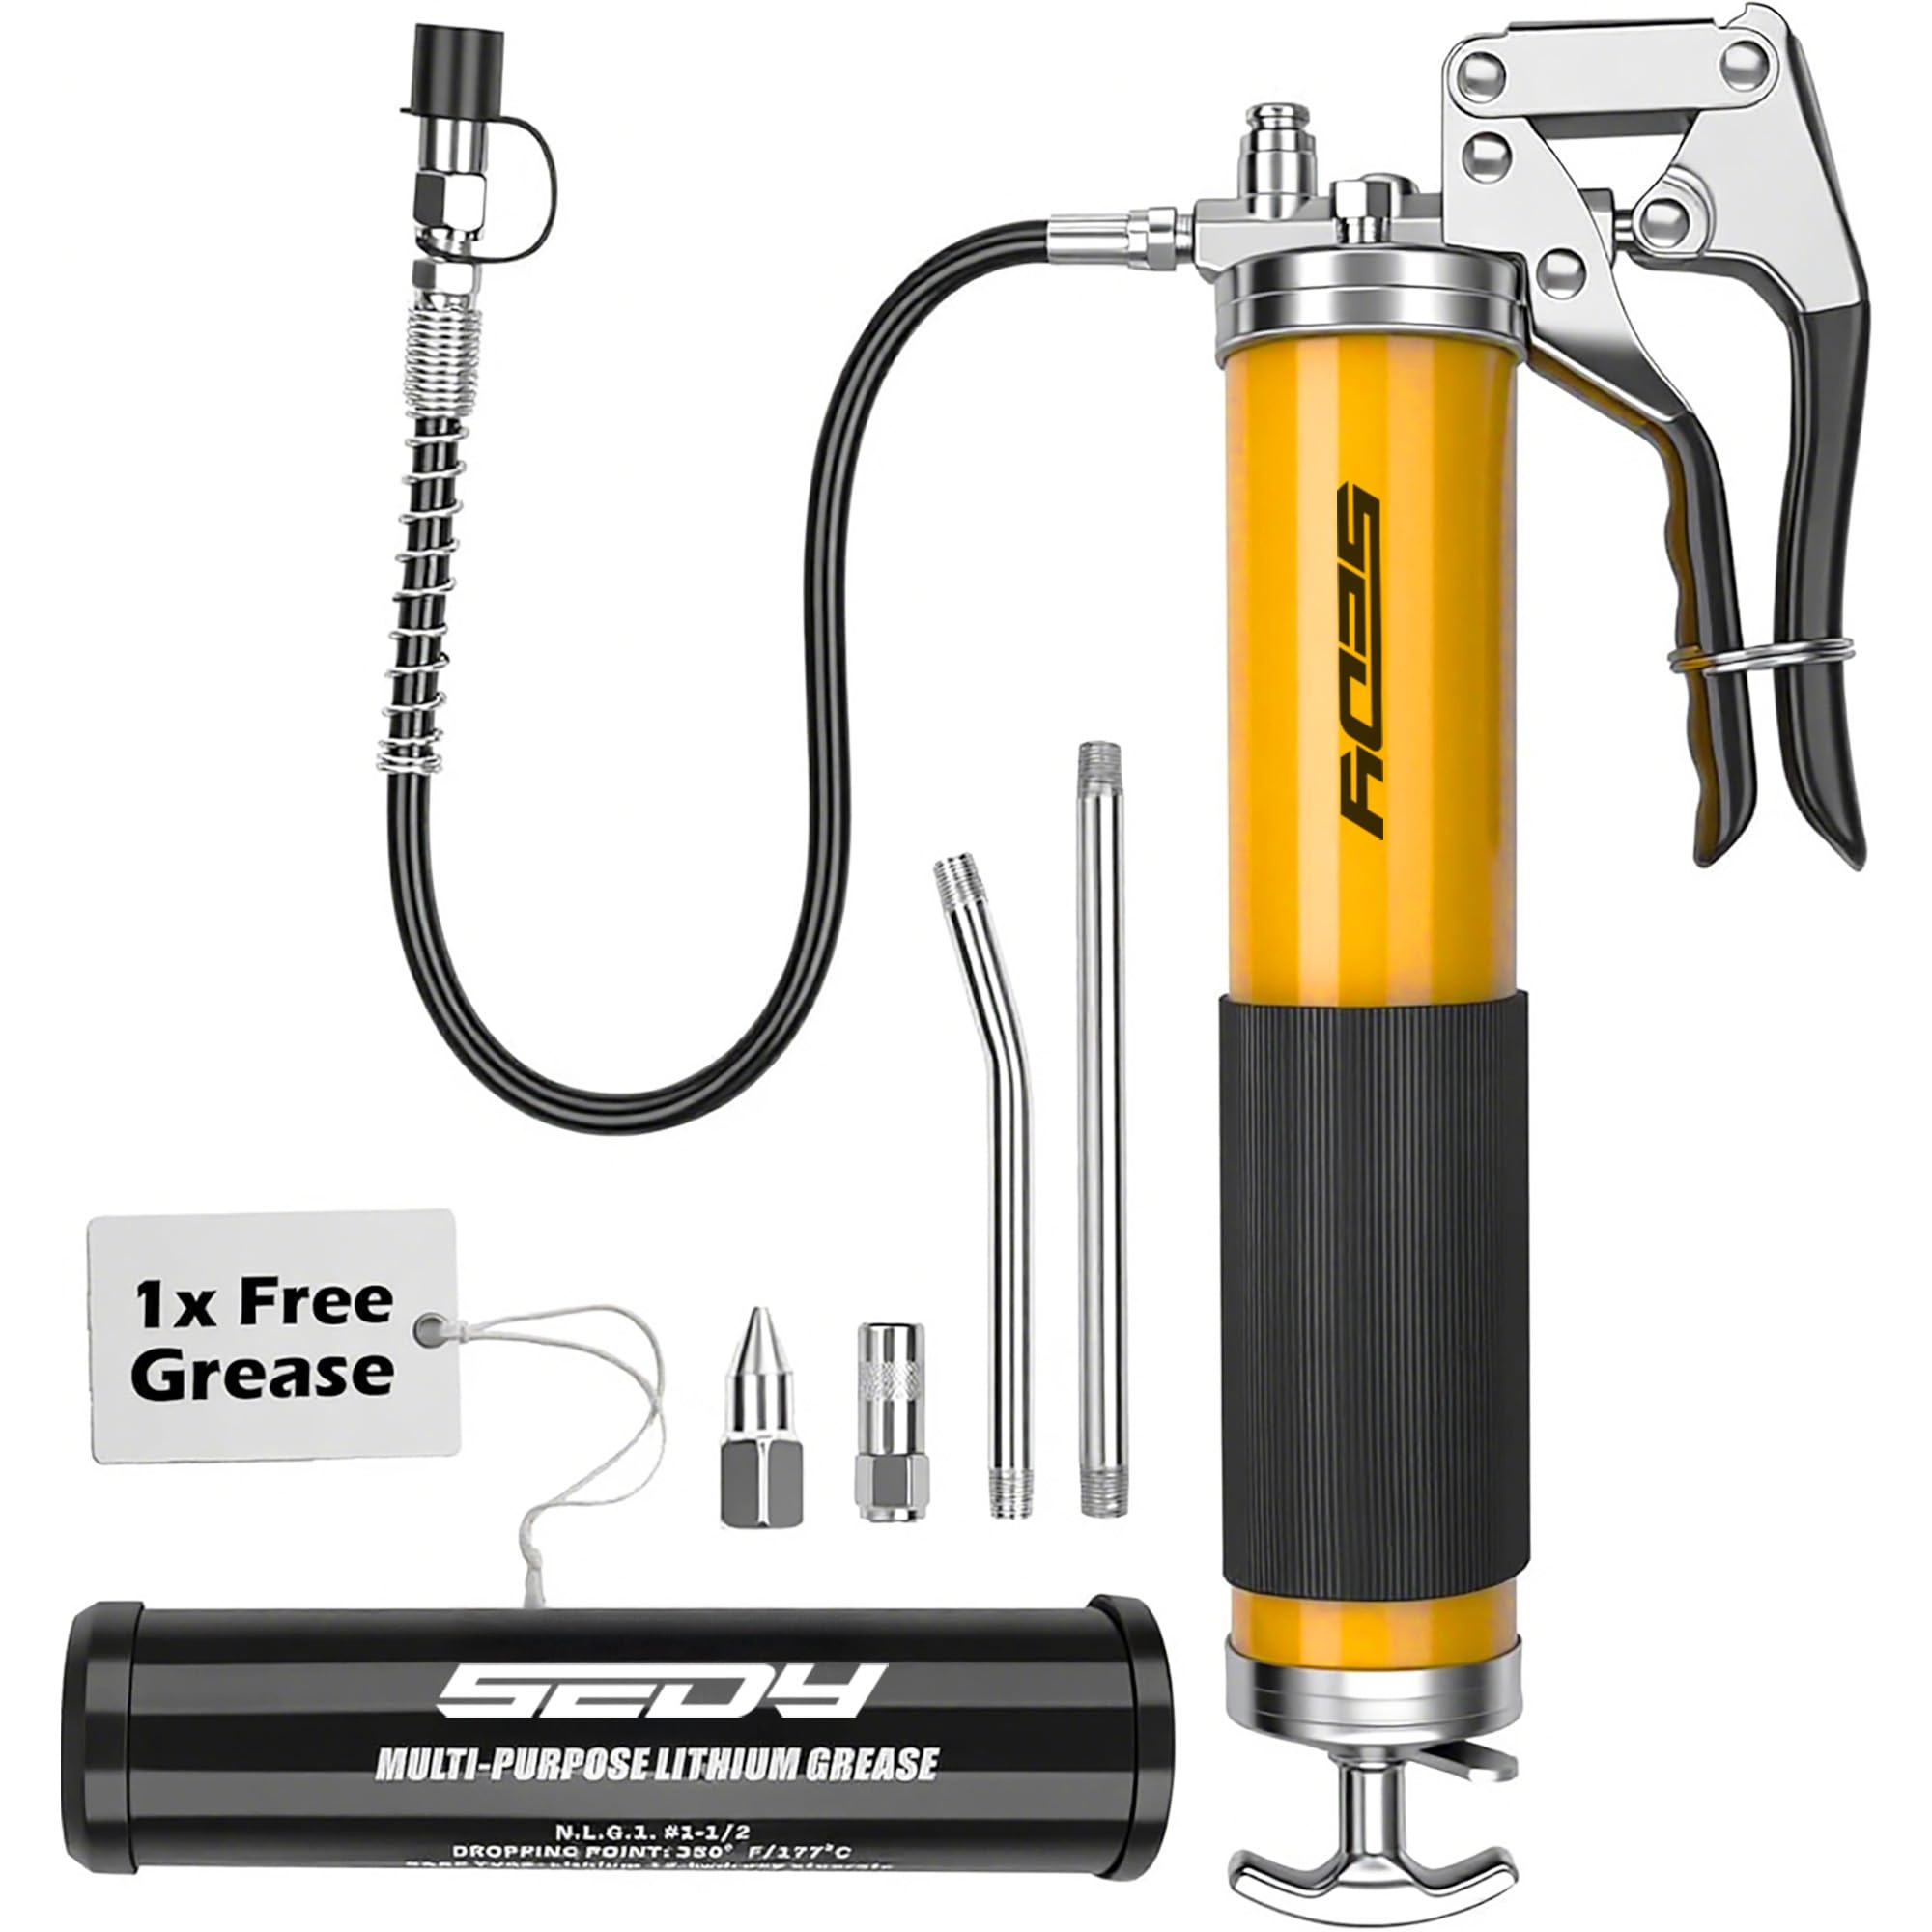
🛠️ Grease like a pro—power, precision, and ease in one heavy-duty kit!
The SEDY Heavy Duty Grease Gun Kit delivers professional-grade lubrication with an 8000 PSI pistol-style grease pump, ergonomic grip, and an 18-inch flexible hose. It includes a free 14oz grease cartridge and multiple connectors for versatile applications, making it ideal for marine, automotive, and industrial maintenance.


| Manufacturer | SEDY |
| Part Number | 83001 |
| Item Weight | 4.49 pounds |
| Product Dimensions | 16.1 x 5.51 x 2.75 inches |
| Item model number | 83001 |
| Size | Standard Kit |
| Color | Yellow |
| Style | Heavy Duty |
| Item Package Quantity | 1 |
| Included Components | Flexible Hose, Connectors |
| Batteries Included? | No |
| Batteries Required? | No |
Trustpilot
1 month ago
3 weeks ago