We remain fully operational. Our teams are working around the clock to ensure your deliveries continue safely.

DOWNLOAD THE APP


Customer Services
Copyright © 2025 Desertcart Holdings Limited
DOWNLOAD THE APP


🐾 Unlock freedom and style for your small pet — because they deserve the best!
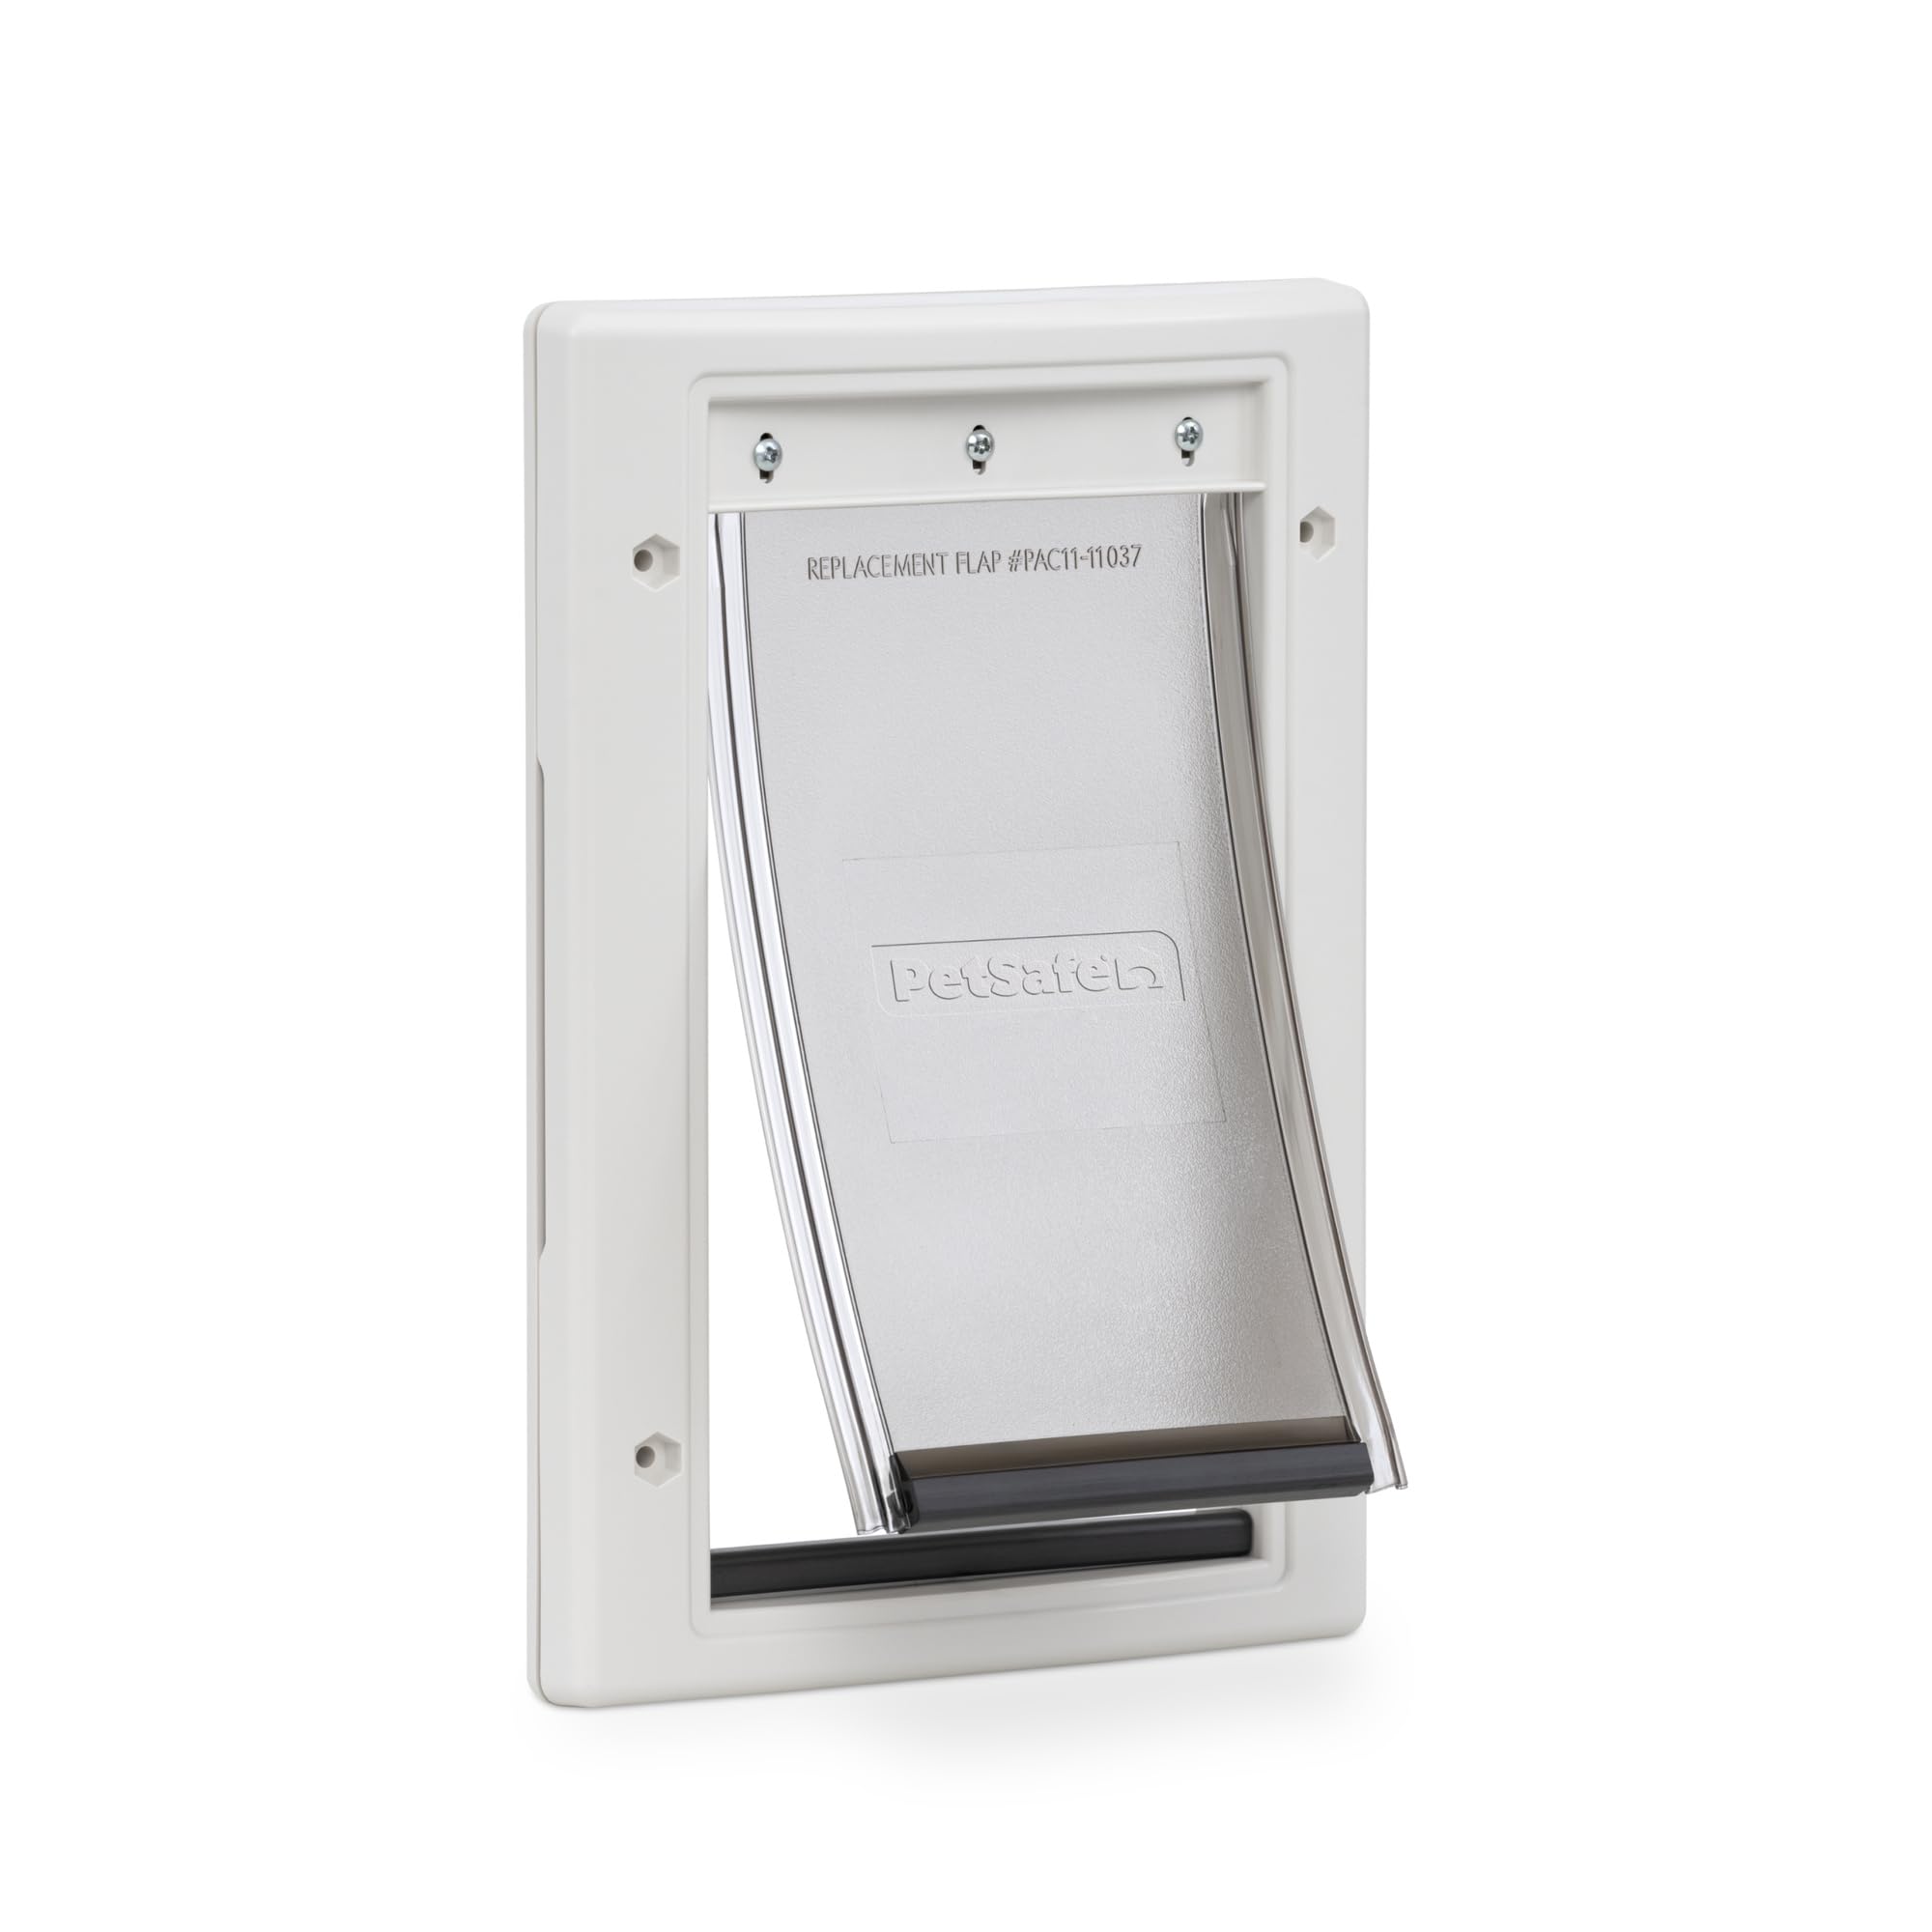
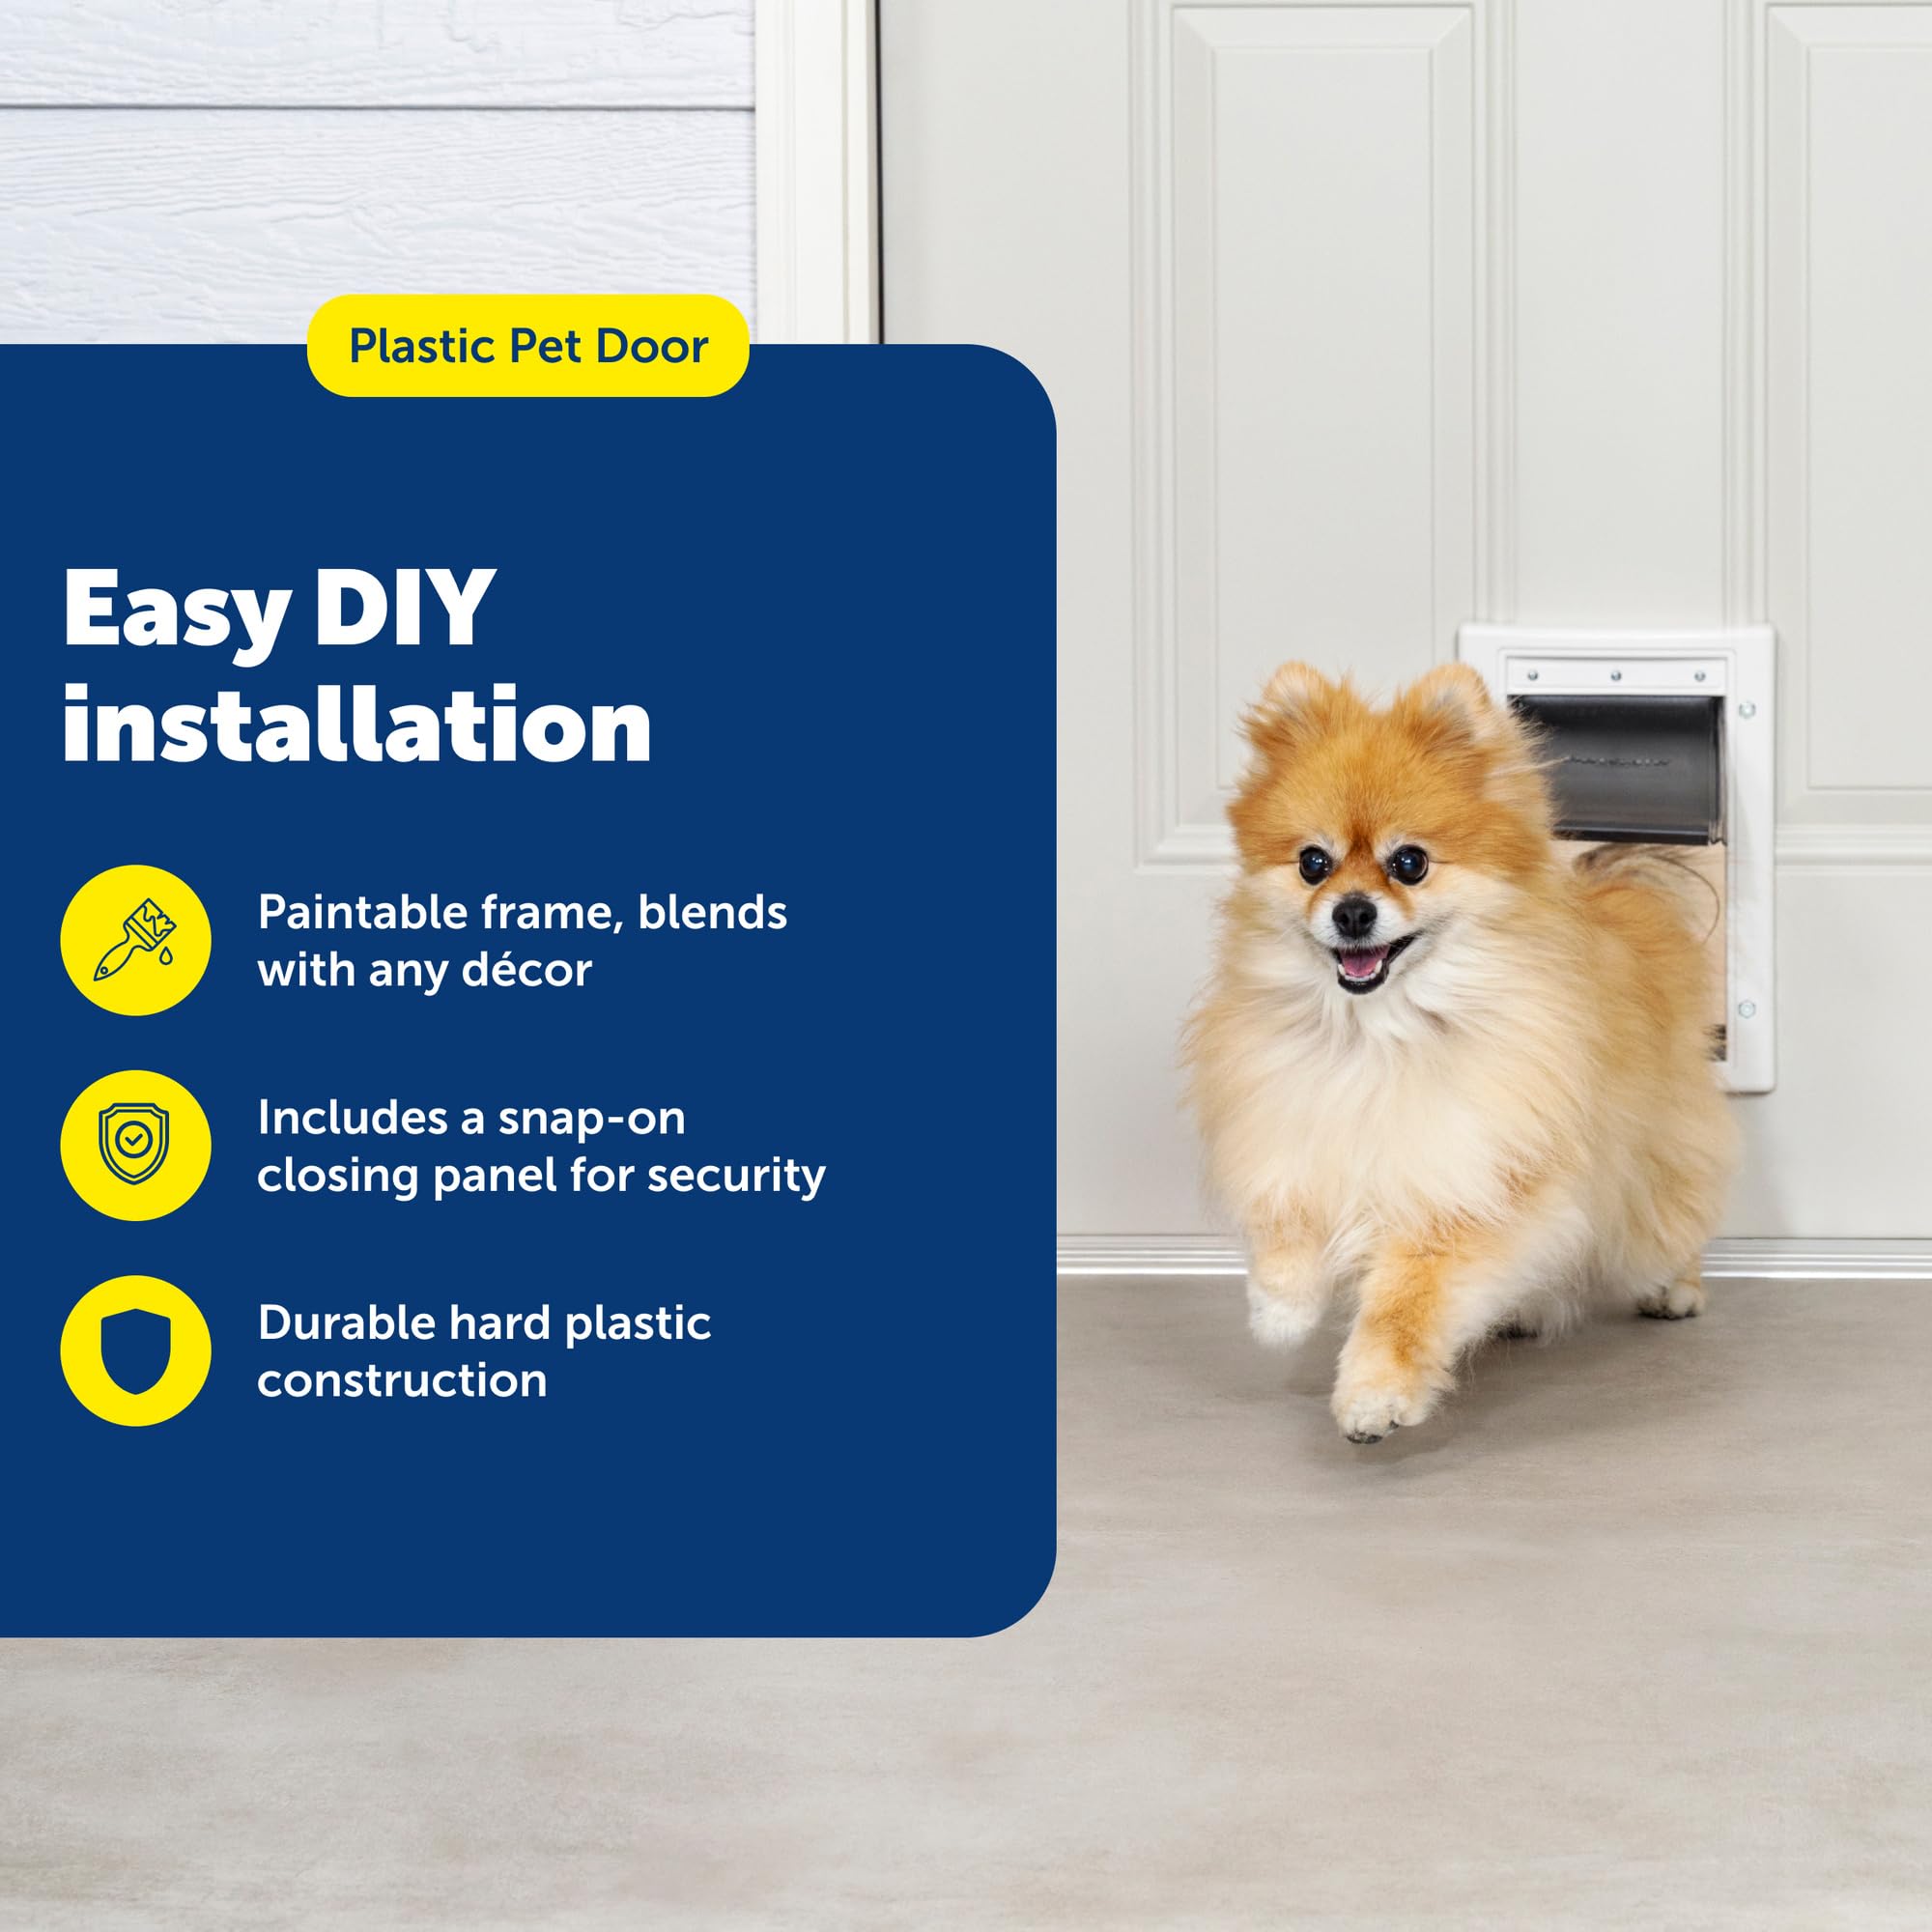
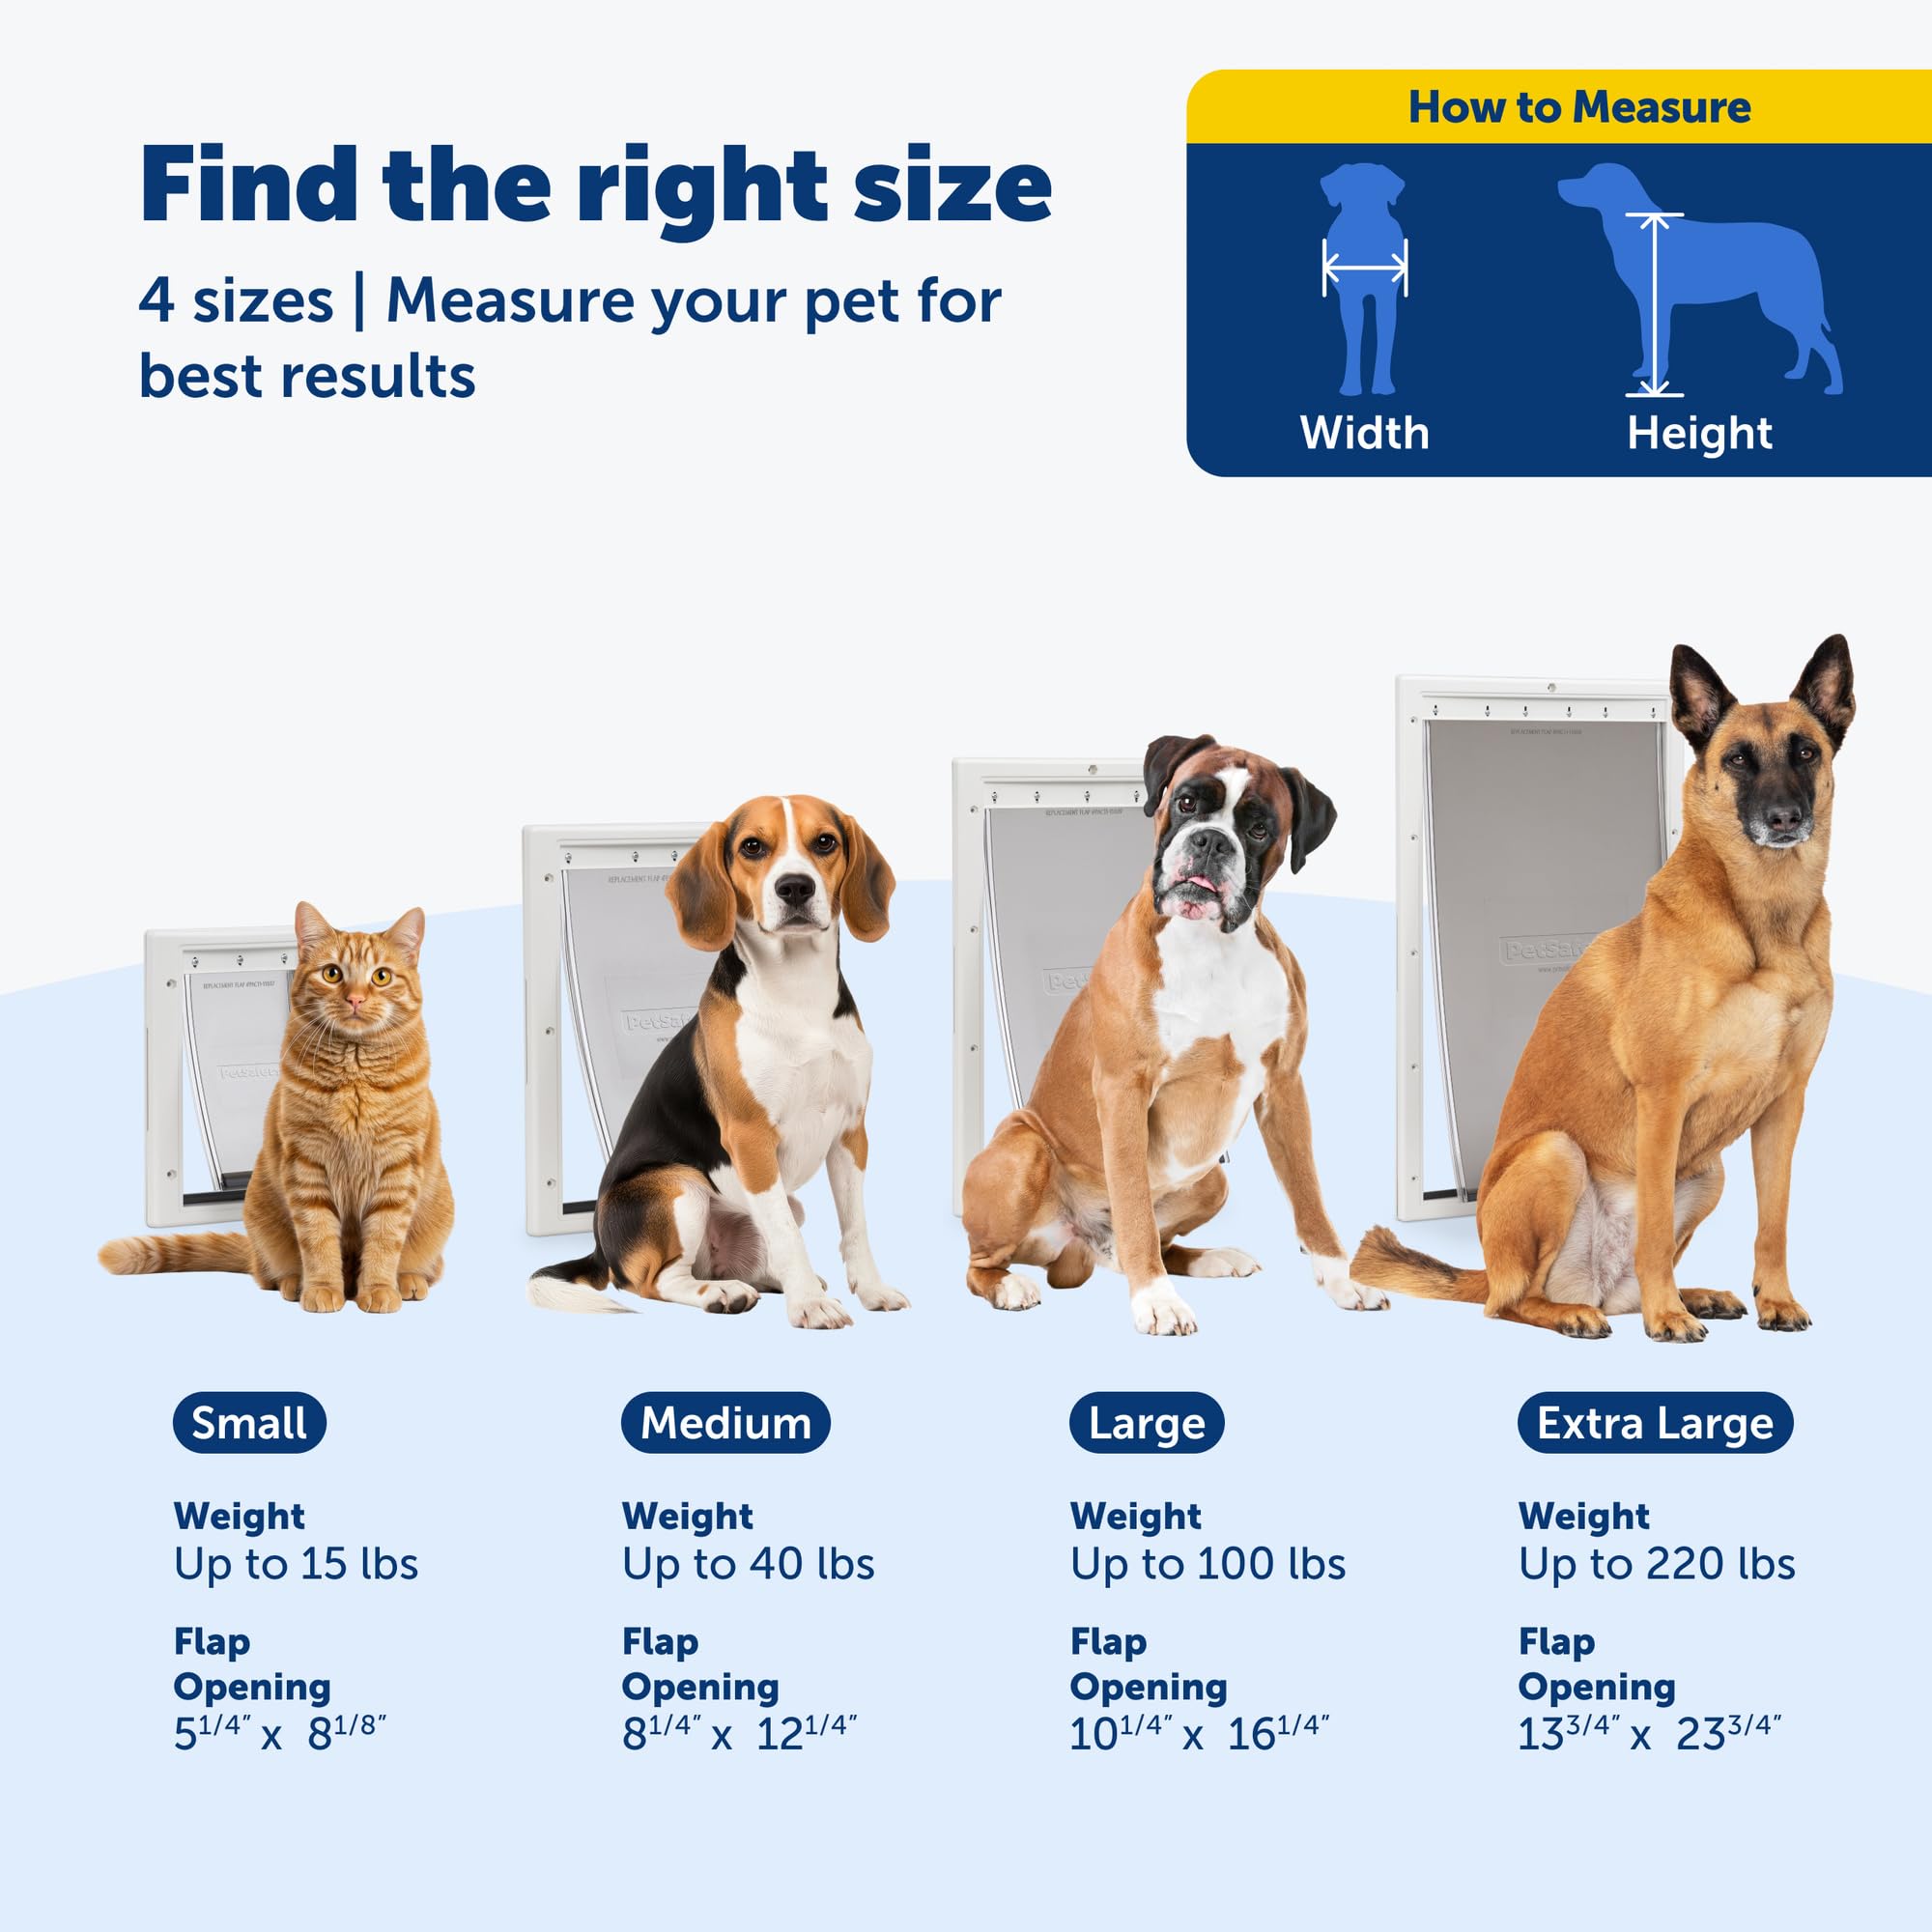
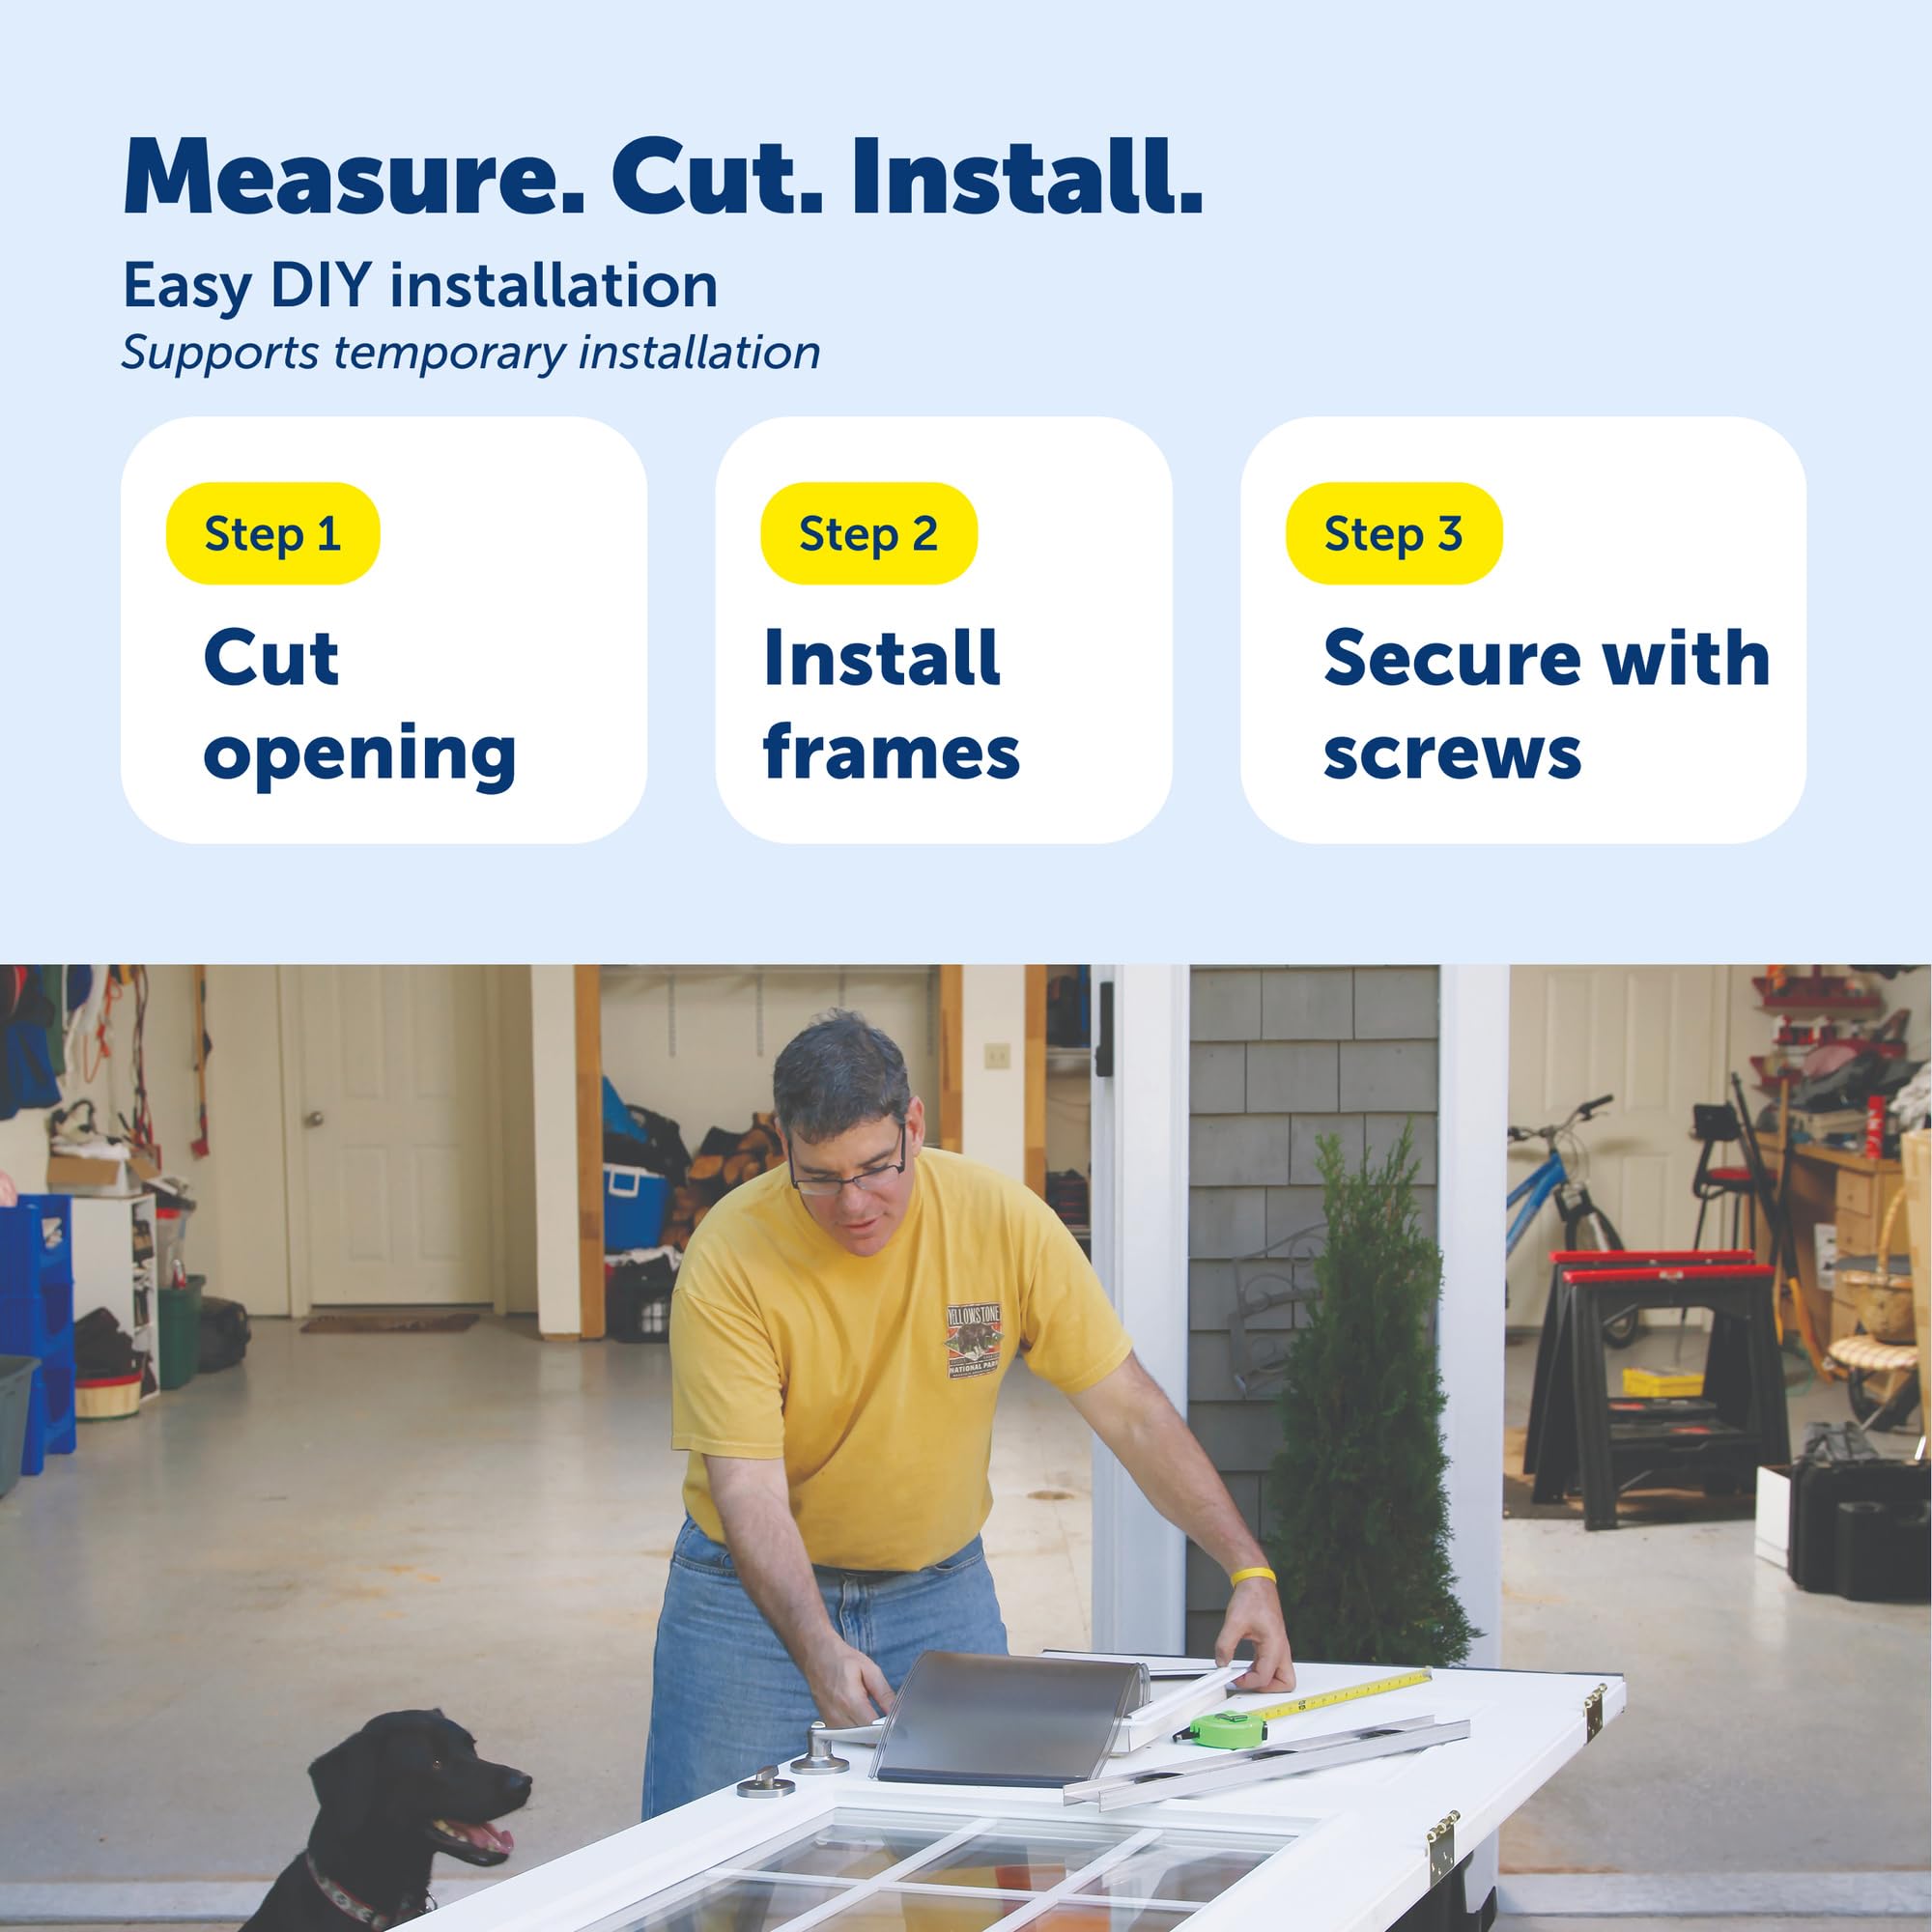
The PetSafe Plastic Pet Door offers a rust-free, paintable plastic frame designed for easy DIY installation on doors 1/16" to 2" thick. Featuring a weather-resistant, insulated flap measuring 5 1/4" W x 8 1/8" H, it accommodates small pets up to 15 lbs. The lockable slide panel provides secure control over pet access, while the durable, smooth-swing flap ensures comfort and longevity. Trusted for over 25 years, PetSafe combines innovation and reliability to enhance pet independence and home harmony.


| Best Sellers Rank | #2,354 in Pet Supplies ( See Top 100 in Pet Supplies ) #1 in Dog Doors |
| Brand | PetSafe |
| Color | White |
| Customer Reviews | 4.4 out of 5 stars 21,745 Reviews |
| Material | Plastic |
| Mattress Thickness | 2 Inches |
| Minimum compatible thickness | 1.88 Inches |
| Size | Small |
C**J
Perfect for independent pets
After installing this doggie door for my 85-pound Labrador, I'm impressed with both the durability and functionality. The plastic construction makes it significantly lighter than metal alternatives, which made the installation process much more manageable. Despite being plastic, it feels sturdy and has withstood months of frequent use without showing signs of wear. Installation was straightforward, though I'd recommend having a second person help hold it in place while marking and cutting. The included template was accurate, and the mounting hardware is good quality. The paintable surface is a nice touch - I was able to match it perfectly to my door color. The weather stripping creates a good seal, and I haven't noticed any drafts even during windy weather. The flap itself moves smoothly and has just the right amount of resistance. My dog learned to use it within a day, and the transparent flap helped him feel more confident about going through it. The closing panel is secure when locked in place, perfect for nighttime or when we're away. The flap corners are well-reinforced, which is crucial for preventing tears from repeated use. One tip: take time to install it at the right height for your pet. I measured my dog's chest height as recommended, and it's been perfect. While it's marketed for pets up to 100 pounds, the opening is generous enough that I can see it working well for even larger dogs. The value for money here is excellent considering the quality of materials and thoughtful design features.
B**!
Big Dog Door
For big dogs, it’s great. Easy to install also. Very happy with it, love it!
J**N
Simple, easy, works great
Super easy installation—very straightforward. Cut the opening, insert the door, and you’re good to go. I installed it through a single‑layer steel garage door with foam insulation, and the process was smooth. The only downside is that it comes with plastic screws/bolts paired with stainless steel nuts. Two of the plastic bolts snapped while tightening, so I’ll be replacing them with stainless steel hardware soon. Other than that, the installation and overall quality are solid. *Bought the Medium size for this large Orange Cat, perfect size.
D**K
Nice quality
Good quality pet door. Works well for cats.
I**K
Simple installation and great for a bedroom door.
We have 7 dogs and they range from 20 pounds to around 110 pounds. They all come through the door just fine. Even the 110 pounder has lots of extra room to fit through. I have installed many doggy doors throughout my house and in both of my outside doors. This certain doggy door is great for an inside door. For outside doors, I use weatherproof doggy doors. The flaps are heavier and most normal winds will not blow them open. To install the door, I did the following: Remove the door from the door frame and lay it on saw horses or whatever you have to work on. It needs to be at least a foot off the ground to complete the install. Mine was about 3’ off the ground. This keeps you from having to bend over so far to work on it 1. I measured the height of my largest dog standing at her shoulders, then added 2” to give a little extra clearance. I took a pencil and made a light straight line across the door at that point. 2. Next, I measured the width of the door and marked the center from the top line down to the bottom of the door. 3. Next, I laid out the stencil, that comes with doggy door, and lined the center arrows up with the center line on the door and the top of the stencil with the top line I made going across the door. I held the stencil in place with some masking tape. 4 little pieces will do the trick. 4. Next, I traced around the stencil with a black sharpie. This makes it easier to see where to cut the door out. Don’t worry about the black lines, what’s left of them will be hid by the frame of the doggy door. Remove the stencil when done. 5. Next, I used a 1/2” drill bit and drilled a hole inside each of the corners of my lines, getting as close to the corner lines as I could. 6. Next, I used a jigsaw and cut out the hole for the door. Stay on the lines as best as you can and make sure the foot of the jigsaw is flat so your cut will be straight through to the other side. When I got both sides and the bottom cut, I used a screwdriver to hold the bottom of the piece I was cutting out so it didn’t fall when I cut the top. If it falls before the cut is finished, it could break off a piece of the main door. That will make it look bad with a chunk missing out of the main door when you are finished. 7. Next, measure the thickness of the main door and write it down. Add 7/8” to that measurement. My door thickness was 1 3/8”. I added 7/8” to that and got 2 1/4”. That is how wide I cut the plastic spacer pieces that went between the frames of the doggy door. Try to be as accurate as possible with this. I used a utility knife to cut the spacers. Take your time so you can make straight cuts. Make several cuts on the same line, then fold it over and it will break apart on the cut line. 8. Slide the plastic pieces into the slots of the front frame section. Push them in tight. Set the frame in the cutout section of the main door. Then, install the back frame section by lining up the plastic spacer pieces with the frame slots and hold them tightly together. My wife helped me with this part by holding the frames together as I installed the plastic screws and nuts in the frames. I put the top center one in first, followed by the bottom center one. Slightly tighten these 2 but not too tight, you may have to adjust the frame position. After that, she didn’t have to hold it any more. I installed the rest of the screws and nuts. After making sure I had the frame squarely adjusted, I tightened the screws and nuts. 9. With a pair of wire cutters, cut off the excess of the plastic screws. Next, I used a Dremel with a cutoff wheel to grind the rest of the screw down flush so the dogs wouldn’t scratch themselves on them. 10. Clean the sawdust off the door and install it back on the door frame that you removed it from.
D**D
This is the one for you
Great pet door very well designed very detailed instructions. Good quality product for a good price.
A**N
Not as easy as the competitor to install
I am in a unique position to compare/review 2 brands of large size dog doors. I have recently installed 2 dog doors, one was this brand, Pet Smart, The other brand was BarksBar. Competitively priced. The BarksBar was much easier to install. Once installed both doors worked well. I prefer the BarksBar for 3 reasons. 1. The BarksBar template for cutout was thick plastic, making it easy to trace around. Pet Smart you had to cut out the paper template to size, Then try to trace around the flimsy paper. 2. The 'tunnel' between the inner and outer shells on the Pet Smart was mickey-mouse, hard to cutout and hard to install. The 'tunnel' was 4 pieces of hard plastic you had to cut to the correct width. Better bring some tin-snips for this job, the hard plastic will defeat most scissors. Once 4 pieces are cut you have to tape them into one side of the door and try to align them (blind assembly) into the other 1/2 shell as you install the 2 sides into the door. You had better get some help to work both sides of the door. BarksBar had a telescoping design that was easy to install. 3. The Pet Smart closing panel just snapped on, and was hard to remove. The slide-in BarksBar was more sturdy and easier to remove. One further note. The Pet Smart panel can be installed on very thin panels on your door, but you must still cut the hard plastic tunnel pieces. The BarksBar needs a minimum 1.25 inches for the telescoping panel. So if you have a thin panel to install into, go with Pet Smart.
D**E
Exactly what we needed for a cat door
This pet door does its job quite well! Reasonably easy to install and the cats (and the dog, unfortunately) learned to use it with no problems. It keeps the cold out pretty well. The soft (ish) door males me feel more secure for the kitties tails not being caught as possible in a rigid door.
Trustpilot
1 month ago
1 week ago