


🏡 Elevate your backyard game with sleek, secure, and spacious storage!
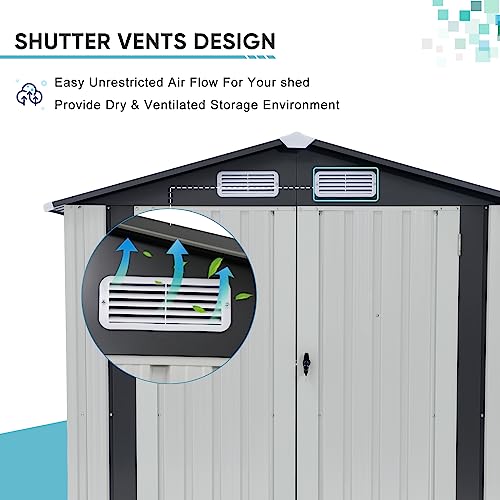
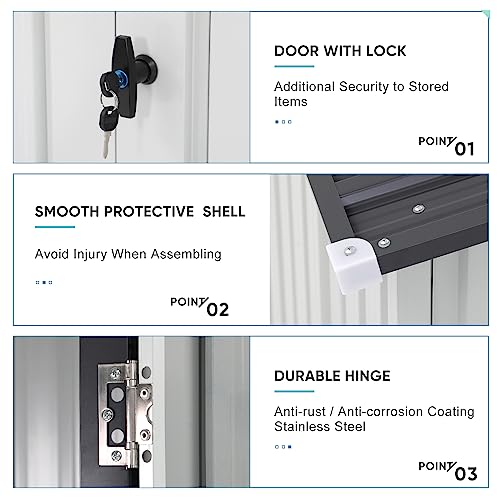
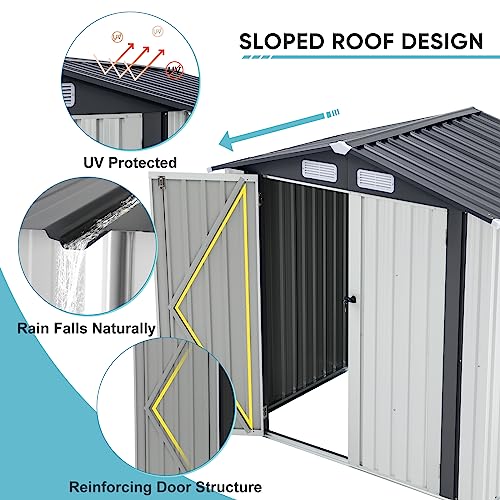
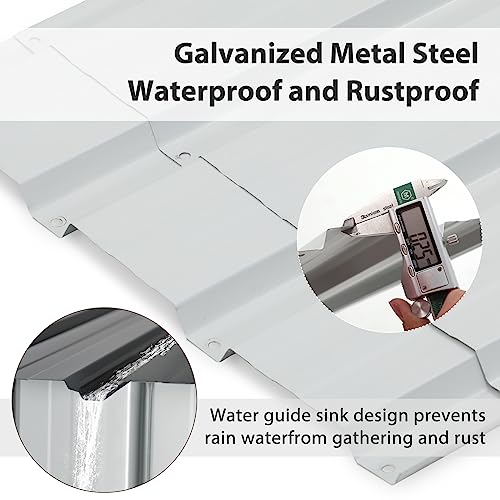
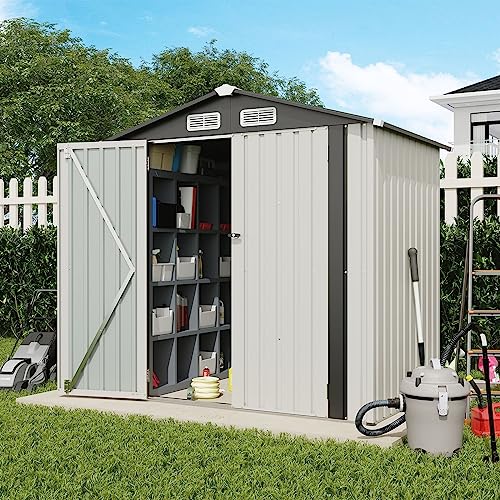
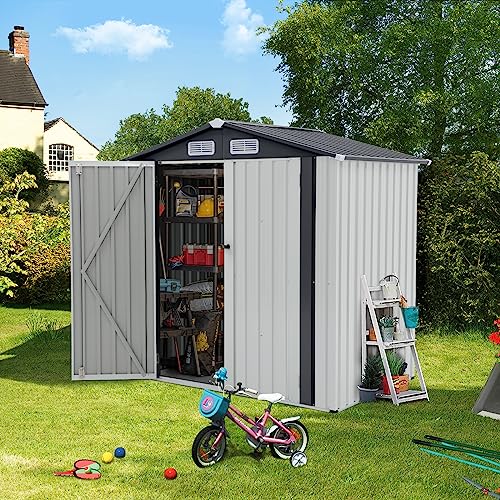
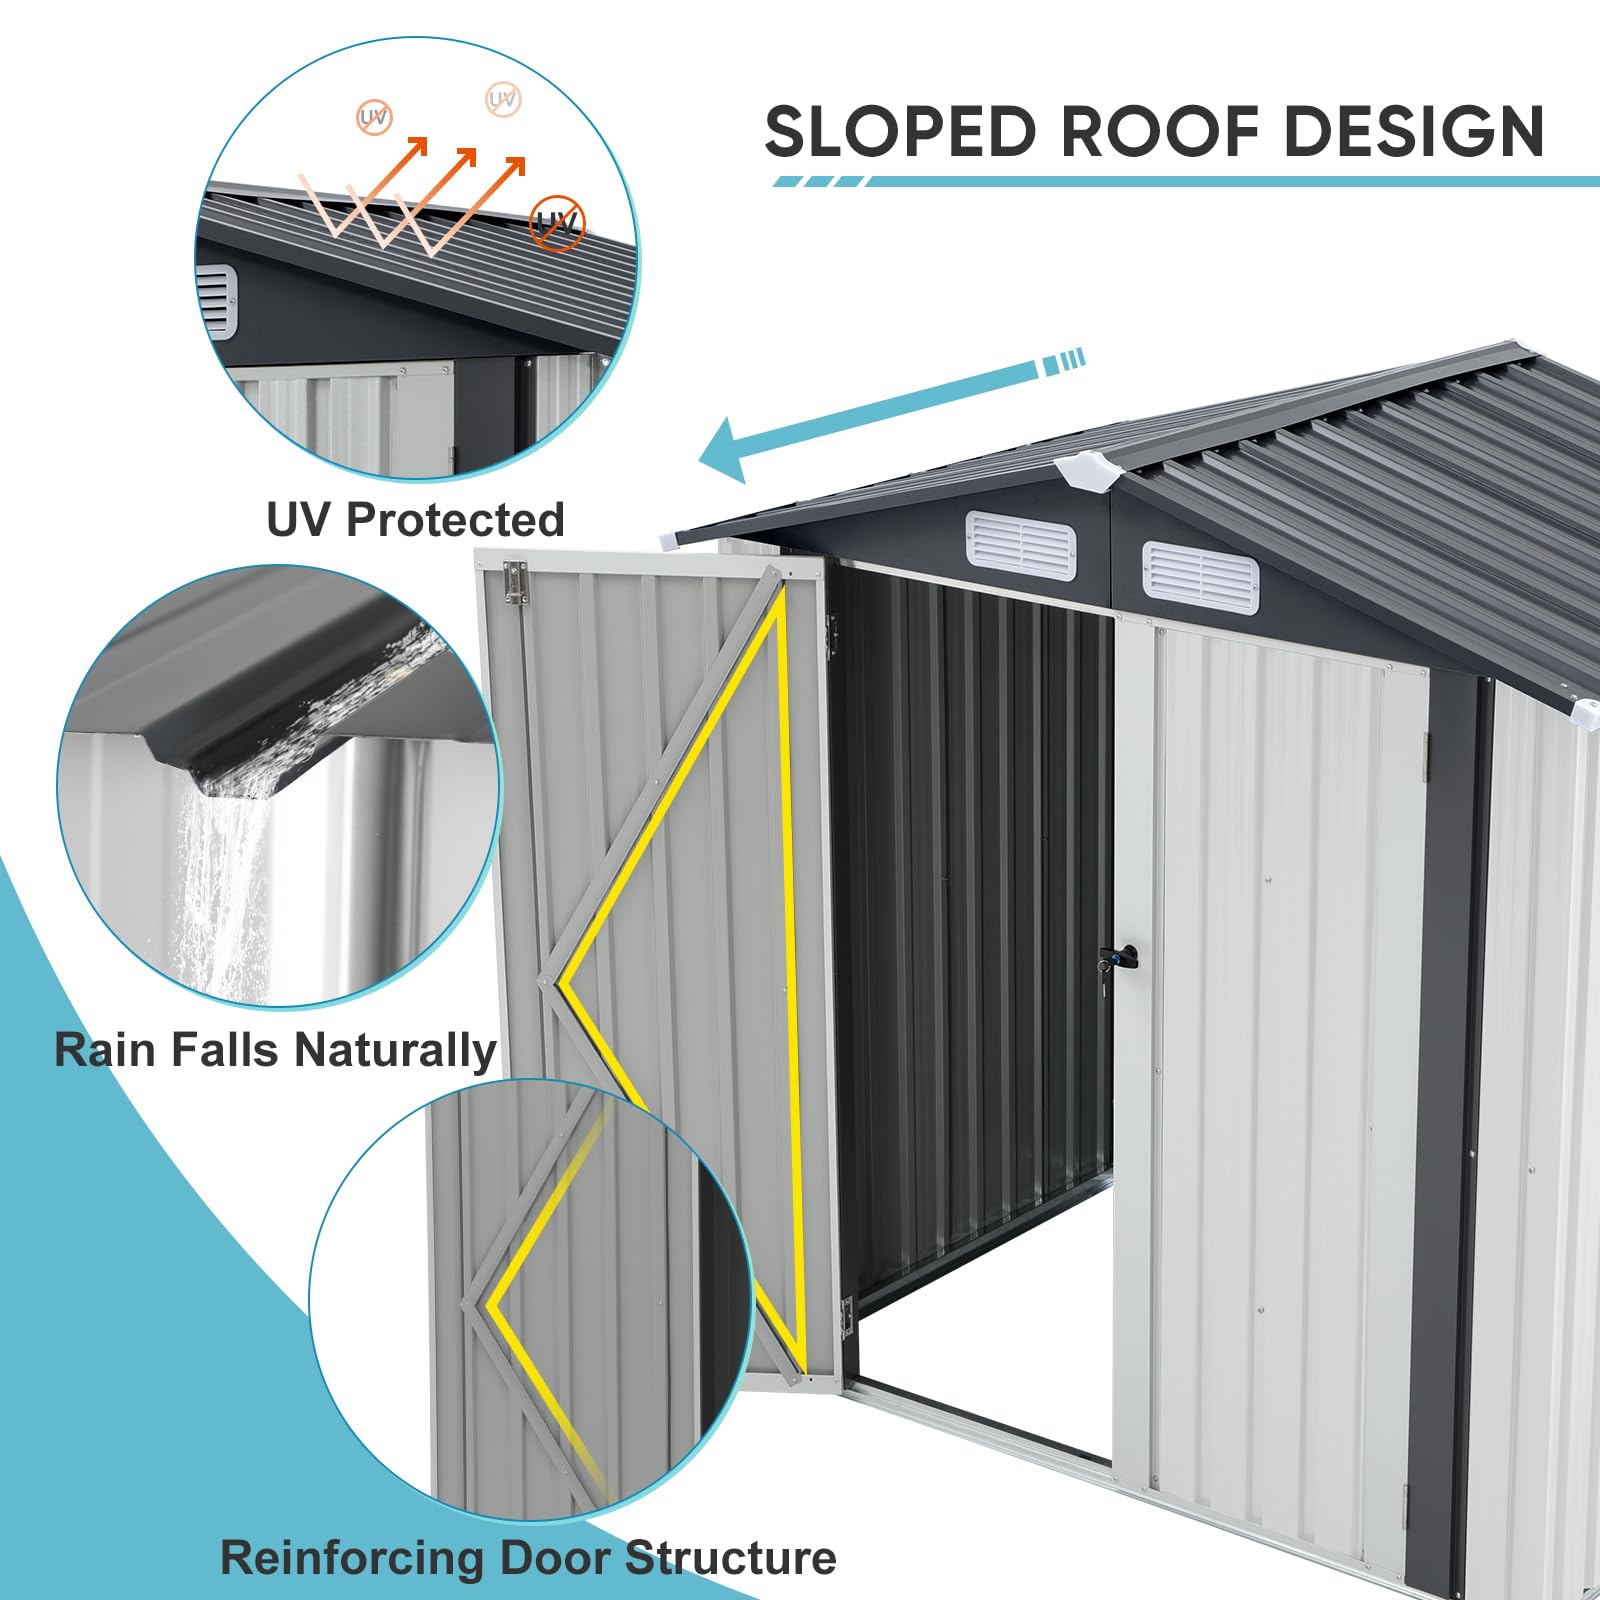
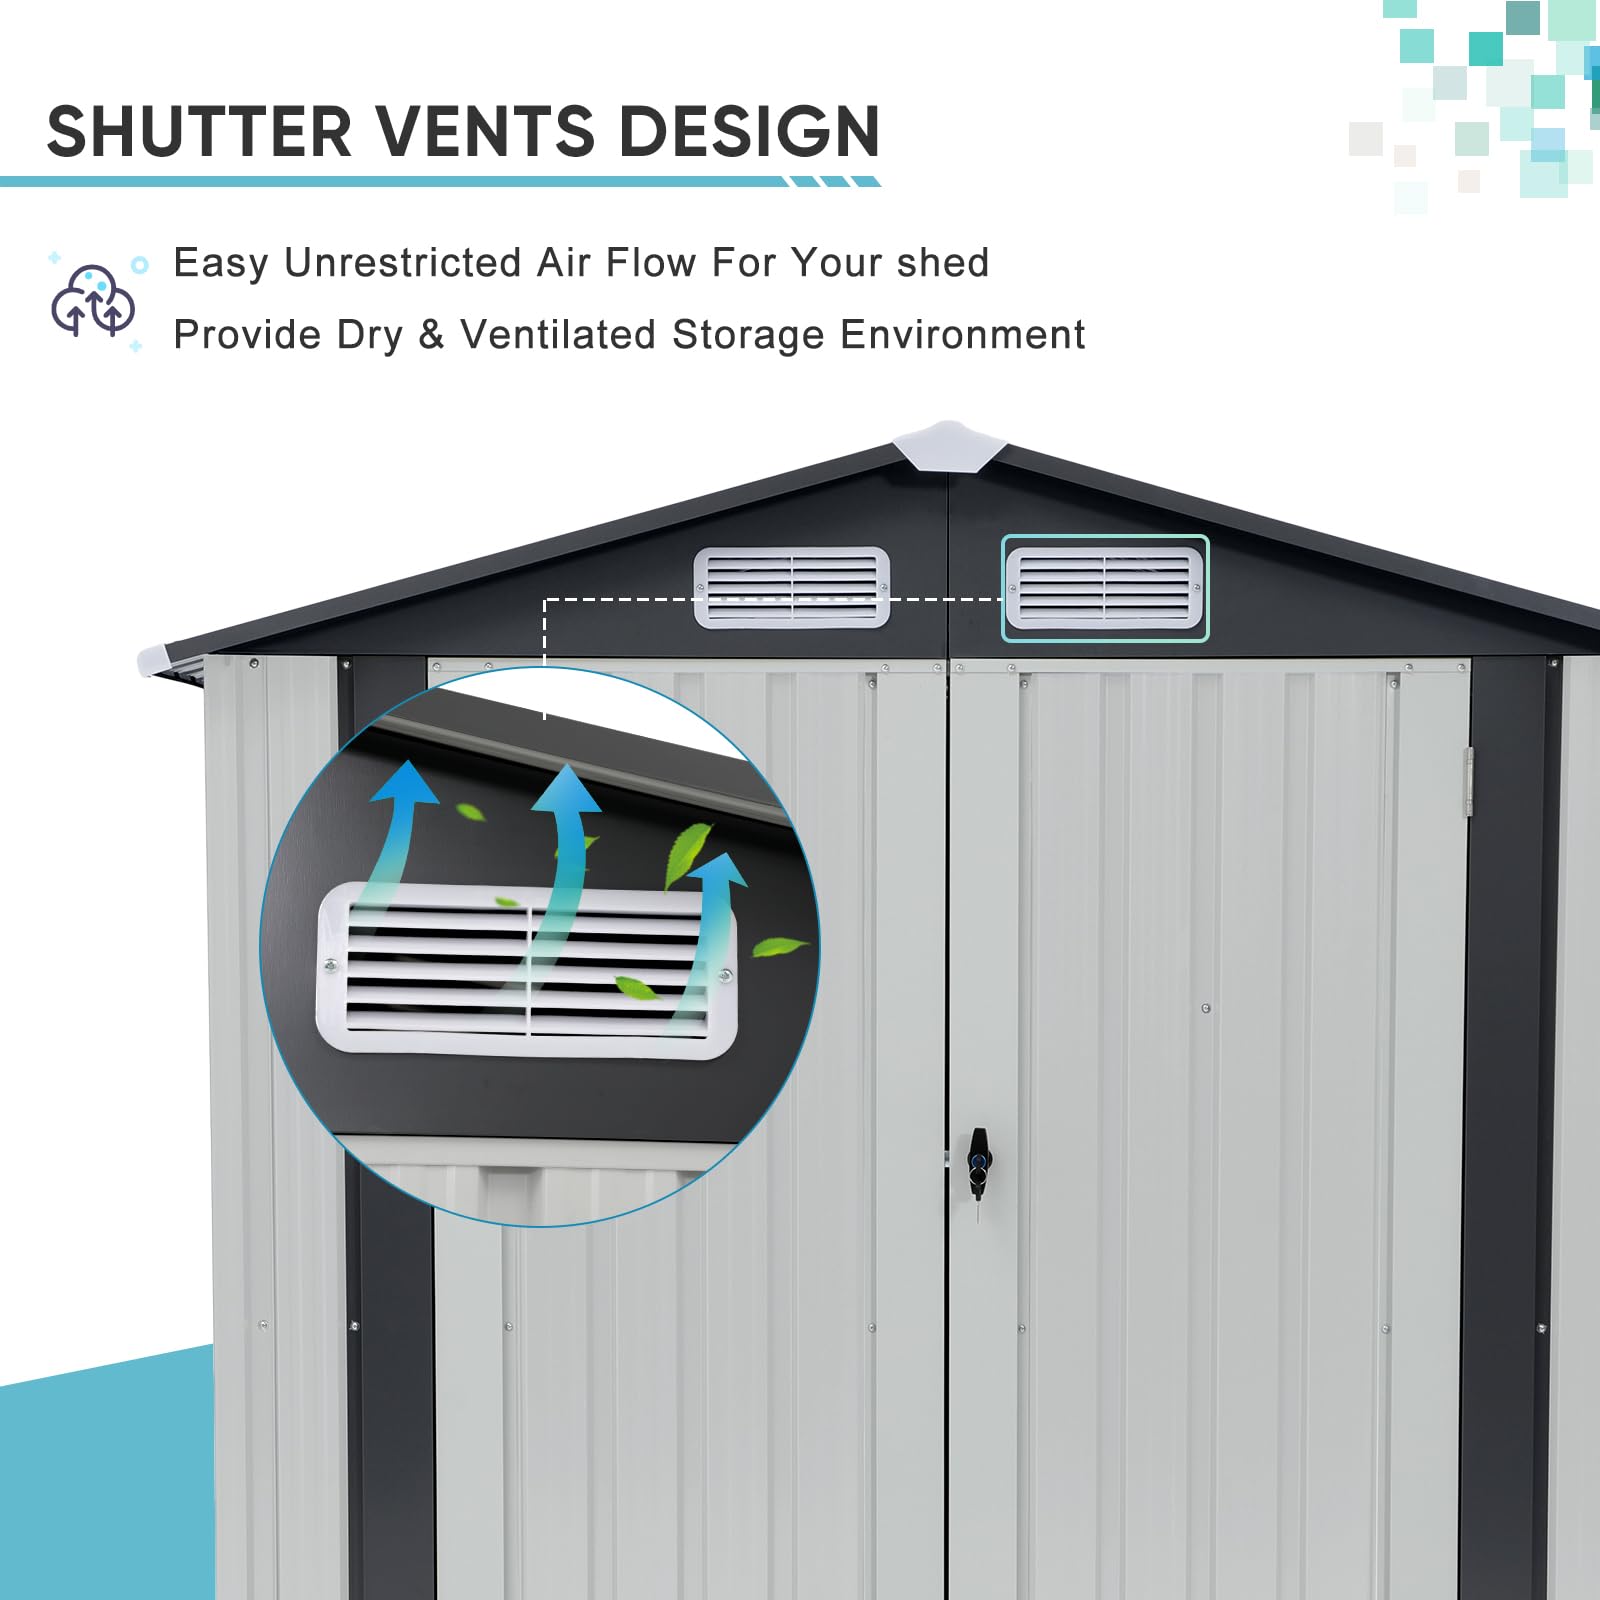
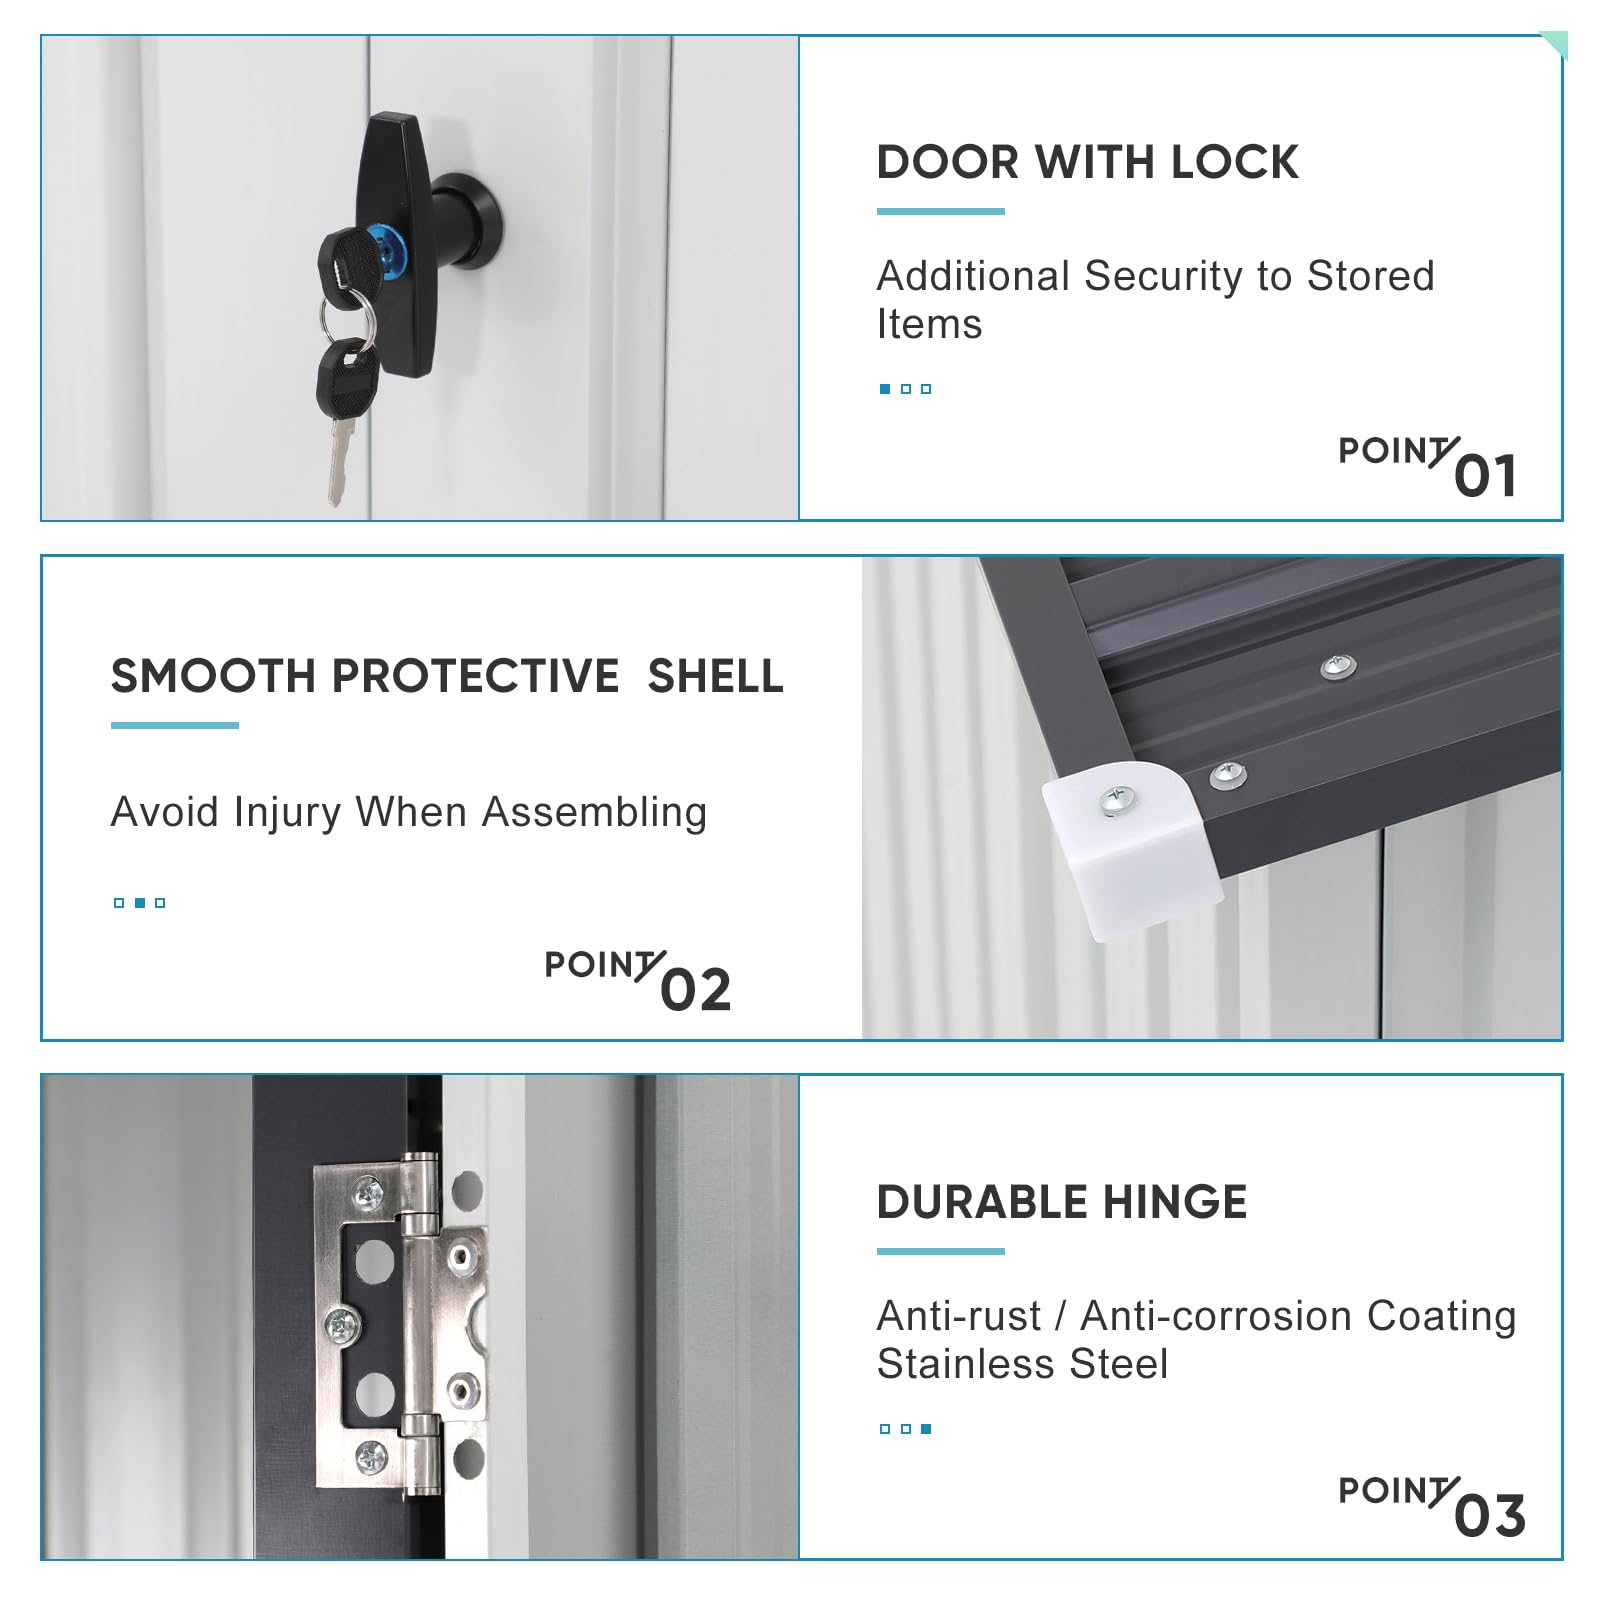
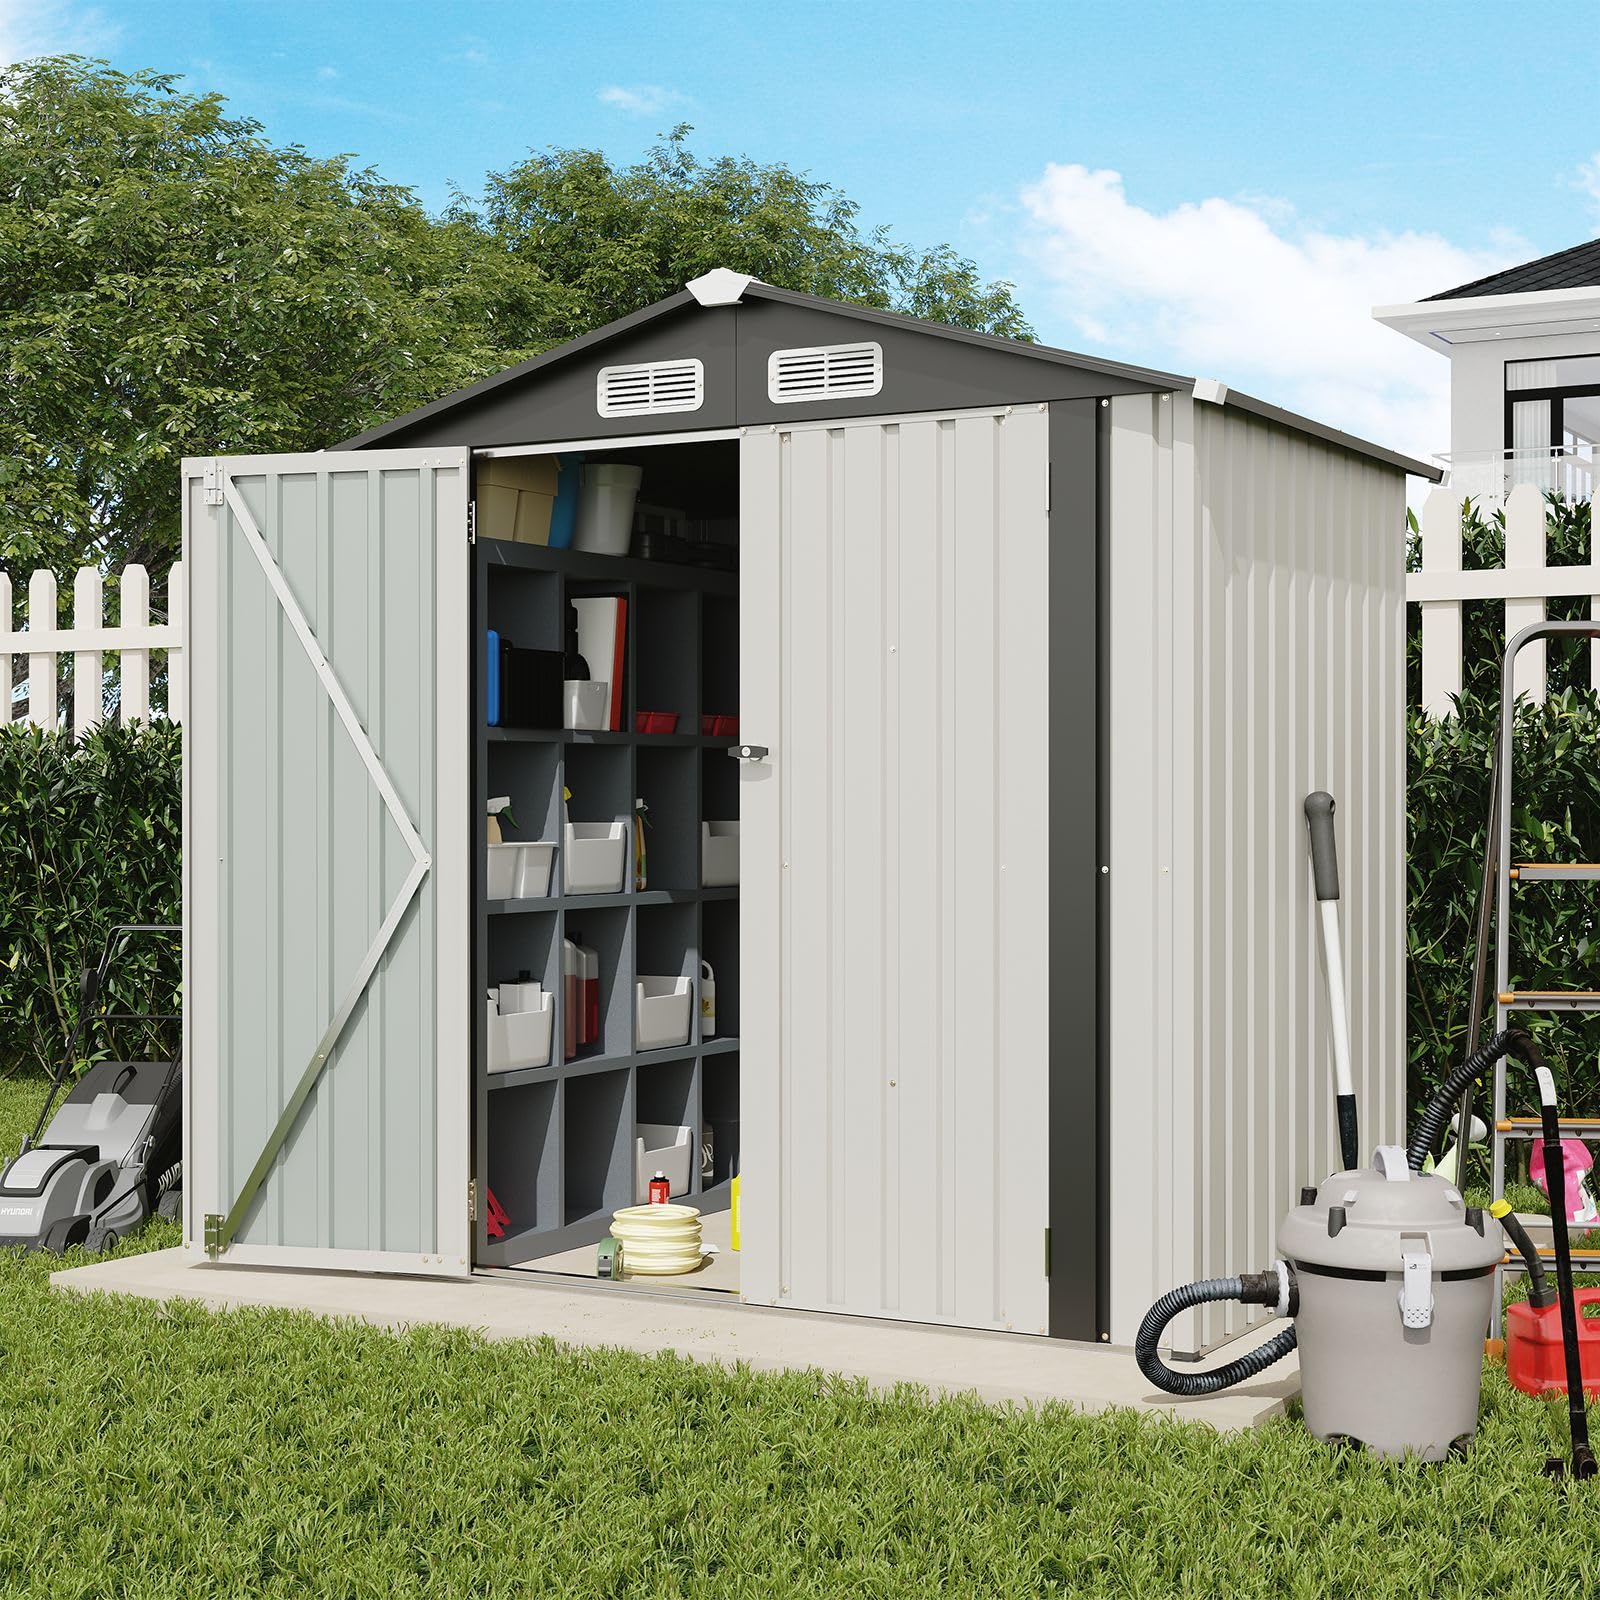
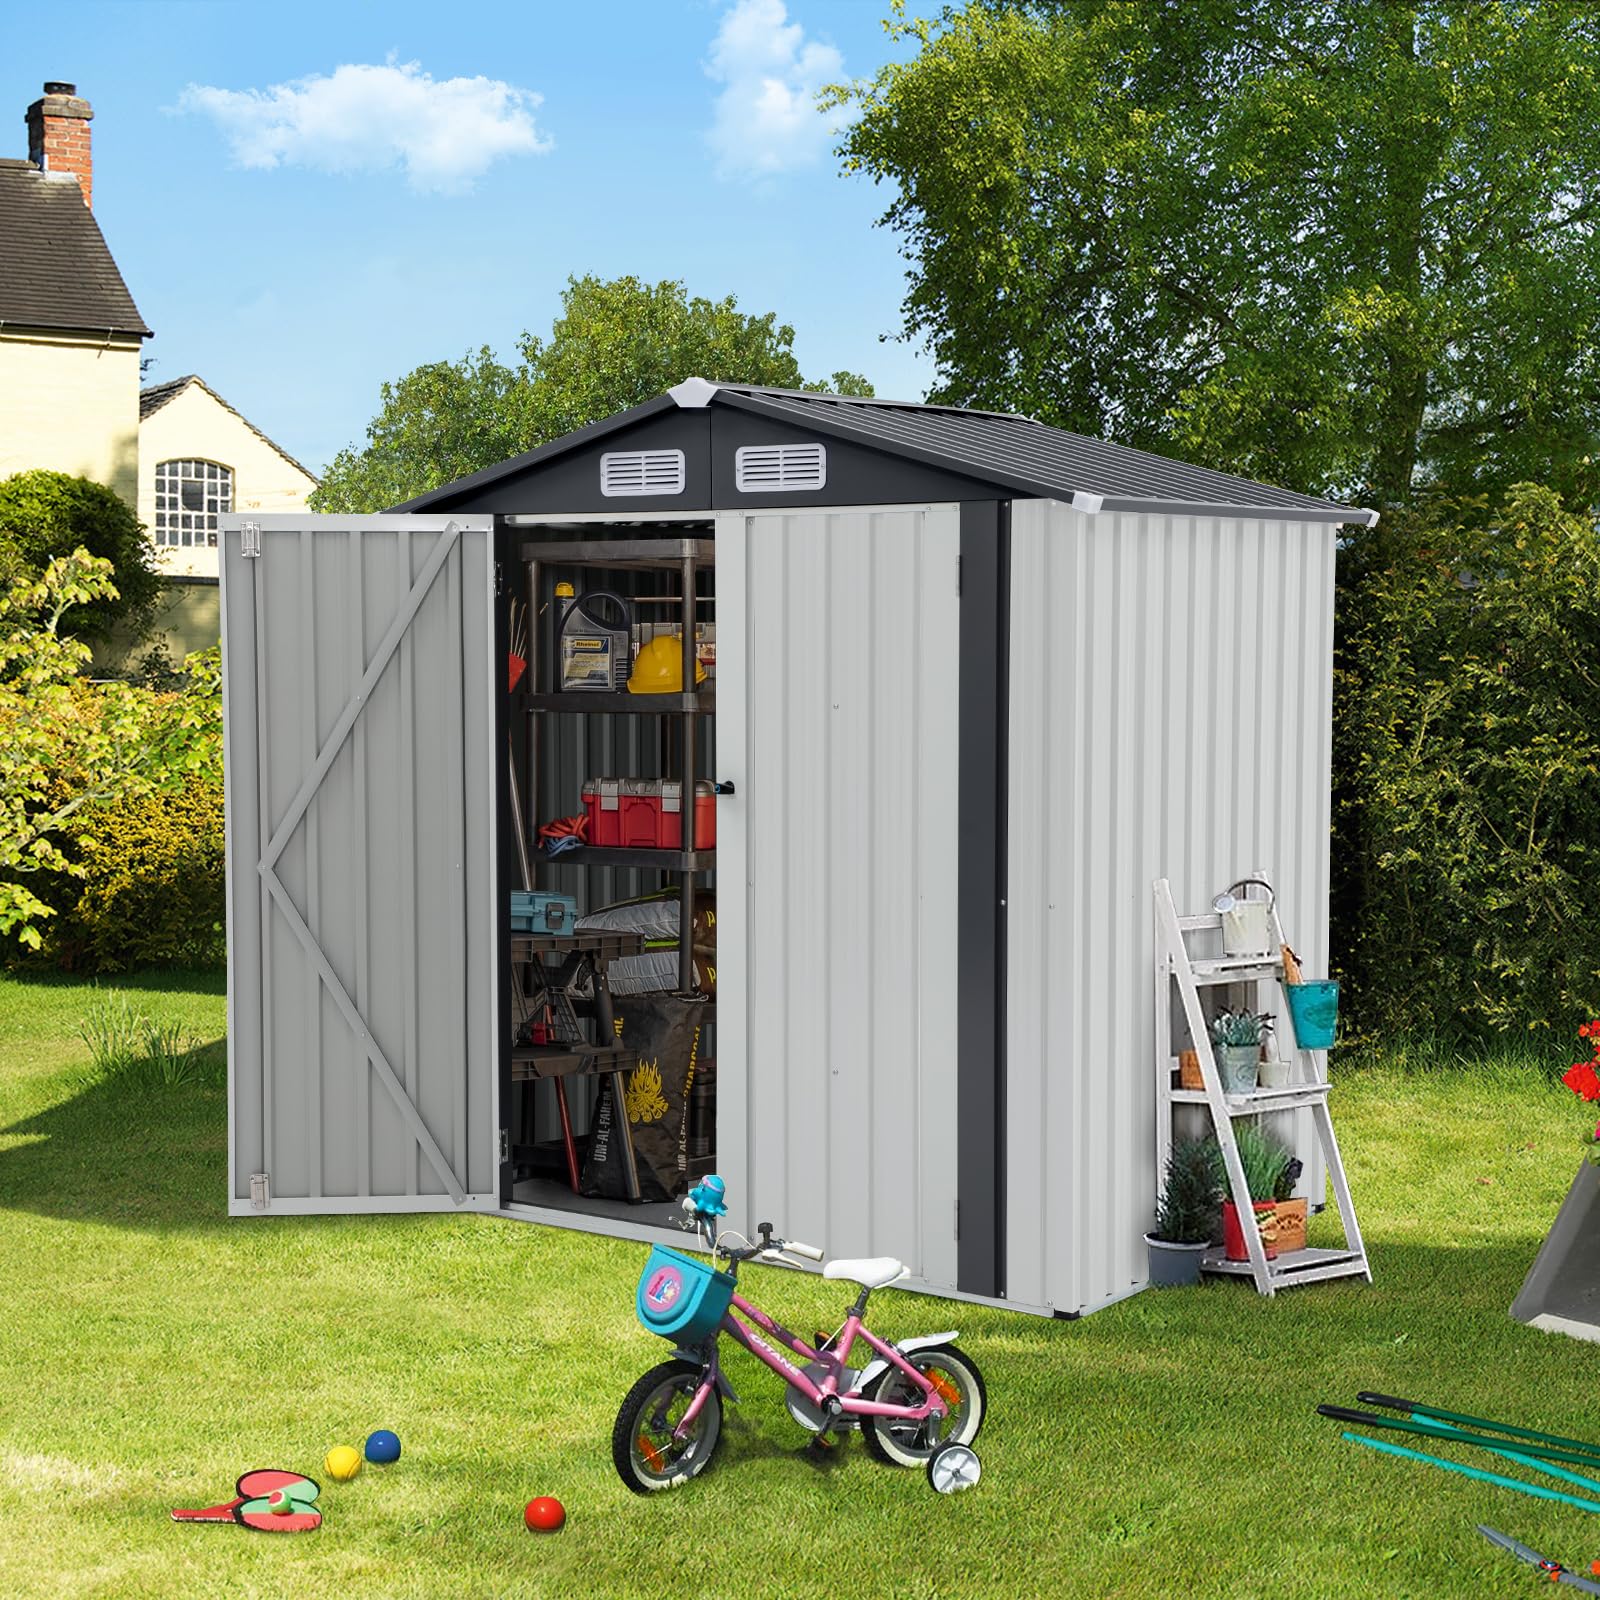
The Verano Garden 6x4 FT Outdoor Storage Shed is a robust galvanized steel structure featuring thick 0.01-inch weatherproof panels, a sloped roof for efficient drainage, and lockable double doors. Designed for durability and spaciousness, it offers a secure, versatile solution to organize and protect outdoor equipment year-round.


| ASIN | B0C9Y6YJ2R |
| Assembly Required | Yes |
| Base Material | Alloy Steel |
| Best Sellers Rank | #135,737 in Patio, Lawn & Garden ( See Top 100 in Patio, Lawn & Garden ) #342 in Storage Sheds |
| Brand | Verano Garden |
| Color | White-Dark Grey |
| Customer Reviews | 4.1 4.1 out of 5 stars (167) |
| Door Height | 61.42 Inches |
| Door Style | Sliding Doors |
| Door Width | 47.24 Inches |
| Frame Material | Galvanized Steel |
| Item Weight | 95 pounds |
| Item model number | SHED |
| Manufacturer | Verano Garden |
| Material | Metal |
| Product Dimensions | 87.8"D x 137.72"W x 76.77"H |
| Style | Garden,Lawn,Outdoor,Patio |
| Top Material Type | Metal |
| Water Resistance Level | Waterproof |
L**H
Not as bad as I read from others, but parts missing
The first thing I did was lay out all the pieces and check against the parts list. Found like 9 things missing so I emailed the company and they asked I send pictures of the box.. luckily I hadn’t taken it to the trash yet but it was all in a big garbage bag so i had to take it out to get the pictures. It took about 2 weeks to get the parts so I put a tarp over the parts I had so rain didn’t mess them up. That’s fine because I had an injury and probably didn’t need to be doing it then anyway. I got the parts yesterday and began building it being very careful to focus in on the pictures. There is tiny little detail in the pictures that is useful like the orientation of the frame bars so the screw holes line up. If you mess this up you can always drill holes later. I plan to drill more holes and as screws around the top trim so the pieces are more secure. It came with a few extra screws so I don’t have to go buy more. I also added screen to the vents so wasps don’t try to colonize it and it took a whole can of spray foam to close the holes resulting from the corrugated metal attaching to straight frame pieces.. did this to keep wasps and other crawly things out. I built it over 12x12” pavers that I used sand to fill the cracks around and in between them. I plan to sweep some Portland cement over the cracks and spray with water so they will grout themselves.. this has worked on other outdoor projects. Then I’ll drill the corners and a few spots around and tap on the shed to the pavers so it’s anchored since Florida has hurricanes. I built this alone. Had zero help and it was nice to use my battery drill with the setting half way to avoid stripping the screw holes. I also used a socket wrench for the tiny nuts which is way easier than the little wrench that’s included. I hope this helps you. Oh and I also drilled extra holes to use three screws each for the latch mechanisms on the door.. still pondering ways to make the door with the handle a little more closed at top and bottom since the locking mechanism isn’t really enough. Great for the price at any rate and is buy it again.
A**A
Very nice shed
The product looks beautiful but it was too difficult for me to put together myself. It arrived in a timely manner and was not all banged up when I opened up each box. no bent pieces everything was there. When it came time to actually build the shed I realized it would take at least two people to build this shed or at least someone who knows what they're doing of which I did not. This just was not going to work for me. I put in a claim to return the item and an RMA was issued right away.
L**N
Overall good, but with some quirks
As others have mentioned, the plastic film is a time consuming nightmare to remove, so I ended up just leaving it on. Maybe the sun will help loosen it up next summer. I tried a heat gun and everything, but it's like peeling sunburn. Just when you think you get a big piece, it rips off in a small piece. Every once in a while I got lucky and got a larger piece off, but it never comes off completely. So I gave up after one panel. Next, buy a bag of short self tapping stainless steel screws. Many holes just don't line up if you want to keep panels straight and true - more so on the roof panels. So the easiest fix was to tap in thriugh the pre drilled panel holes and make my own frame holes in areas that didn't line up, rather than have a panel off center. Side panels go on fairly easy, but a tip I learned is to install the screw/nut combo in the middle of each panel first, then the sheet metal screws to the frame top and bottom. If you do it the other way, you will have a hard time getting the holes for the screw/nut combos to line up between panels. Use the video and pause at each step. Much better than the paper instructions. Double check your front cross beams direction. If you install in wrong direction, even though all the panel holes line up, your door stop holes won't and you'll have to disassemble to flip it around so your left door lock holes are in the right spot. Ask me how I know. The directions don't tell you this and even though it's a "I should have thought of that" moment, I didn't. I don't like that the completed design leaves a ton of openings for insects to call home, especially the top roof vent. Wasp nest heaven. I may be going around with window screen next summer to cover all the openings into the structure itself. Overall it's much sturdier than I expected given the thickness of the metal. I did use adhesive at every panel join seam. I also ran metal roof screws along the center of the roof panels on both sides, as they aren't secured to the internal cross beams - they just rest on them. I found that odd and not secure. They are secured to the center top beam and the side frames but not in the middle. Maybe I overengineered it but better safe than sorry.
L**S
Serves the purpose
Serves its purpose but very flimsy. I reinforced the walls by applying barn wood to the exterior.
J**.
Pleasantly surprised
For the price this a great purchase. It’s not too difficult to put together (a bit of a pain as others have pointed out just because of the number of panels and screws and all the plastic wrap to remove). But in general it’s a straight forward build. Took 2 people about 3 hours to put together. Seems very sturdy once assembled and looks much more expensive than it was. The 8x6 size is more like 8x5.25 but still works for our needs. Very happy with the shed!
J**A
Excelente opción para Storages, se necesitan al menos 3 personas para armarlo
M**R
Don’t buy this item!!!!
The illustrations in the instructions are horrible and not very detailed. Parts of the building have several overlapping pieces in which the holes don’t line up and not to mention the fasteners are small and had to handle.
S**O
Good price
Nice and easy
Trustpilot
3 days ago
2 weeks ago


