
DOWNLOAD THE APP


Customer Services
Copyright © 2025 Desertcart Holdings Limited
DOWNLOAD THE APP
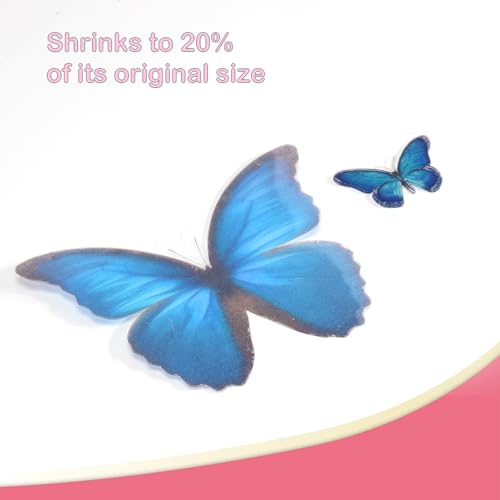
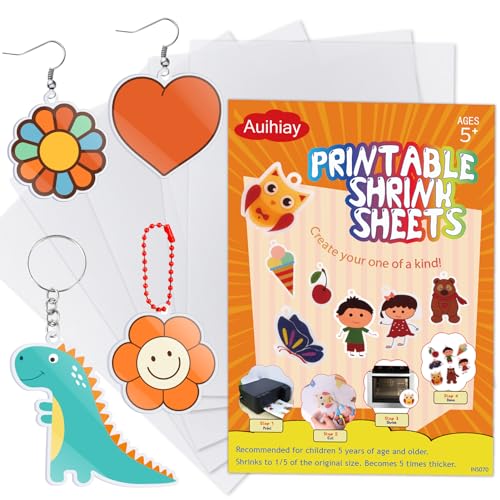


🔥 Shrink your art, amplify your style! 🎨
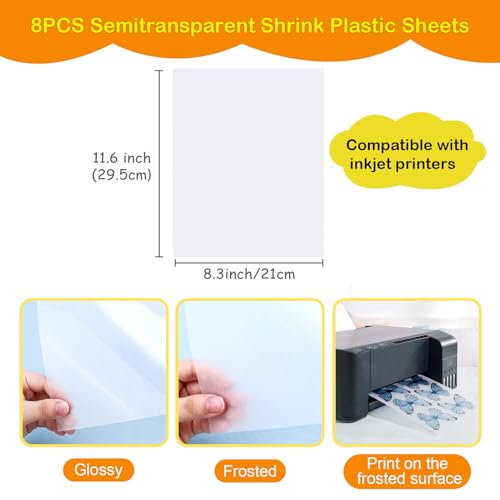
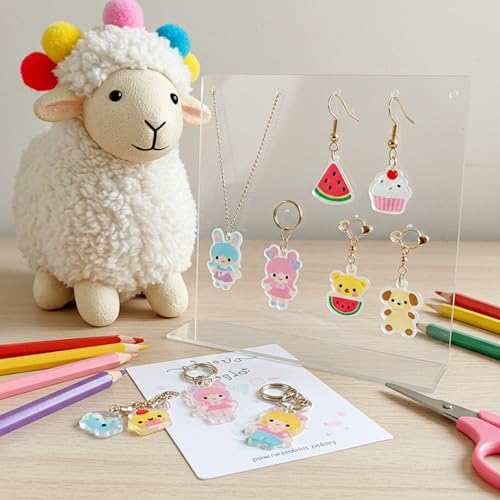
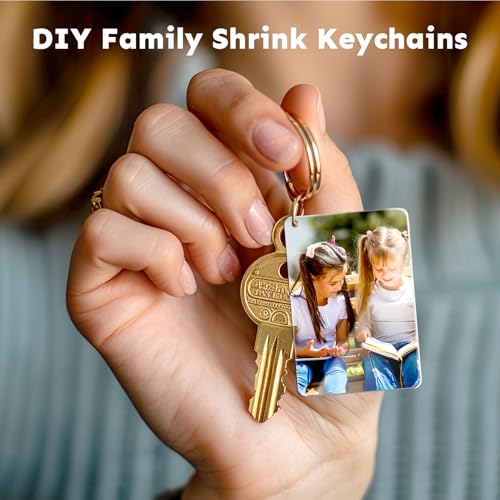
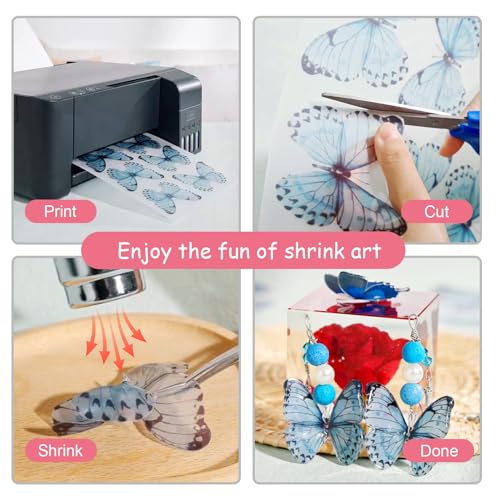
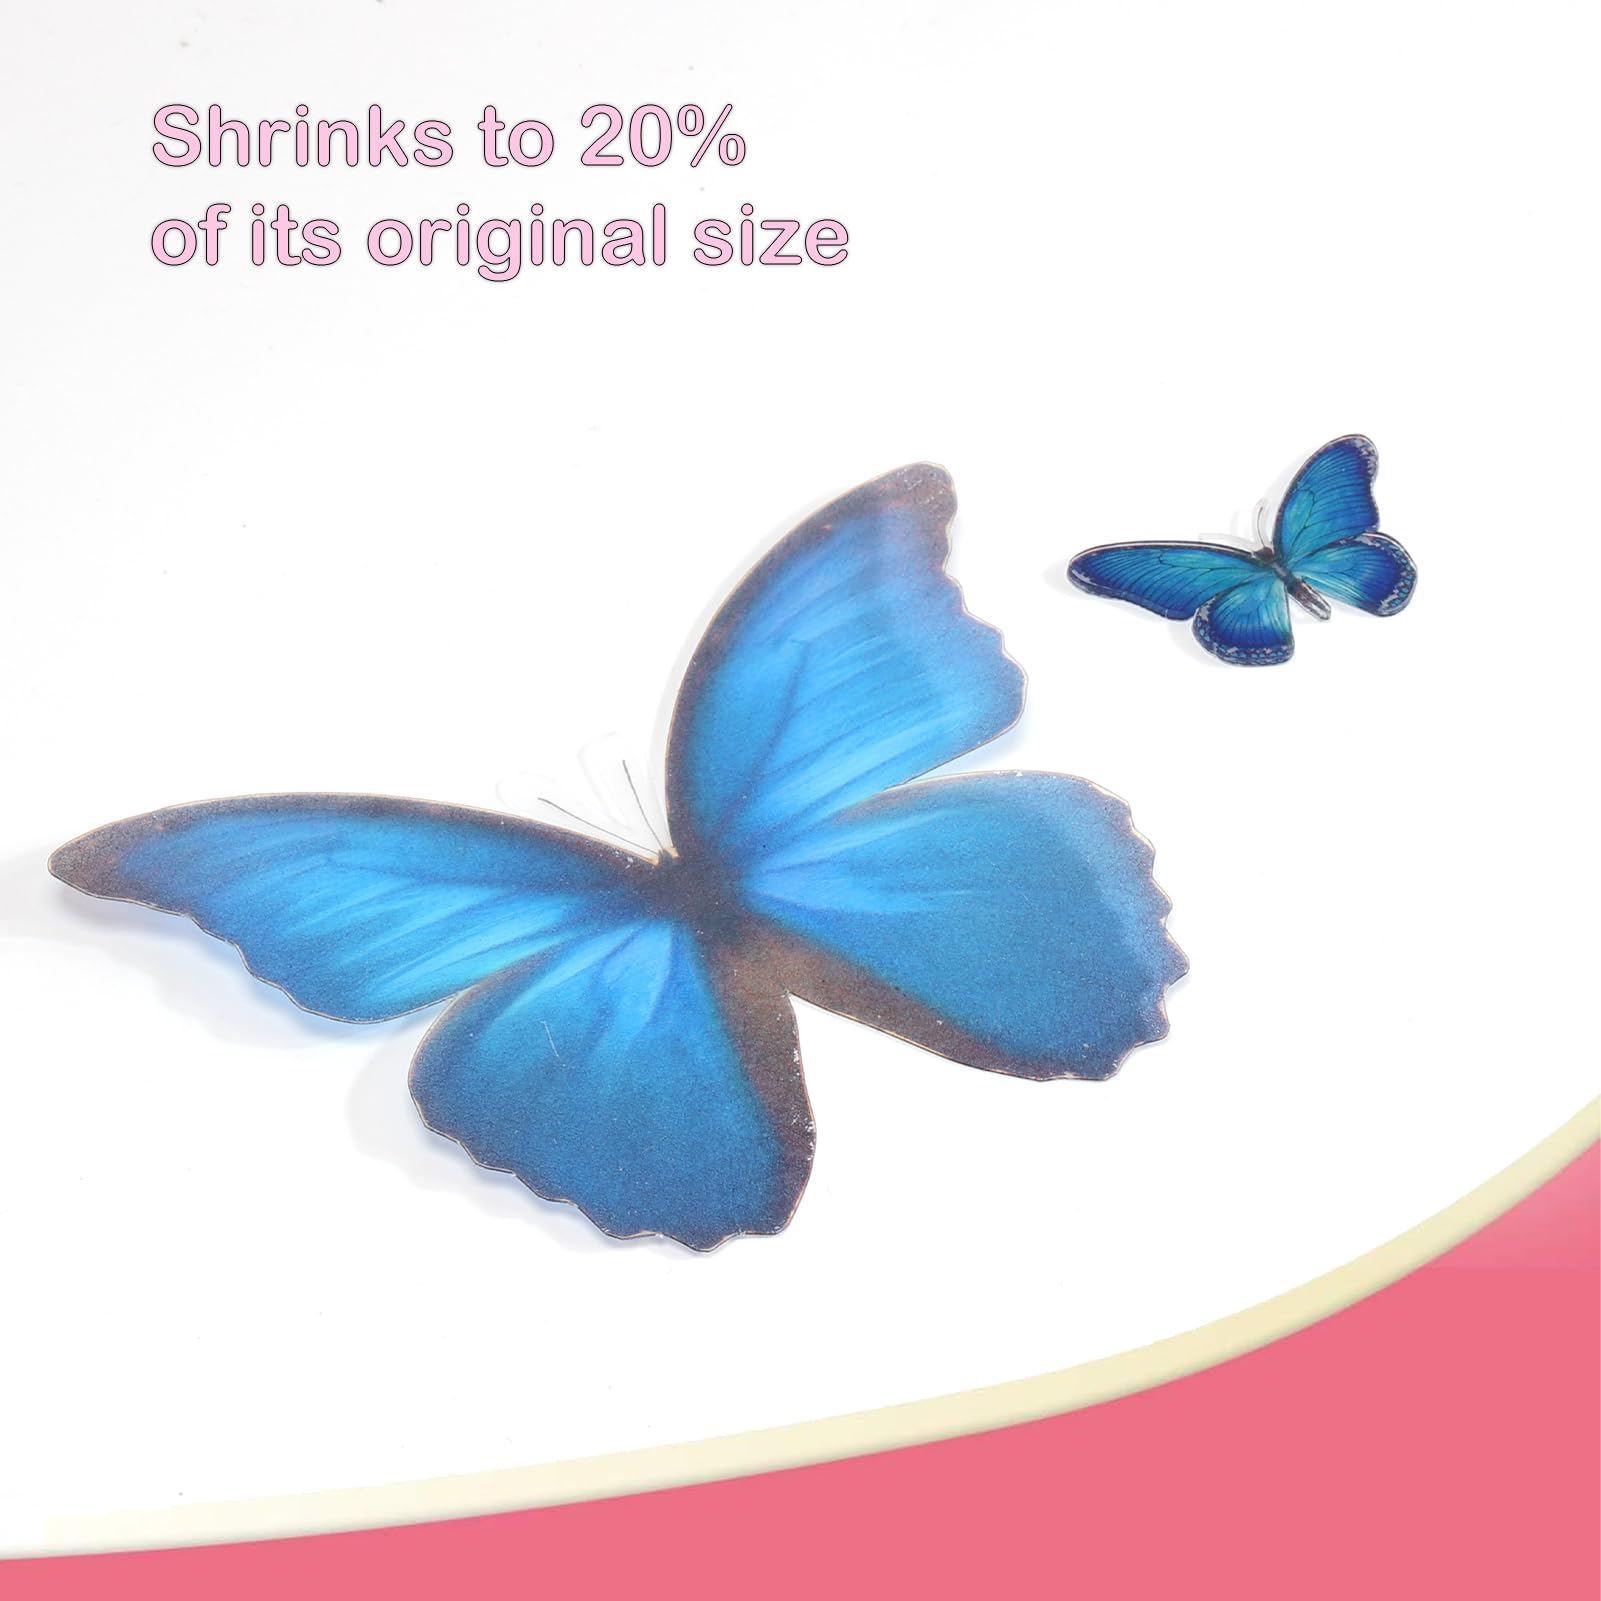
Auihiay’s 6-piece printable shrink plastic sheets offer a premium DIY experience with 11.6x8.3 inch semi-transparent sheets that shrink to 20% of their size and become 5 times thicker when heated. Compatible with inkjet printers, these sheets enable quick, personalized designs perfect for keychains, jewelry, and unique gifts—ideal for creative professionals and craft-savvy millennials looking to elevate their handmade projects.


| ASIN | B0D3LMT5K4 |
| Age Range (Description) | Kid |
| Art Craft Kit Type | shrink art kit |
| Batteries required | No |
| Best Sellers Rank | #9,216 in Arts, Crafts & Sewing ( See Top 100 in Arts, Crafts & Sewing ) #45 in Decorative Craft Paper |
| Brand | Auihiay |
| Customer Reviews | 4.4 4.4 out of 5 stars (1,349) |
| Item Weight | 5.6 ounces |
| Item model number | S-036P |
| Manufacturer | Auihiay |
| Material | Plastic |
| Number of Pieces | 6 |
| Package Dimensions | 11.73 x 8.35 x 0.43 inches |
| Size | 6 PCS |
| Theme | DIY keychains, DIY projects for Kids & Beginners, Easter Ornament, Father's Day Gift, Mother Day Gifts |
H**R
Works great with ink jet printers or paint pens!
I’ve used these shrinky plastic sheets for several projects, and they work exactly as described. They shrink evenly and predictably when heated, resulting in durable, smaller versions of the original designs—perfect for charms, keychains, or art pieces. I really appreciated the versatility: you can print directly on them using an inkjet printer (just remember to set your print settings correctly and allow the ink to dry), or for more vibrant results, you can paint or color them by hand. Both methods work great, depending on the look you're going for. Highly recommend for crafters, kids’ projects, or anyone looking to have fun with shrink art!
R**L
Great!
Works great. I use my Cricut to cut and print. Shrinks well. Ends up being about 1.75mm thick, which is nice and sturdy
A**R
would repurchase
i've made a good handful of charms from this paper now, and i'm satisfied with the quality. there is a bit of a learning curve when you're starting out. here's a few tips I've picked up along the way: -reduce opacity of your image by 50% before printing (unless its B/W only) or the image will look terrible after shrinking. the prints will still come out a tad bit dark, and i usually do some manual touch-up work on my pieces to correct spots. -don't touch the front of the paper, & use gloves to cut out your pieces if doing by hand, as oils from your skin can ruin the paper. -make sure to use proper printer settings. this paper is slightly different from printer paper size, so input the proper dimensions. i also use the "matte photo paper" setting to print. (when i dont use this setting, i get slight horizontal lines across the image, likely due to the heavier weight of this paper when compared to printer paper) -bake those cookies until they lay completely flat, leave them in a bit longer if needed. i've never actually had one burn on me. quickly place between some heavy books & parchment paper to cool after baking to keep them flat. hope that helps someone just starting out!
J**N
Fun to use but a learning curve.
The white is a 5 star and I’m sure the clear would be too! The only issue is it doesn’t work with my printer an Epson eco tank. I have tried so many different t printing methods but it still won’t print. It’s still 100% usable for other methods however. I’m still learning the appropriate amount of opacity to print but I’m impressed with the first attempt at using it.
R**A
I burnt it and it’s not their fault
It worked with my CMY printer although it came out a bit dark because I burnt it. Maybe don’t put it in the oven for the full minute lol. Size correct, easy to follow, thickness was perfect.
P**E
This product is AWESOME!!!
This product exceeded my expectations. After reading other reviews for similar products and was discouraged, I decided to take a chance and order these inkjet printable shrink sheets. These do not bleed or smudge when printed. Although I only used MS Word for the images, I tweaked the color only slightly and the color printed bright and heated fine. They do shrink 5 times smaller, so make sure your images are large enough before printing. You can put the images really close together if you are super precise and accurate during cutting and separating before baking. Round shapes keep their round shape during and after baking. Odd shapes too. I was really impressed. I did use to books covered in aluminum foil for flattening the shrinks immediately after coming out of the oven. I covered them with a piece of card stock them pressed them with the books for a few seconds. I sealed mine with gloss modge podge spray sealer and they didn’t get super glossy. I am going to try a new batch and use clear embossing powder. I prefer the white sheets over the frosted. I wish the package wasn’t split 6 of each. I wish you could order all white. The color is brighter and if you cut the images out right to the edge, the only white that is visible is on the cut edge and the back. Brought back childhood memories. Super fun. I will purchase this product again. Very happy with the outcome of my project!
B**H
It does the job.
It arrived pretty quick. It shrinks well, also holds in cricut good. It is a little bit thicker than what I normally use. I still sanded it, but otherwise I recommend it. The Auihiay is on the right, what I use normally is on the right. I also love how big it is and that I don't have to buy multiple times.
A**R
Uneven shrinking
Prints well but this product does not shrink evenly. Not recommended for geometric shapes.
F**A
buoni ma non tengono perfettamente la forma
A**R
brilliant quality, have purchased many times to create items for my small business. designs come out clear even without 'best' quality set on printer, very easy to shrink. overall great item
M**I
Edit: My mistake, I’m happy!
B**N
Ich habe die Folien bestellt, da meine letzten aufgebraucht waren und diese bessere Bewertungen hatten (die ich absolut nicht nachvollziehen kann). Ich habe die Folien nach Anleitung bedruckt, trocknen lassen, ausgeschnitten und in den Ofen gemacht. Ich hatte bei allen Teilen das selbe Ergebnis: Die Weihnachtsmitgebsel für meine Schüler sind verschwommen und milchig. Links sieht man meine alten Folien und rechts die angebotenen. Für mich absolut unbrauchbar - schade!
A**A
Es un regalo para mis alumnos, ha quedado muy chulo. Lo recomiendo, funciona perfectamente.
Trustpilot
1 day ago
3 days ago