We remain fully operational. Our teams are working around the clock to ensure your deliveries continue safely.

DOWNLOAD THE APP


Customer Services
Copyright © 2025 Desertcart Holdings Limited
DOWNLOAD THE APP


🛠️ Fix it once, fix it right — floors that stay flawless!
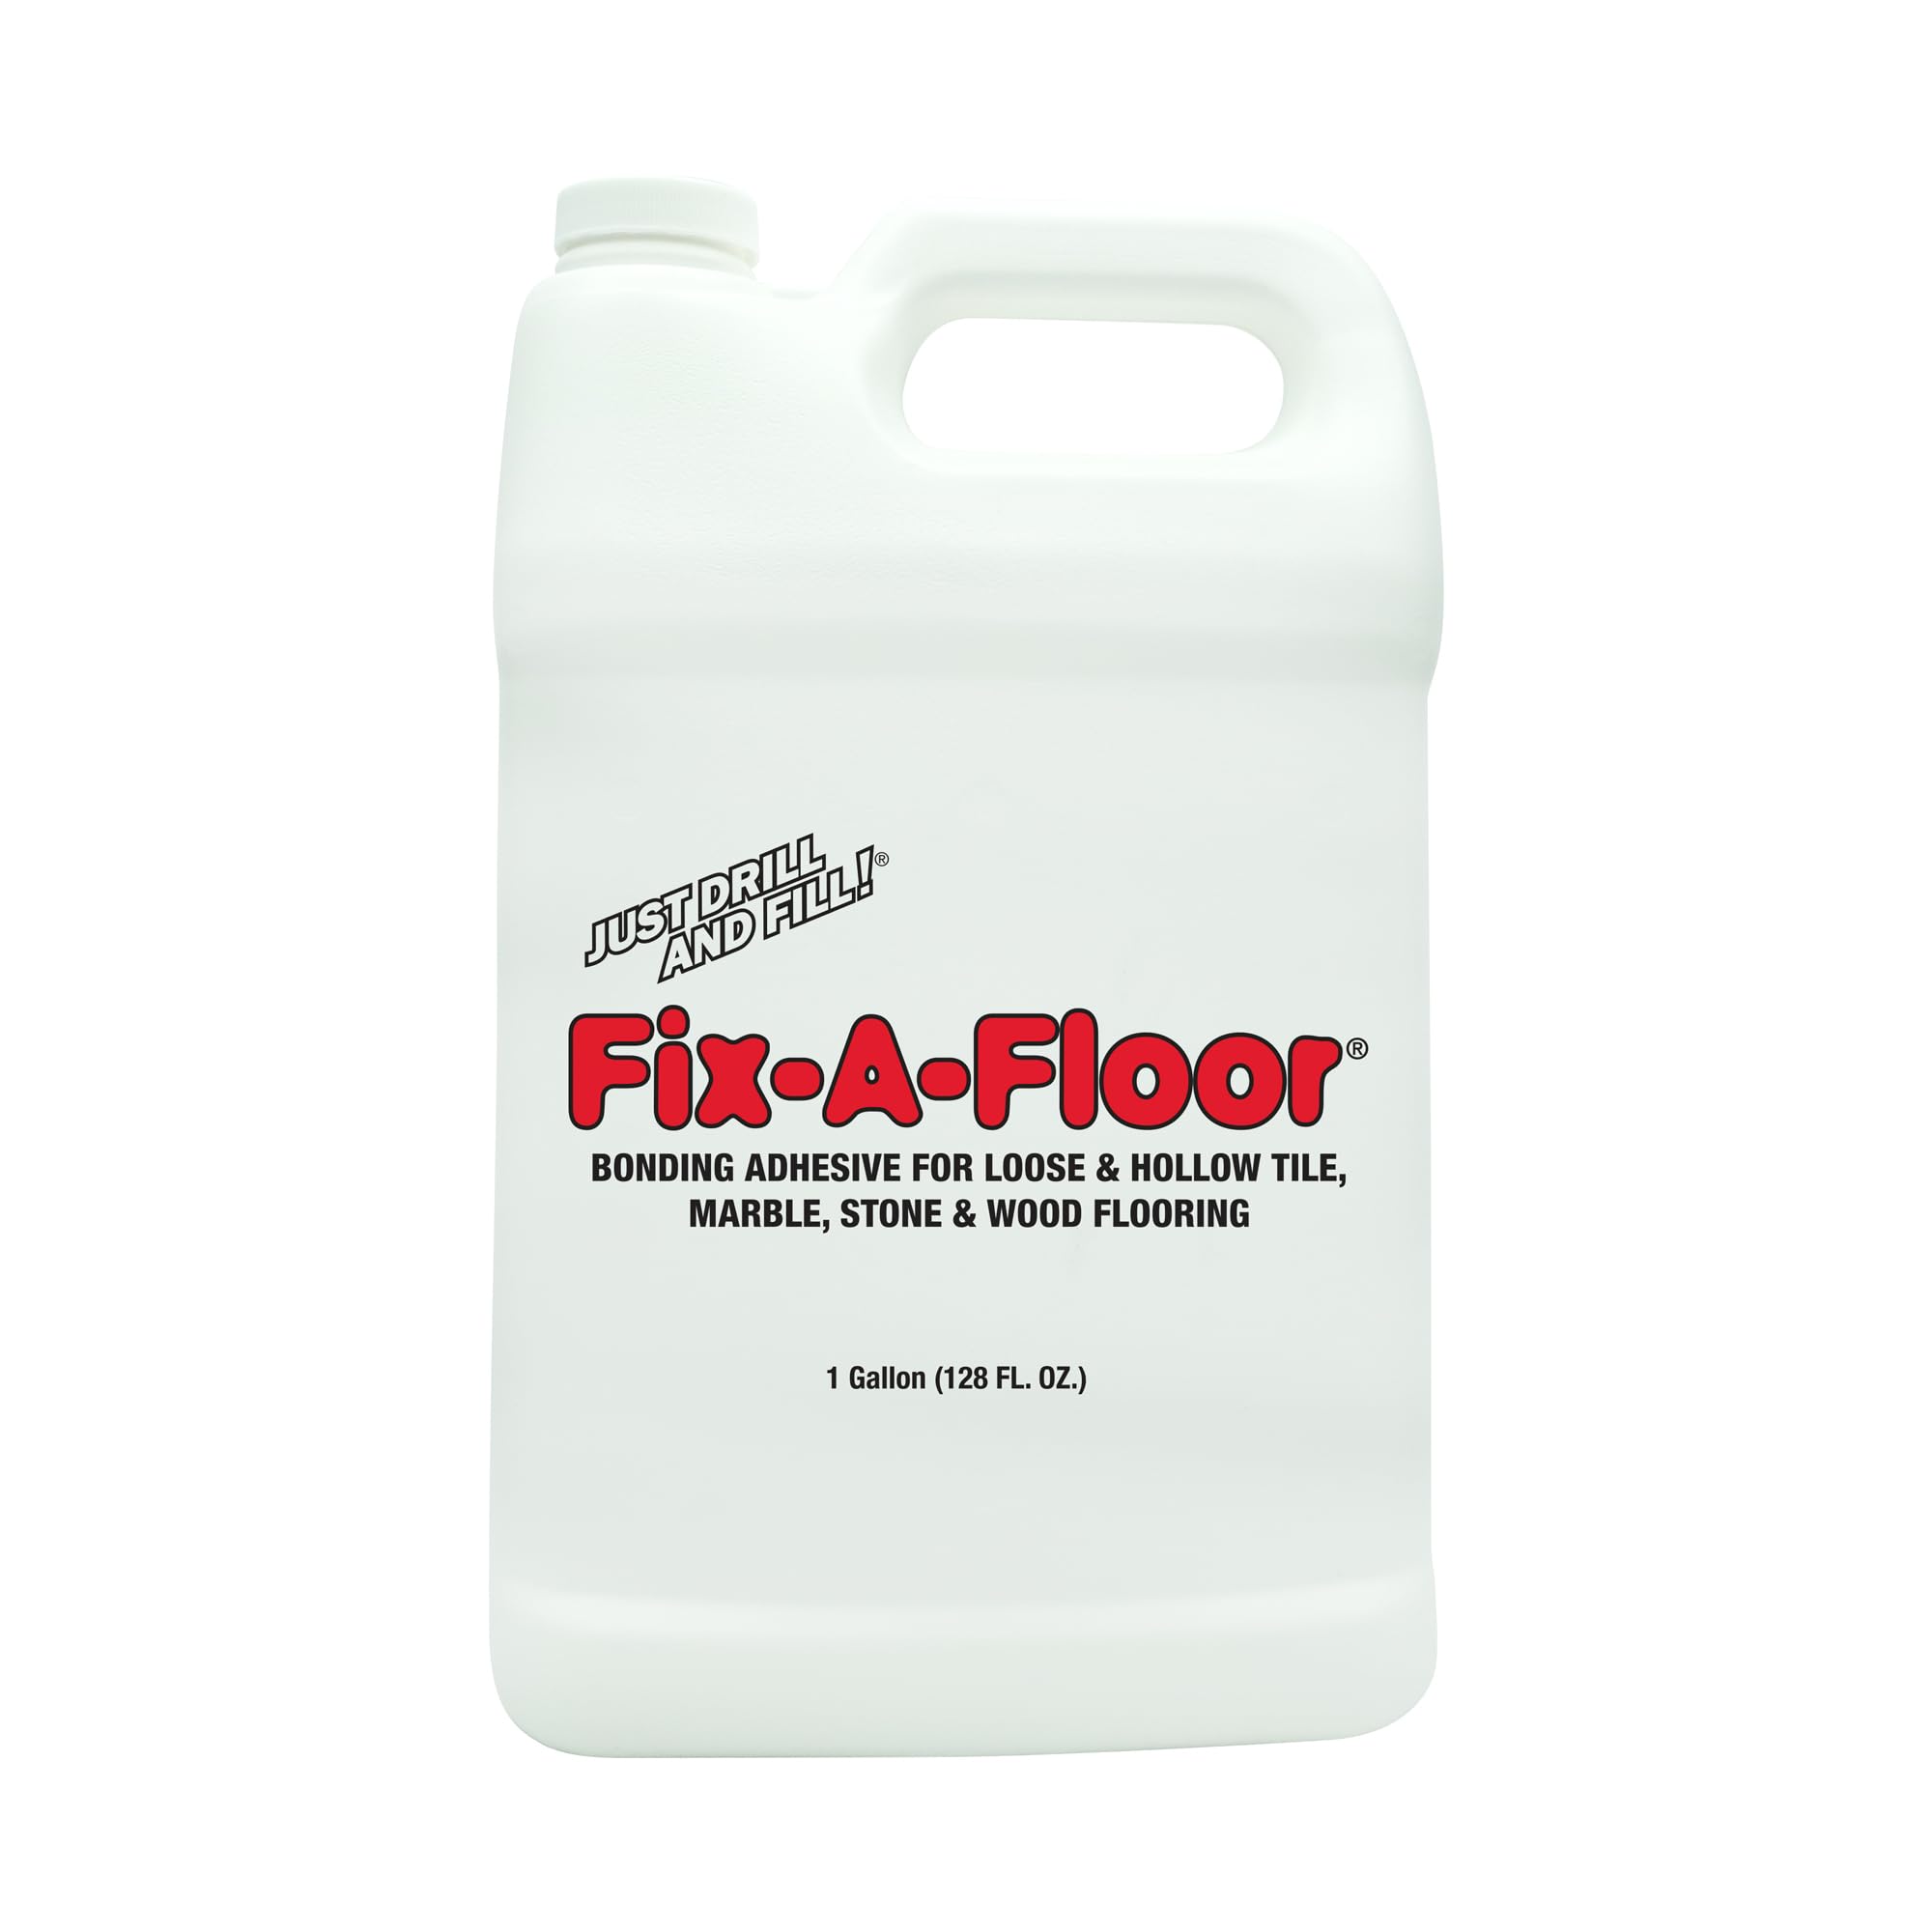
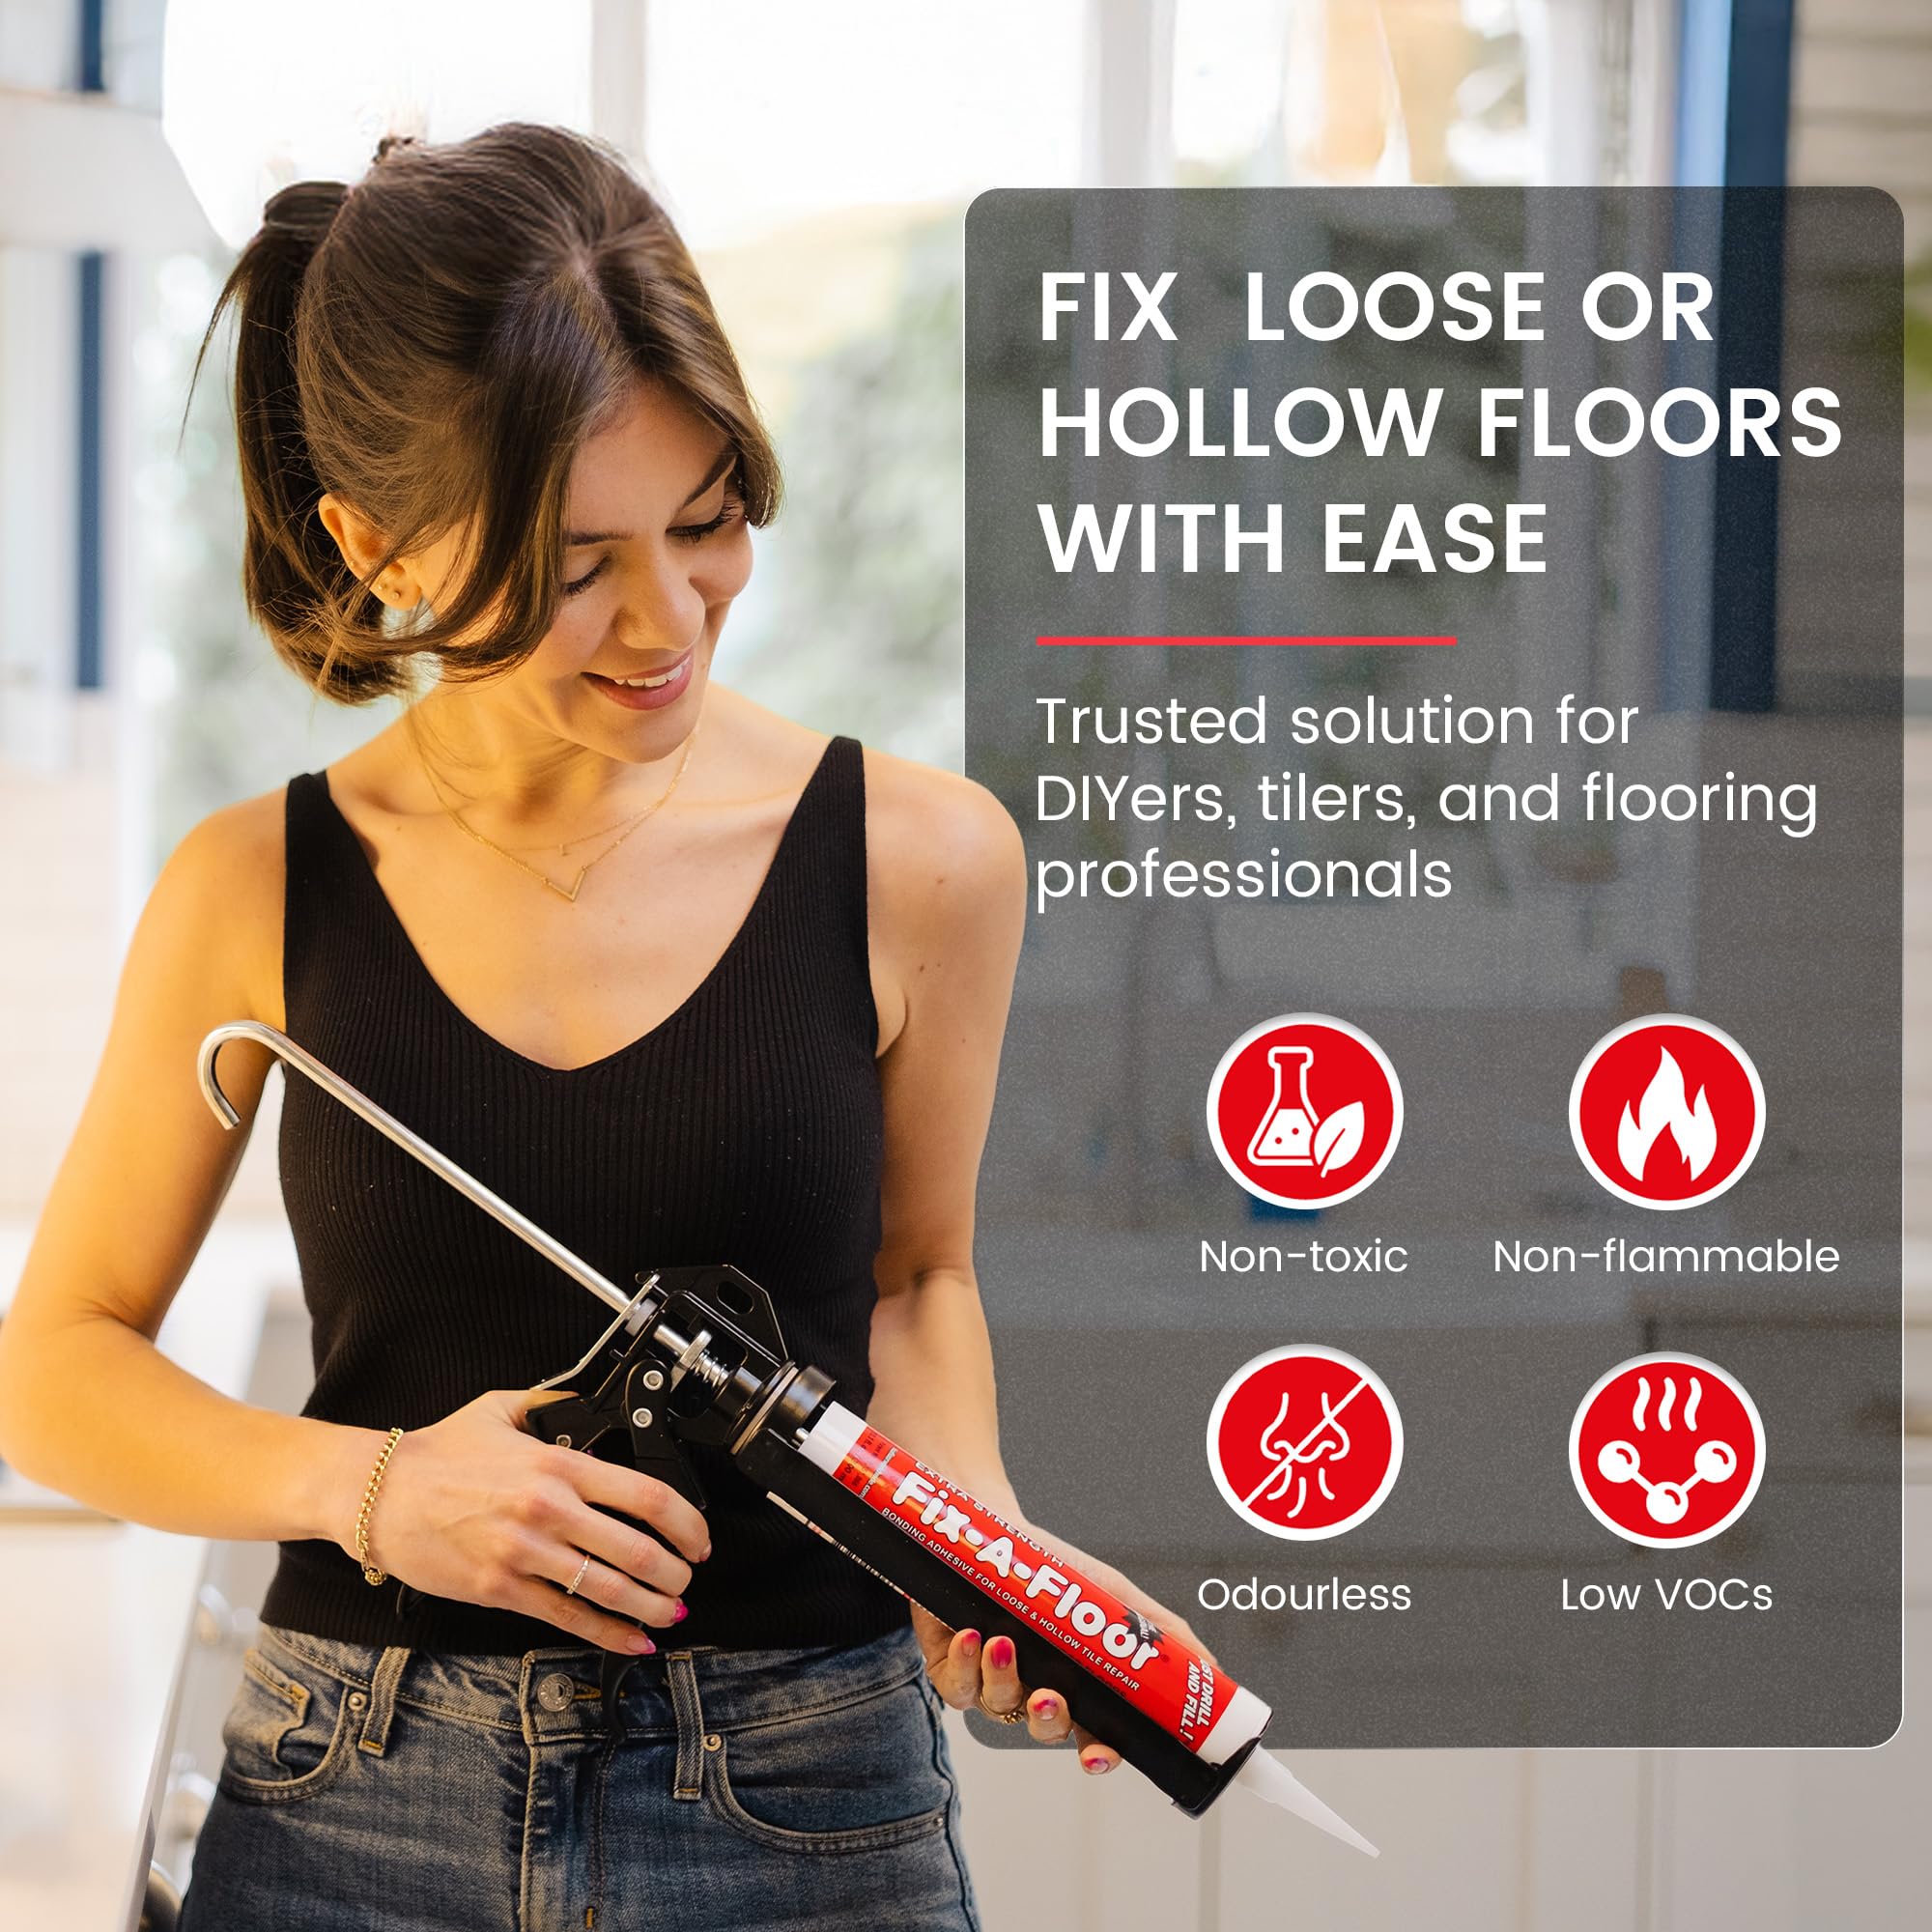
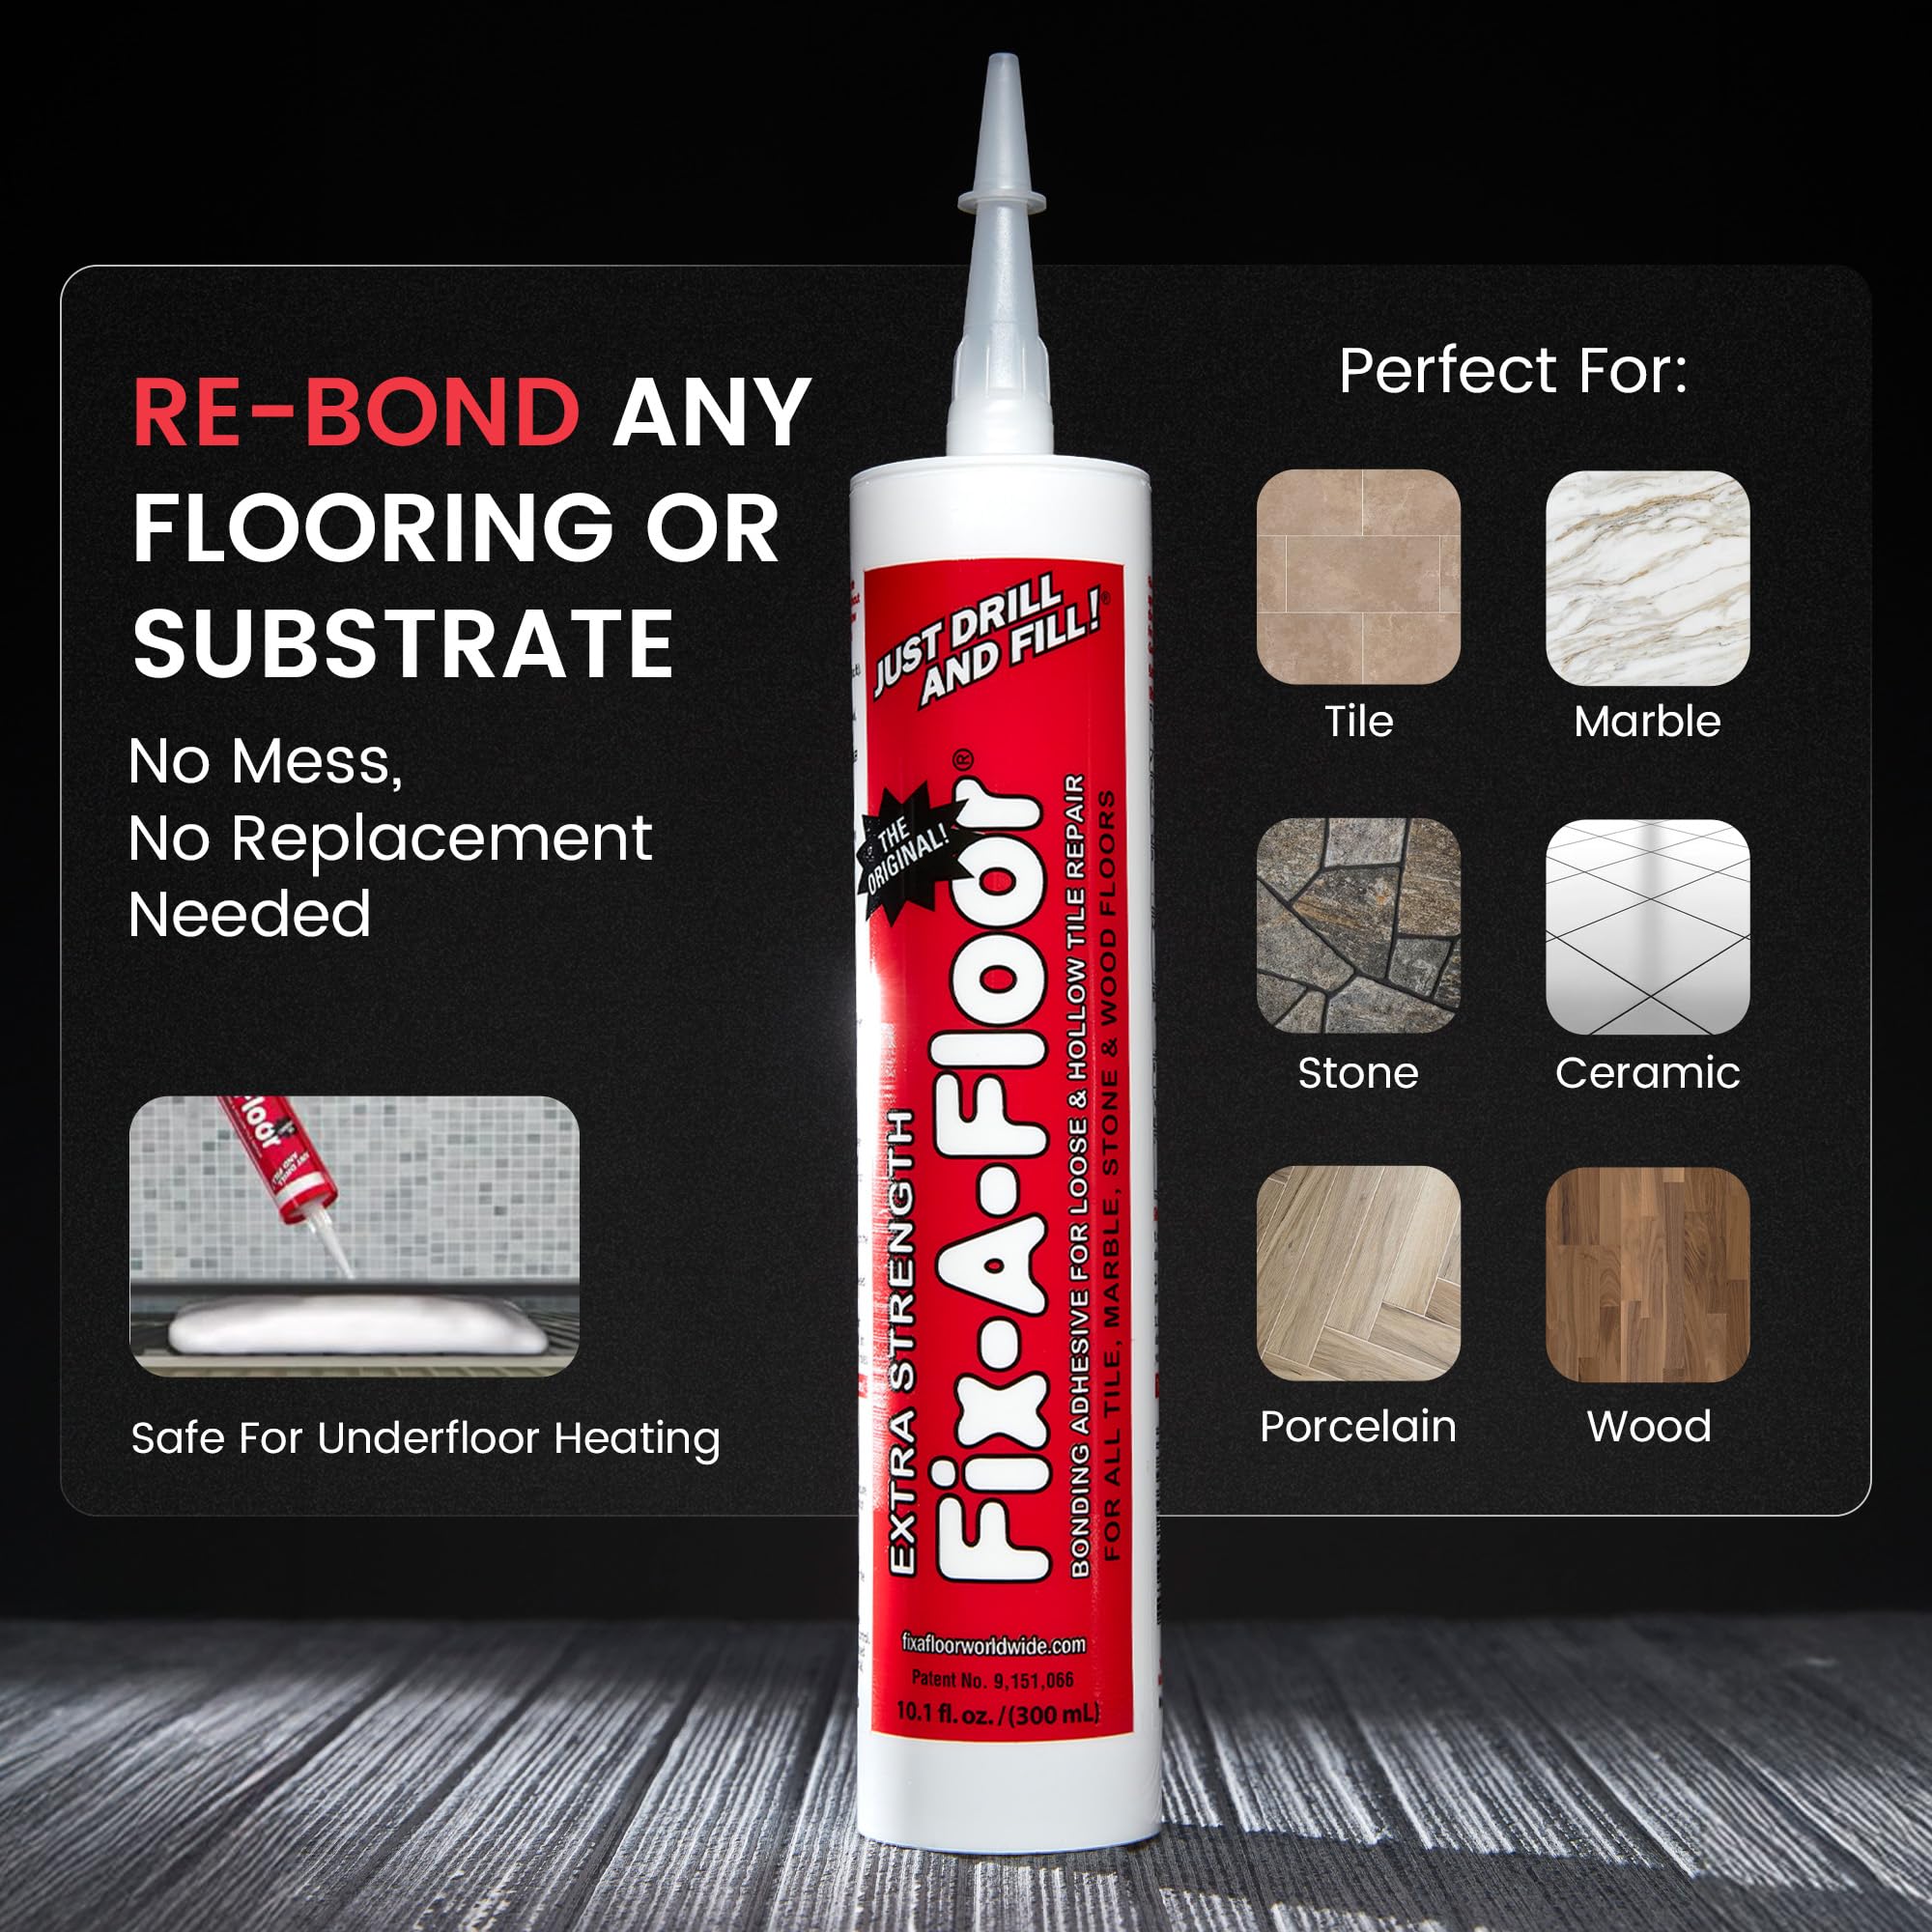
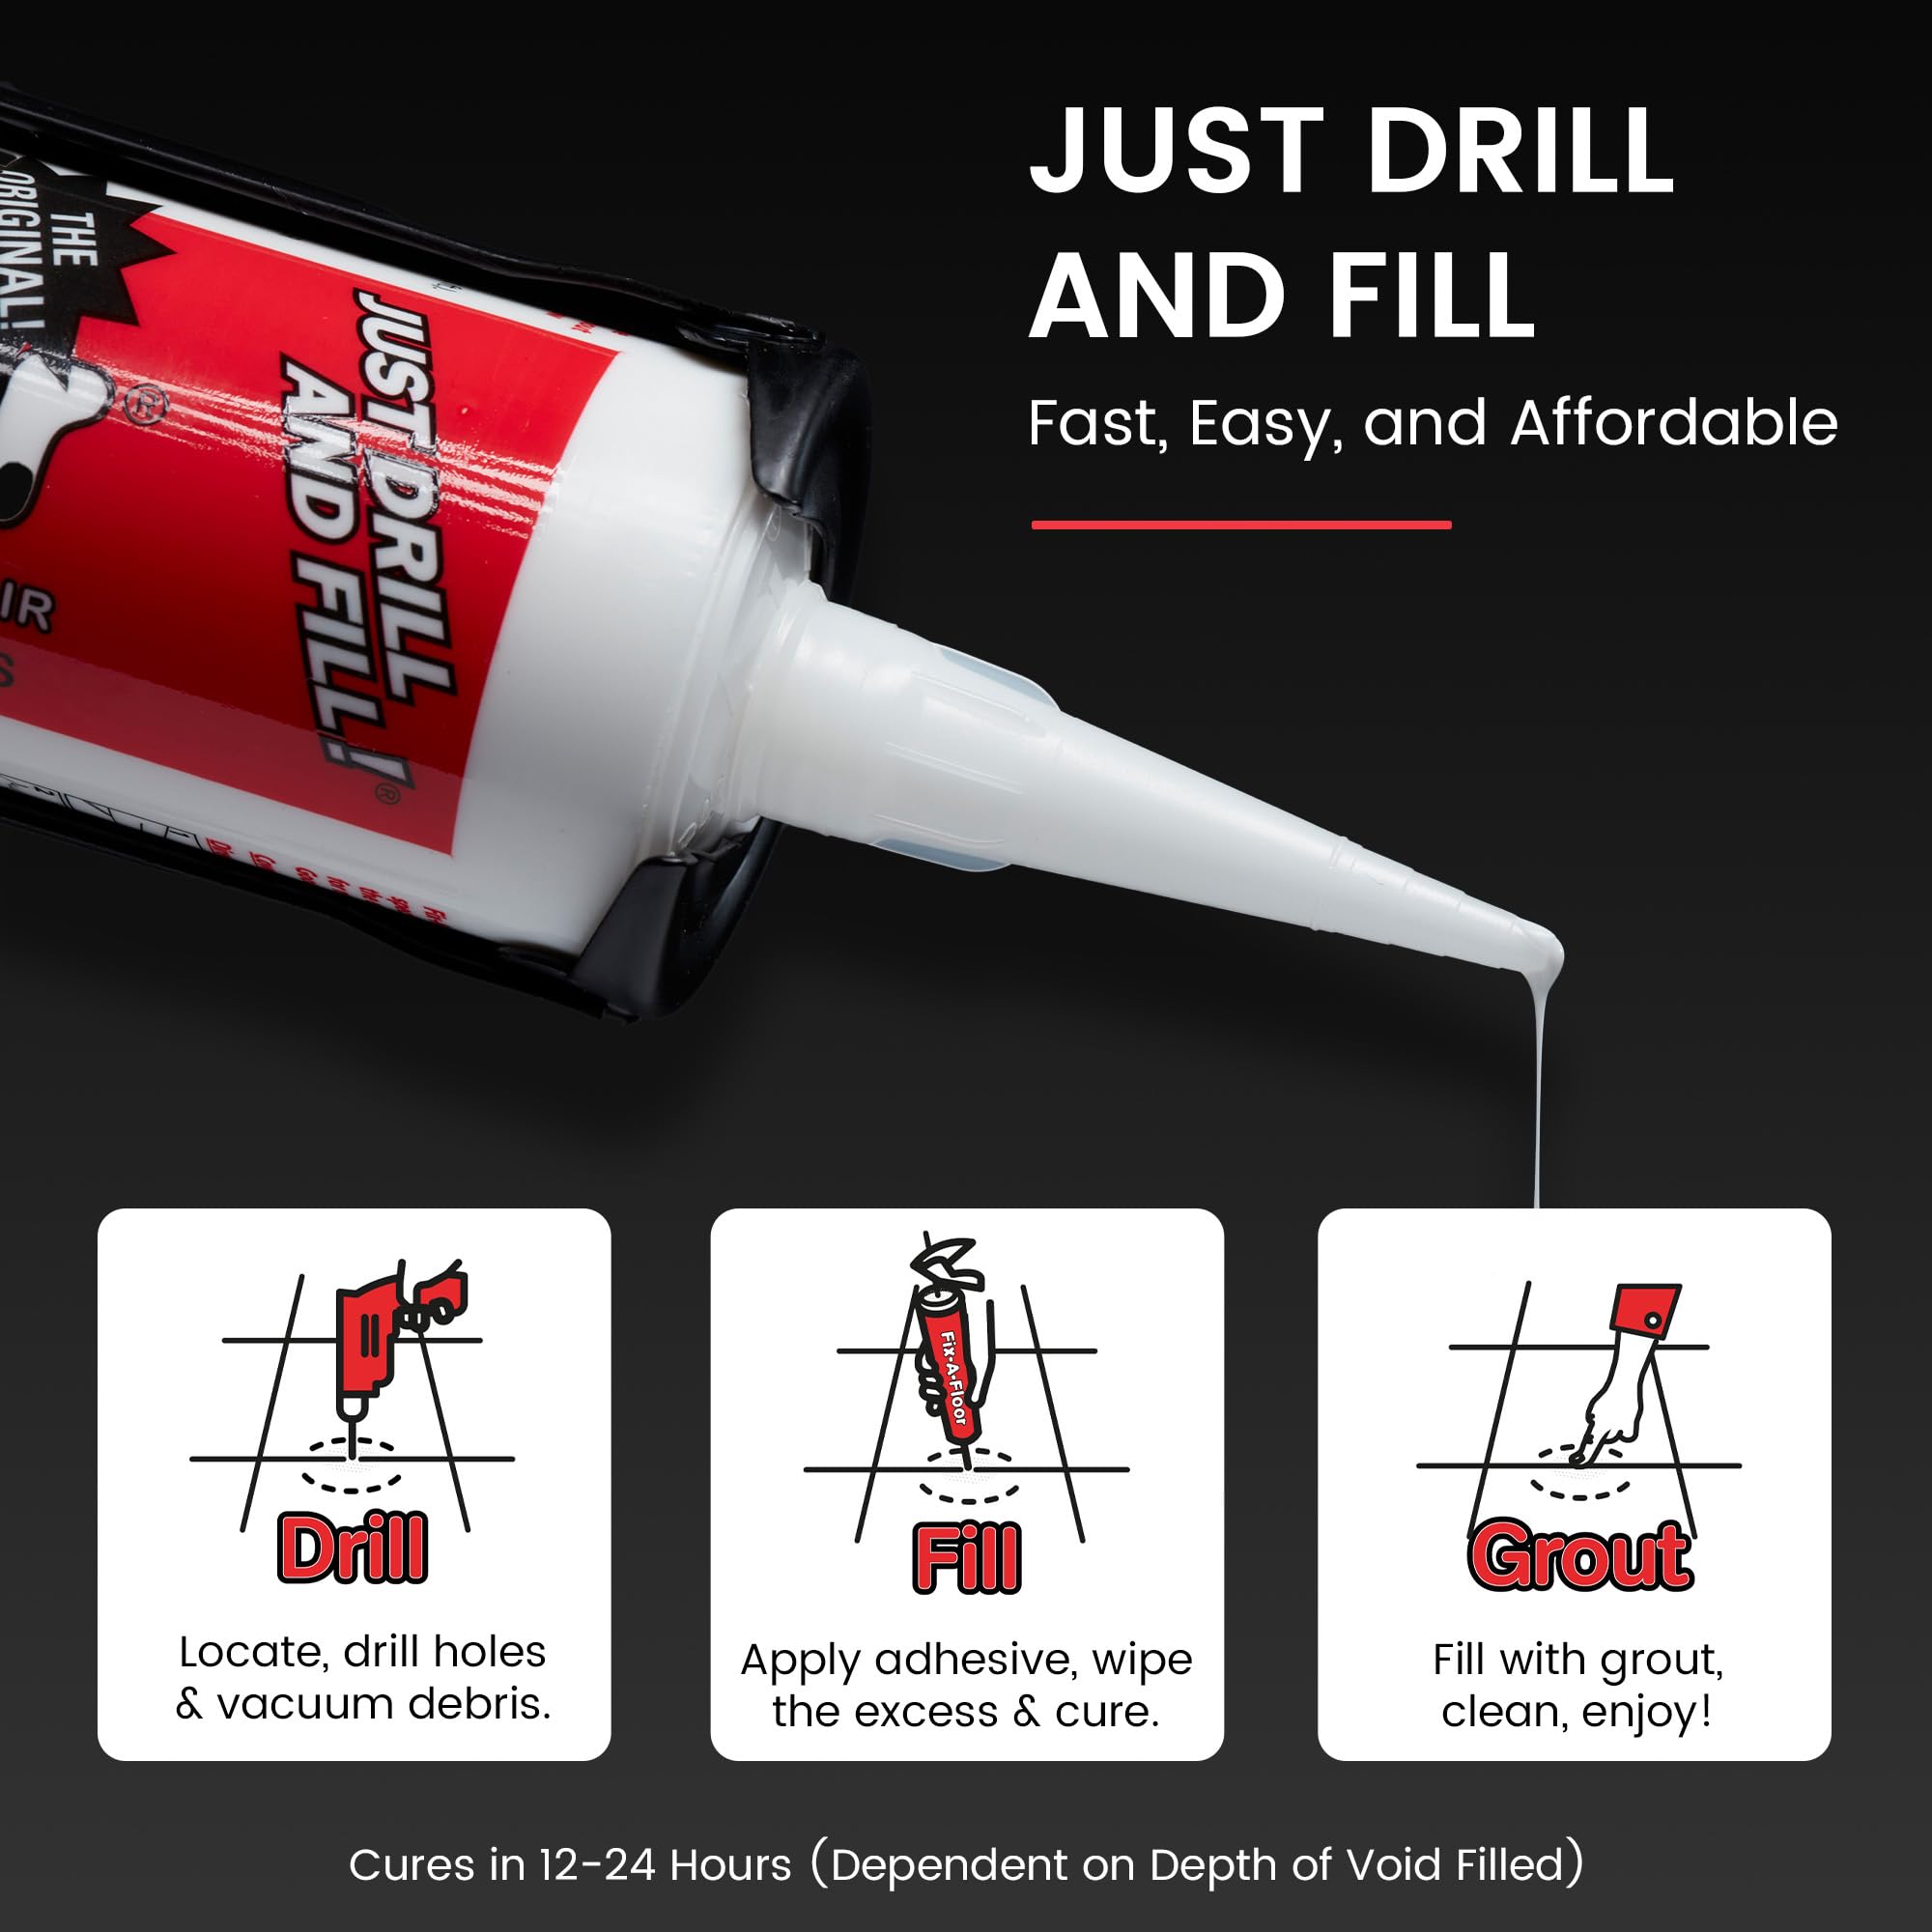
Fix-A-Floor Loose Tile Repair Adhesive is a powerful, easy-to-use solution designed to permanently re-bond loose, hollow, or squeaky tiles and wood floors. Its extra-strength, flexible copolymer formula works on all subfloor materials and is non-toxic with low VOCs, making it safe and eco-friendly. Ideal for DIYers and professionals alike, this 1-gallon adhesive ensures fast, mess-free repairs with a 24-hour cure time, delivering durable, squeak-free floors without costly replacements.
| ASIN | B0F3JW5LG8 |
| Best Sellers Rank | #105,307 in Industrial & Scientific ( See Top 100 in Industrial & Scientific ) #124 in Tile Epoxy Adhesives |
| Brand | Fix-A-Floor |
| Color | White |
| Date First Available | January 21, 2025 |
| Full Cure Time | 24 Hours |
| Item Form | Liquid |
| Item Package Quantity | 1 |
| Item Volume | 128 Fluid Ounces |
| Item Weight | 8.9 pounds |
| Item model number | FIX128 |
| Manufacturer | Fix-A-Floor Worldwide, Inc. |
| Material | CoPolymer |
| Number of Pieces | 1 |
| Package Information | Bottle |
| Product Dimensions | 8 x 3.5 x 12 inches |
| Special Feature | Non Toxic, Self Leveling, Strong |
| Specific Gravity | 0.04 |
| Specific Uses For Product | Repairs: loose tiles, hollow tiles & creaky wood floors. Great for underfloor heated areas |
| UPC | 859704003073 |
| Unit Count | 1.0 Count |
| Viscosity | Moderate |
| Viscosity Level | Low |
| Water Resistance Level | Water Resistant |
A**R
VERY FLUID!
Often when reading claims of effectiveness, one would take the words with a grain of salt for realism, not so here. The product in this case, works exceptionally well! In my case, rather than as outlined in online videos, I instead opted to remove all grout exposing each ridge of grout possible. Although the instructions are clear and effective, I wanted a greater bond across as many different chambers as possible. Bottom line the adhesion was great, the durability of the bond was assured and the drying time was quick even in a moderately cool environment.
A**Y
Squeeze slowly
I was also as skeptical as some others were. I have about 80 sq ft of loose 18 x 18 inch tiles with an 1/8 inch air gap under the tile. I started with about a 20 sq ft area and let it dry for a couple of weeks before continuing with the rest . I have to say this is working fantastically we'll . I done about 80 sq ft so far and have a total of 100 ft to do. One thing to keep in mind is squeeze the caulking gun slowly to allow the adhesive to travel under the tile with out loosening the tile even more or having it deep last the gun plunger. I am allowing it to dry for several weeks before grouting the holes only because I want to grout it all at the same time. Sorry for long review but l wanted to let others know my great experience. Better than taking up 20 sq ft, grinding thinset off back of tile and floor and resetting them . I did that first then looked for another solution and found this .
R**E
Works as advertised
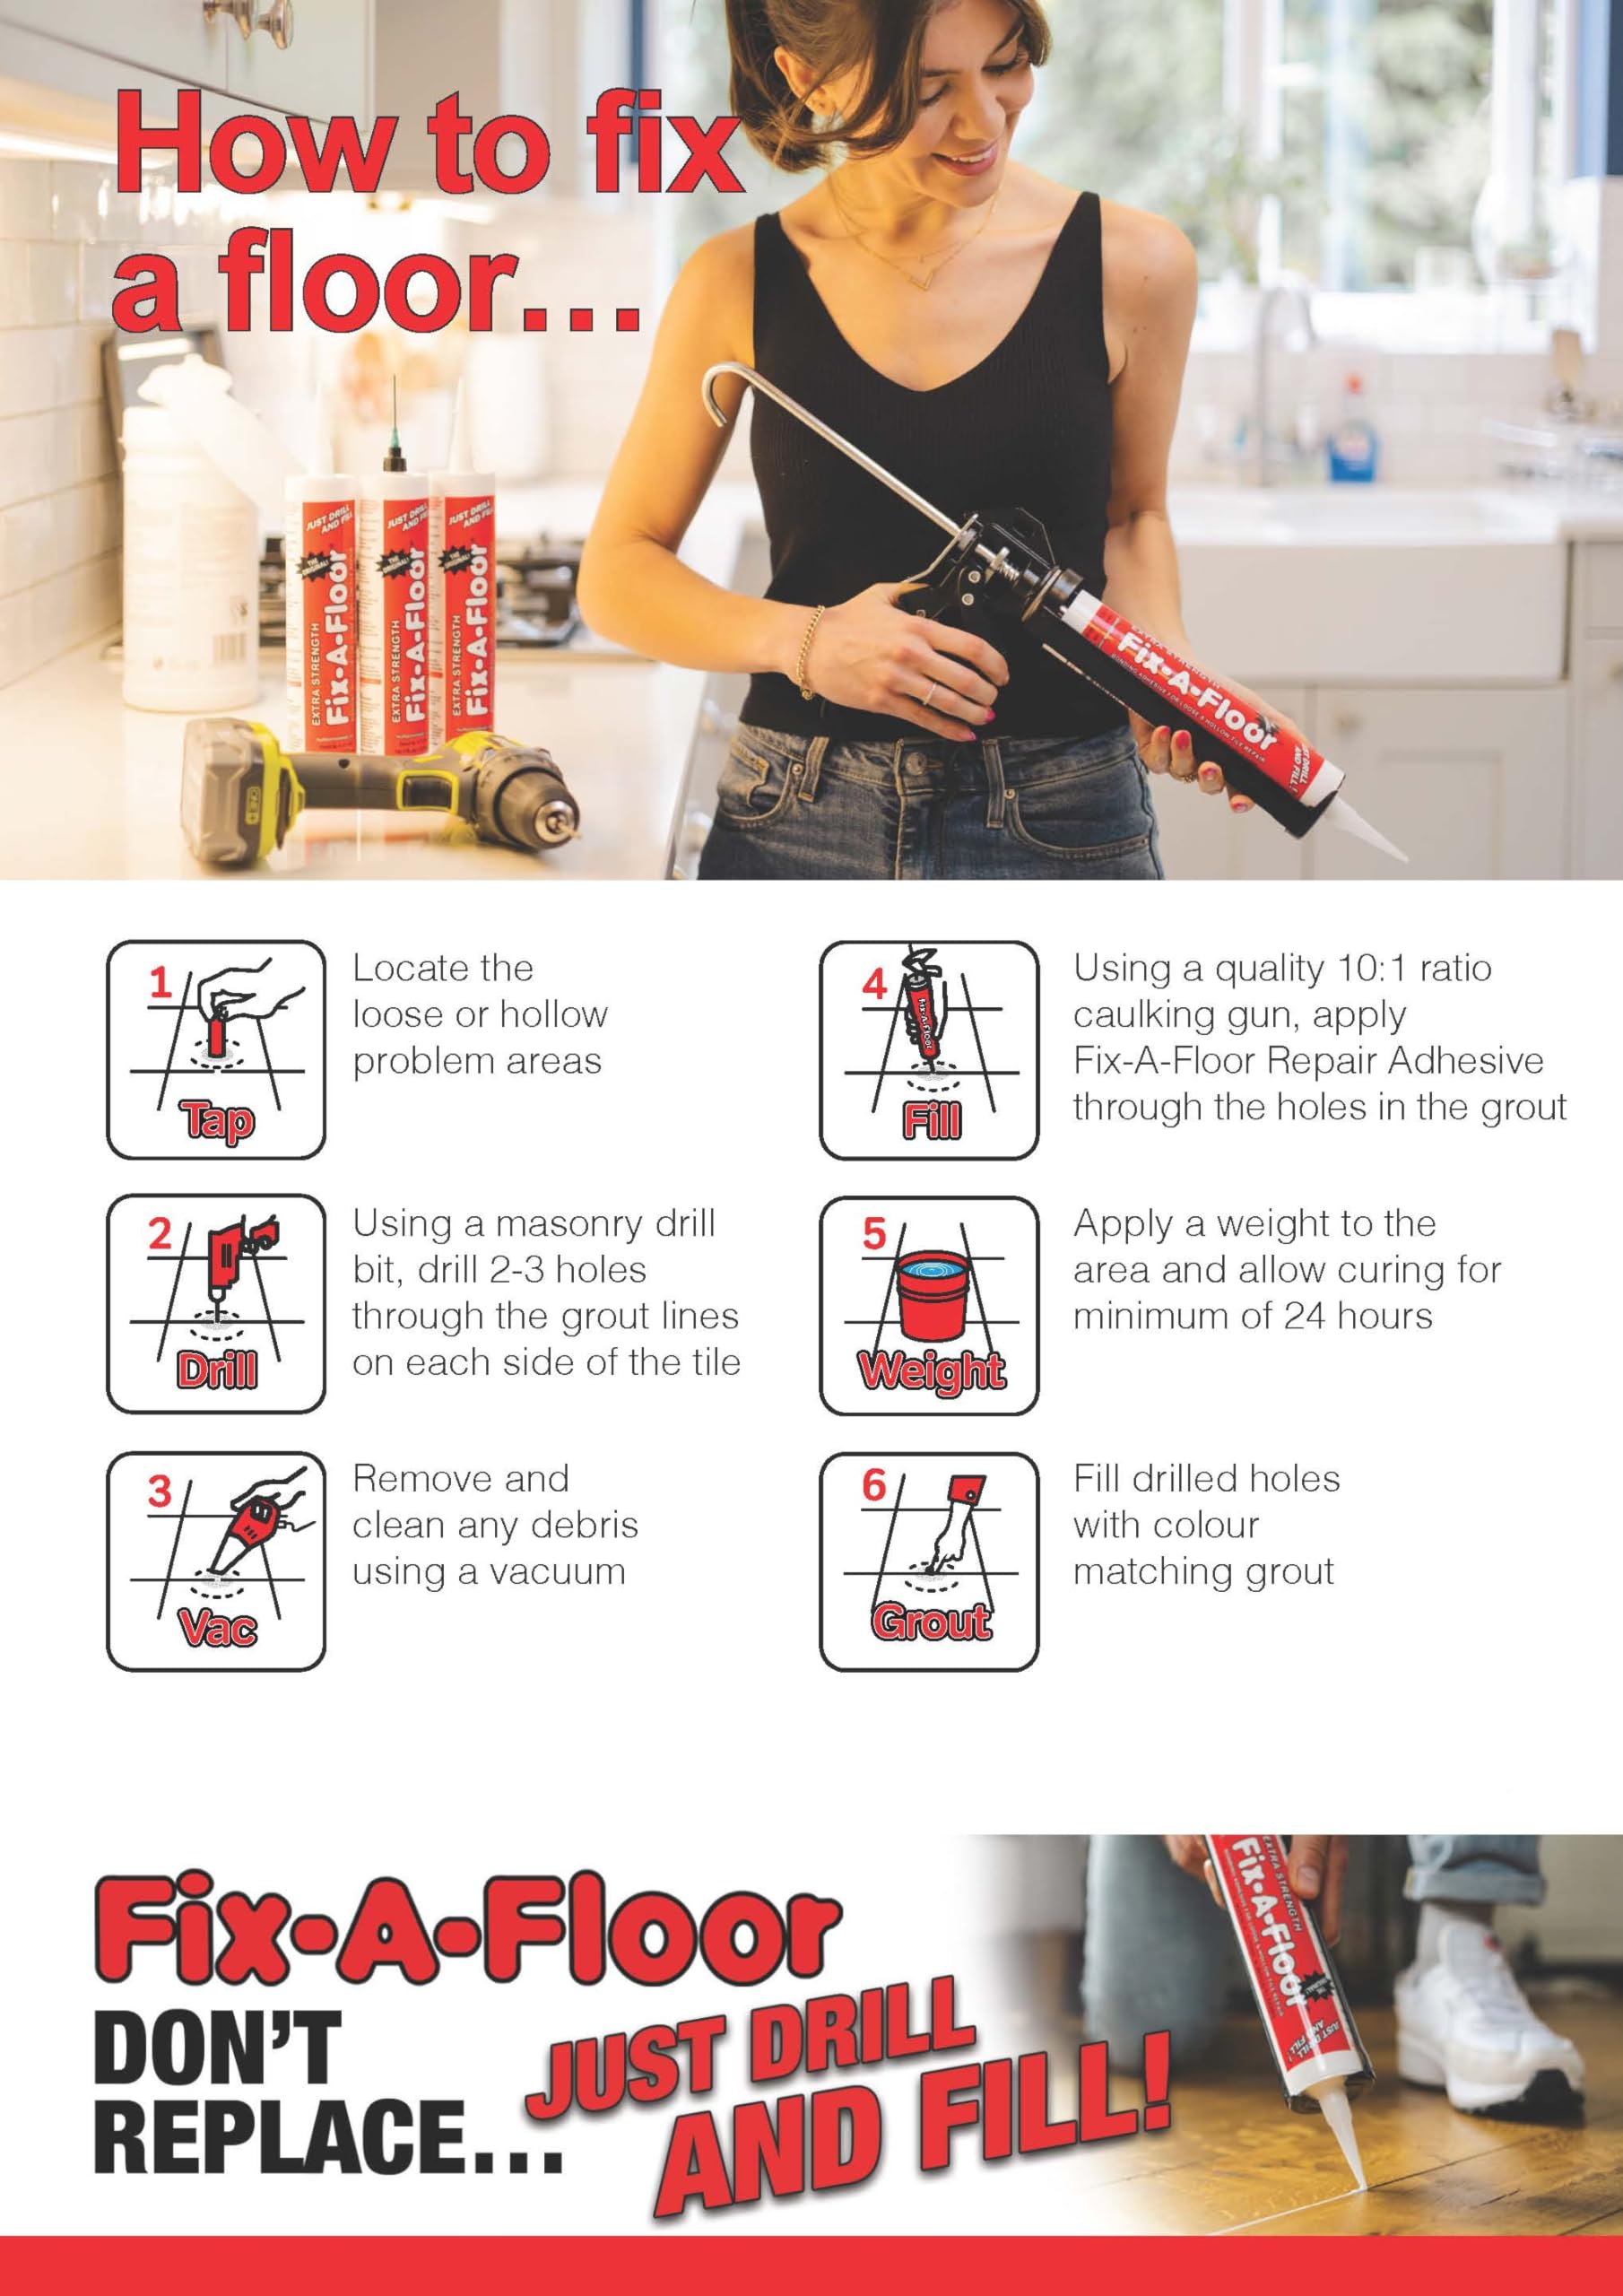
This stuff works well, as far as I can tell. I followed the instructions and now the tiles in question are solid sounding, instead of hollow. And there is no more crackling sound when they are walked on. Time will tell how long it lasts, but I would estimate it will last as long as the original adhesive was designed and intended to last. Now, here are some things you NEED to know, since they are NOT mentioned on the label/instructions: 1. Shake each tube to mix the contents. No telling how long they have been sitting and whether any separation of ingredients has occurred. Why take chances with adhesion and drying? Remember, this is a thick liquid, so temperature matters. If the tube is under about 65 degrees the product will not flow as freely. And it probably won't mix when you shake the tube. You should feel the liquid shifting in the tube when you shake it. Submerge the tube in warm water for a few minutes to warm-up cold contents. 2. You MUST unscrew the nozzle and put a hole in the tube FIRST, before trying to squeeze the contents out (see images). I used the masonry bit I used to drill the holes in my grout. And you must ALSO cut the nozzle (or poke a hole in it for very narrow grout lines) to the size that will fit the holes you drill. I don't know why this isn't mentioned in the instructions, but I suspect a lot of guys are having tubes exploding out the back-end like I almost did. I had cut the nozzle, but didn't realize that it unscrewed and that a hole must be put in the tube itself. 3. Keep in mind that you are compressing a two inch tube that is pressing its contents out of the small hole you put into it and then into an even smaller nozzle tip. It is EASY to over-squeeze the caulk gun, while expecting the material to be flowing freely into each hole. Patience is the key. Soft, slow squeezes on the gun. And then waiting for the material to flow. And even then, expect some leakage at the back of the tubes and at the front. A rag and bucket of warm water helps to clean up the gun and tube for the next use. 4. This may be obvious, but before you drill, tap around the perimeter of each tile. Only drill where the tile sounds hollow right up to the grout line. Hollowness next to the grout line should mean that the material will flow into a hole drilled there and under the tile. If it's not hollow right next to the grout line, don't bother drilling a hole, even if it's hollow two inches in. The original adhesive will probably block the Fix a Floor from flowing into that area. And you'll have waste and a mess. Hope this helps. Good luck!
J**.
This will help you!!!
So I have tried 4 tubes of this stuff so far. The first was a mess and absolute chaos. I tried to use the supplied needle attachment and the tube busted out the back and leaked everywhere. The needle clogged constantly. For the second tube I used the normal caulking tip provided and just cut off the very edge of the tip. This worked 1000% better. Squeeze slow and you will feel the resistance when the hole is full. Have all of your holes predrilled so that you can move from one to the next. This stuff will run when removed from the hole so have wet rag handy. You will lose some product but no where near what you would lose trying to use the needle. I used 5 gallon buckets filled with water for weight and that’s it. Easy peasy. Hopefully this saves you some frustration as the product does do what it says, just needs some different steps.
R**S
Be careful
For me, it worked very well once I got it under the floorboards. I found it quite messy, but that was because I was not familiar with the correct procedure. Still the actual glue is very thin and runny and sometimes hard to control.
J**M
Don't use with plywood sub-floor
Hello All, Be careful when you use this product if you have a plywood sub-floor. I followed the instructions and the product is very easy to use. No problems with the injection under the vinyl plank flooring. However, this floor leveler is like a slurry with a high moisture content. Over about a day the floor started to bulge upwards from the injection site, even though I had about 40 lbs of weight over the site. The plywood absorbed the moisture from the leveling compound and buckled. See the enclosed images. This required me to remove the vinyl flooring planks, cut out the damaged plywood, replace the plywood and replace the vinyl flooring planks (thankfully I had some spares). What was to be an easy repair turned into 3 days of work after hours. Ugh... You should be fine if there is a concrete sub-floor.
E**I
Does what is advertised
The product does what is advertise. The only problem which everyone has is that its to runny. Get yourself a injection syringe and fill it up and thats it. If you do this you will have minimal clean up.
E**.
Todo llegó en orden, el adhesivo funciona y me evitó tener que traer al albañil para que quitara todo el piso. Una vez que se usa la primera vez, se vuelve más sencillo aplicarlo pero se debe inyectar con paciencia para evitar derrames de producto tanto en el piso como en el envase del adhesivo porque no aguanta mucho la presión. Muy satisfecho con la compra sobretodo porque ya una vez traté de comprarlo por otro medio y tuve problemas de aduana pero gracias a Amazon todo fué muy sencillo y sin pro lema alguno.
V**O
Great product! Fixed my tiles in the basement that were lifted. Bought it twice.
D**Y
The product may or may not work, who knows if it can't be pumped out of the tube. $50 for 2 tubes and the tubes are NOT up for the job. Every time I tried to SLOWLY and EVENLY pump it into the floor, the piston in the back of the tube let all the product bypass and make a huge mess. almost all of it got wasted and I still have the floor issue.
T**I
This is the 4th time I purchased...it worked perfectly on ceramic tiles that came loose and a laminate flooring plank that was loose. Easy to use but be careful, it's quite runny. Word of advice...if it is being shipped to an area that has below freezing temps( like my Canadian winter), if it does freeze it will not be usable even once thawed.
C**G
The product works well if the caulking tube end doesn’t leak. Bought this the first time and it worked great. On the second time both of tube ends leaked so all the product squeezed out into the back instead of out the nozzle. Other than that the product works.
Trustpilot
1 month ago
2 weeks ago