Desert Online General Trading LLC
Dubai, United Arab Emirates
Desert Online General Trading LLC
Dubai, United Arab Emirates


💡 Light Up Your Prints and Your Imagination!
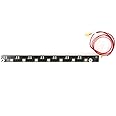
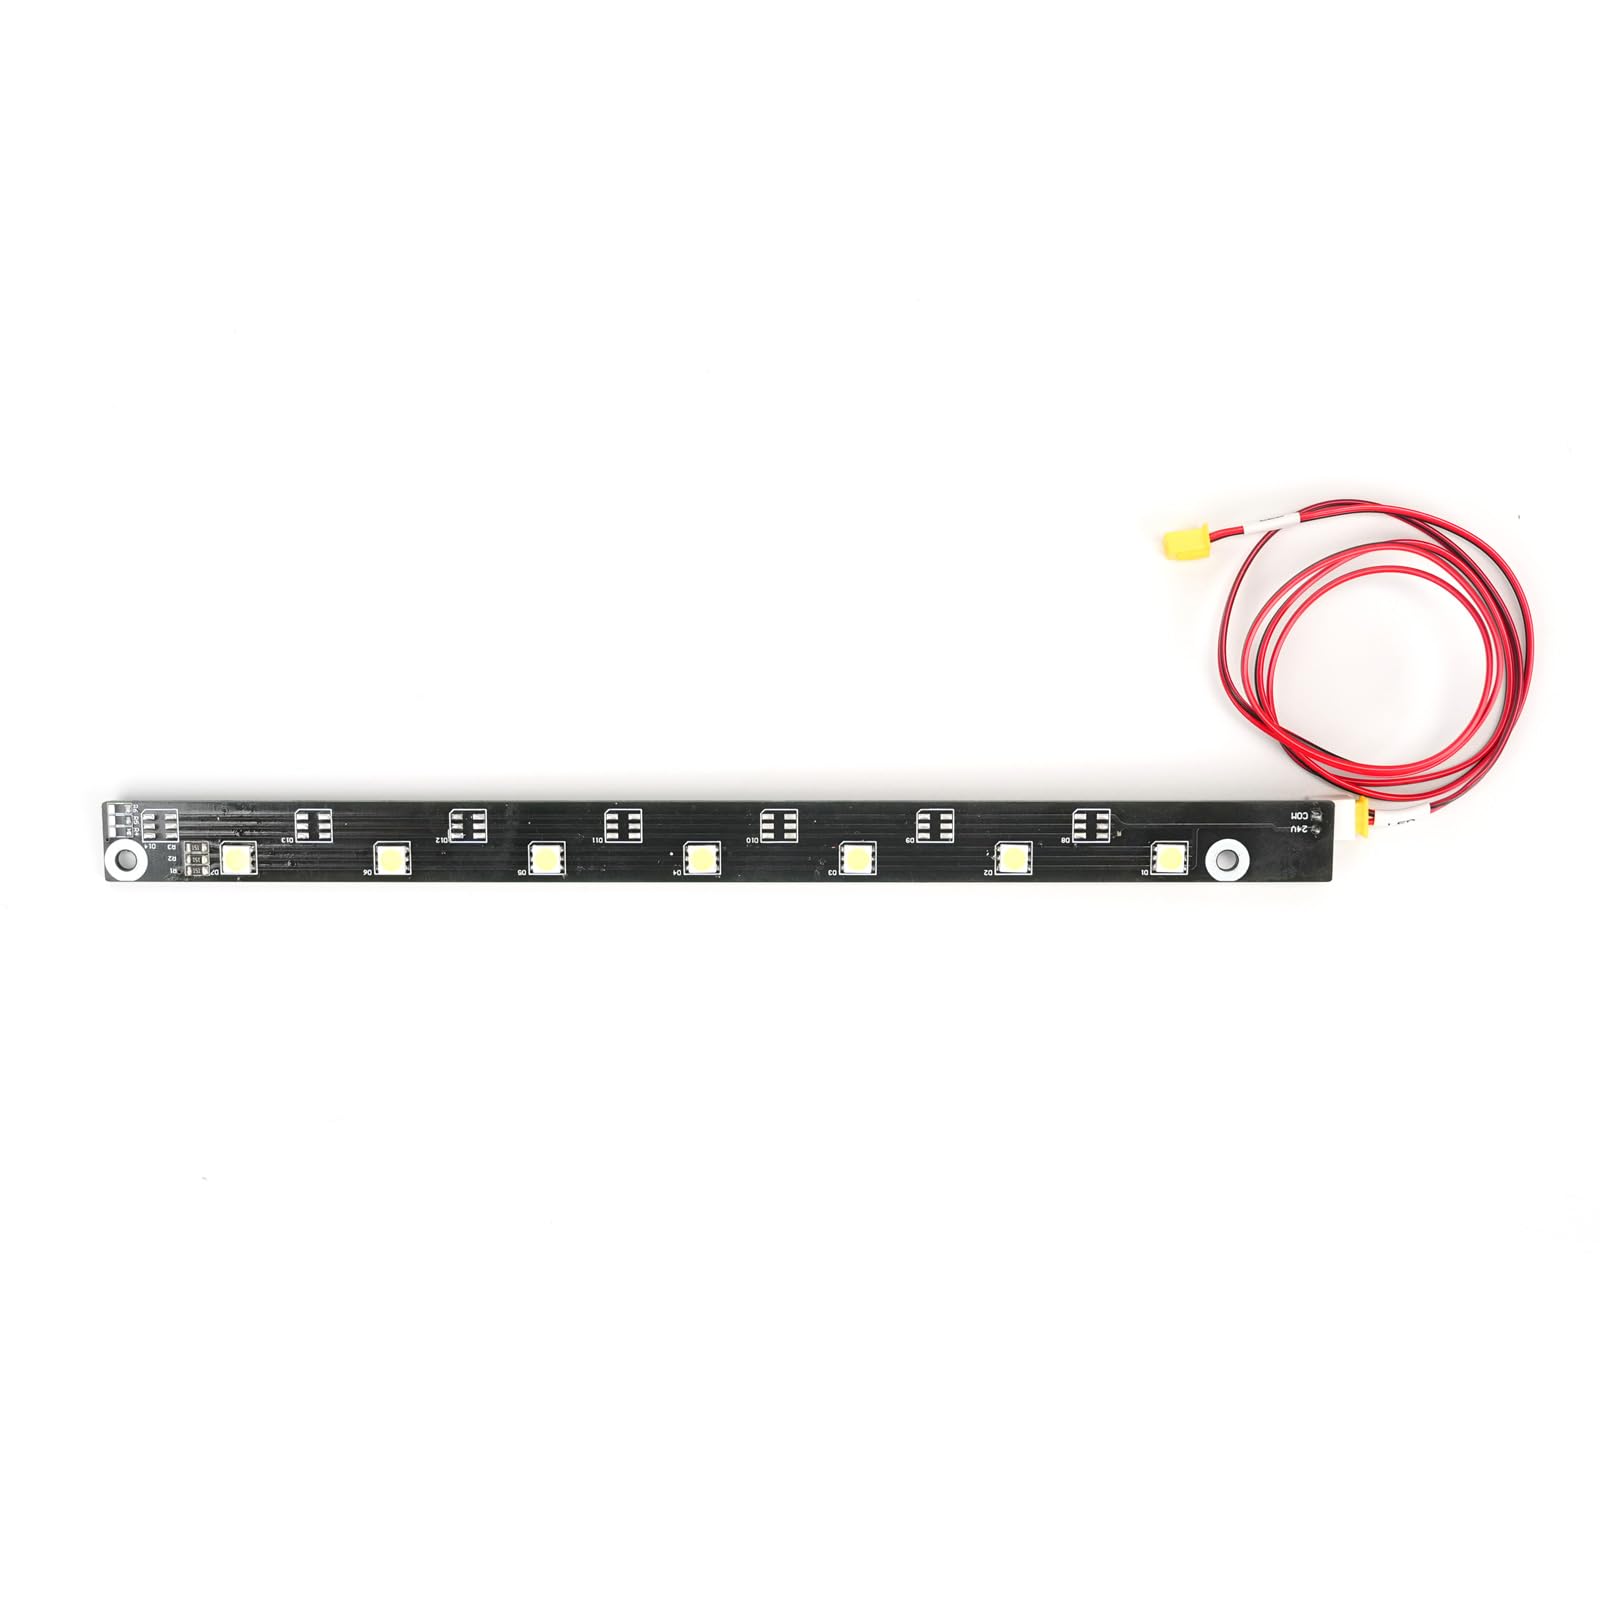
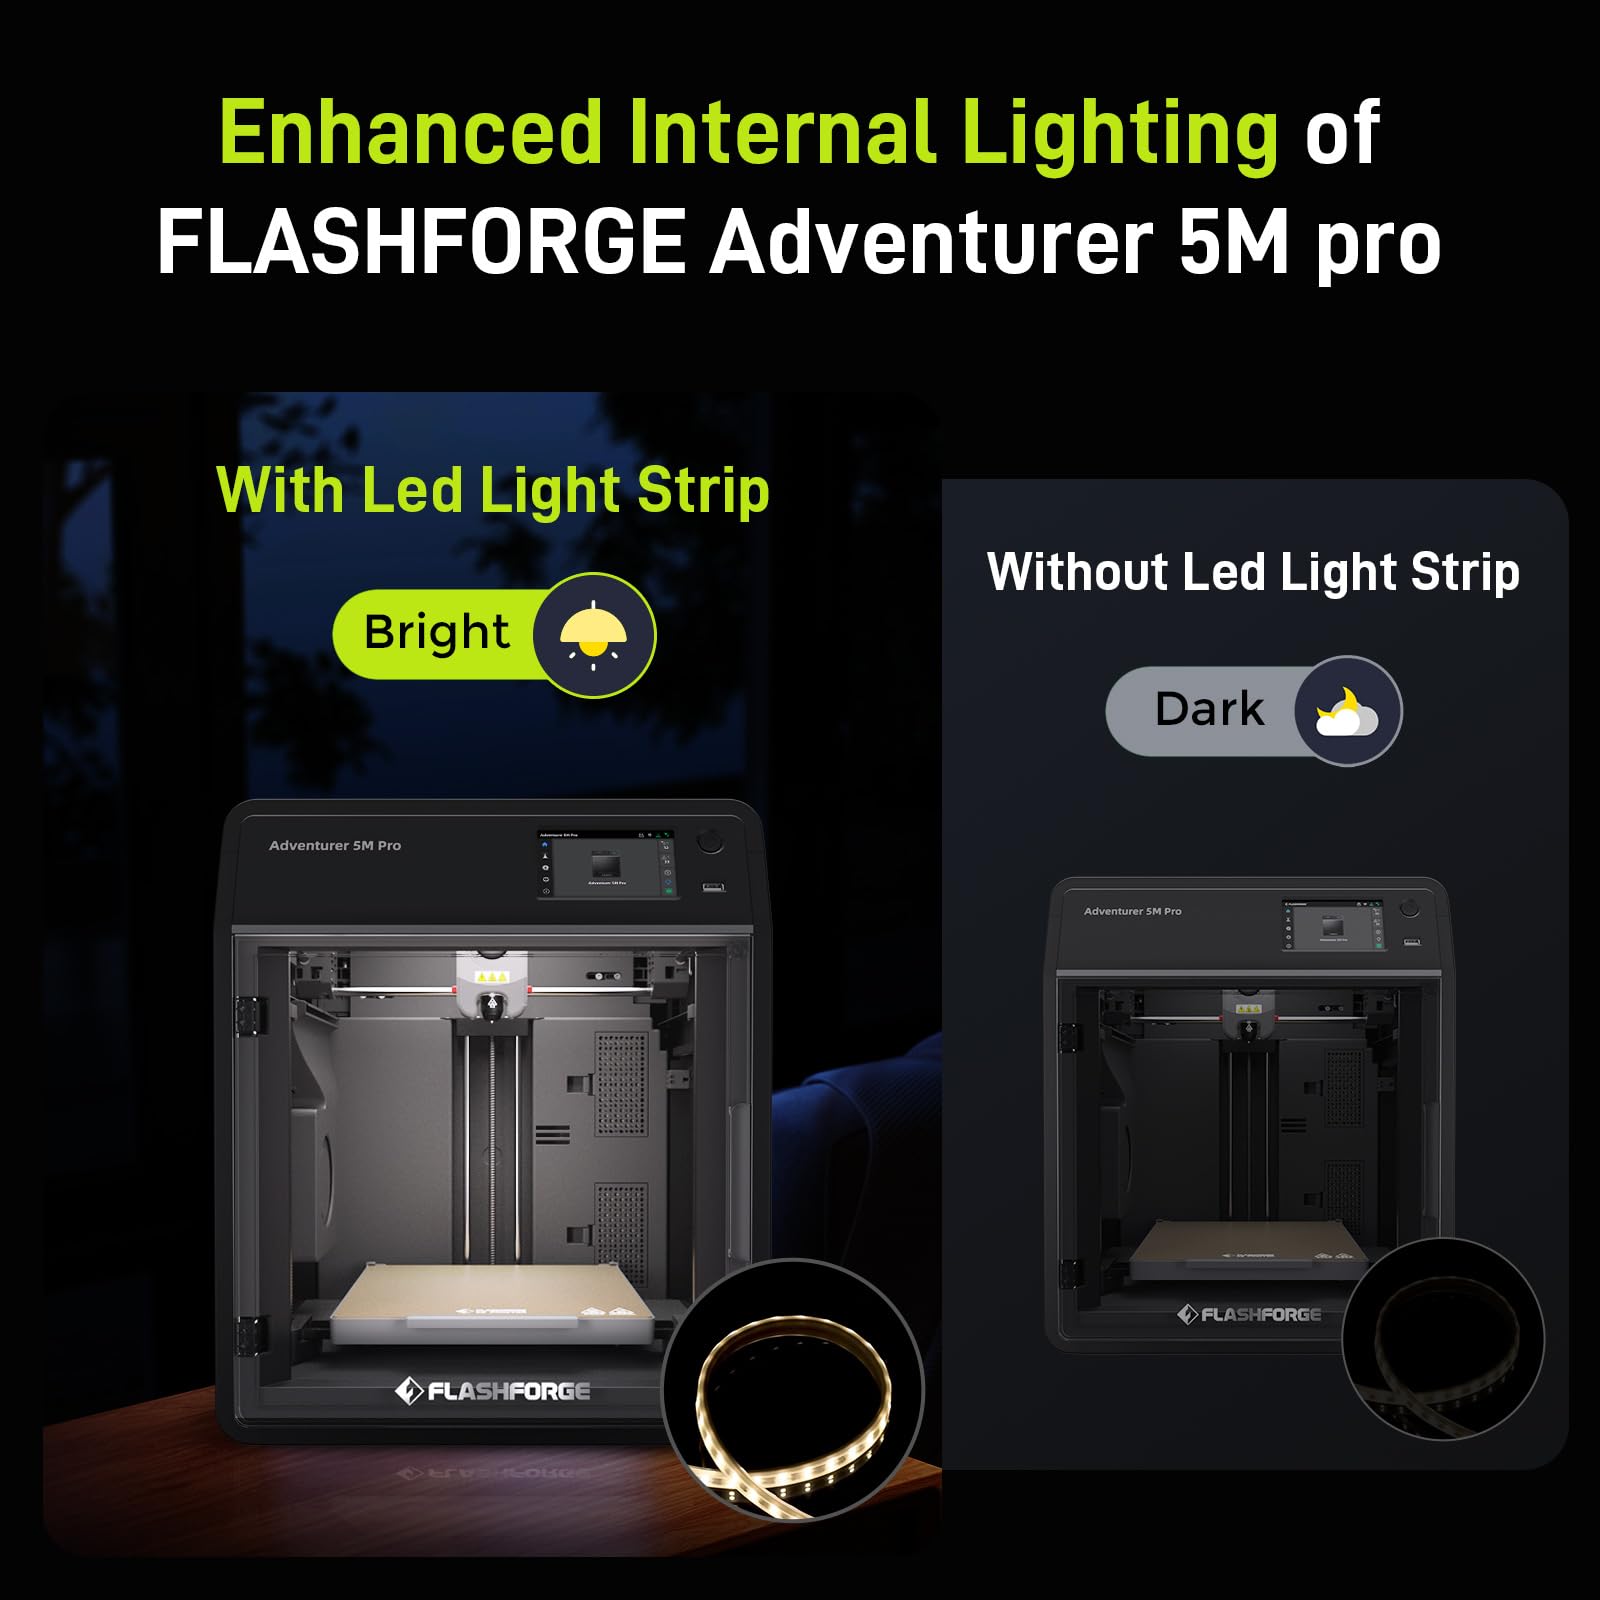
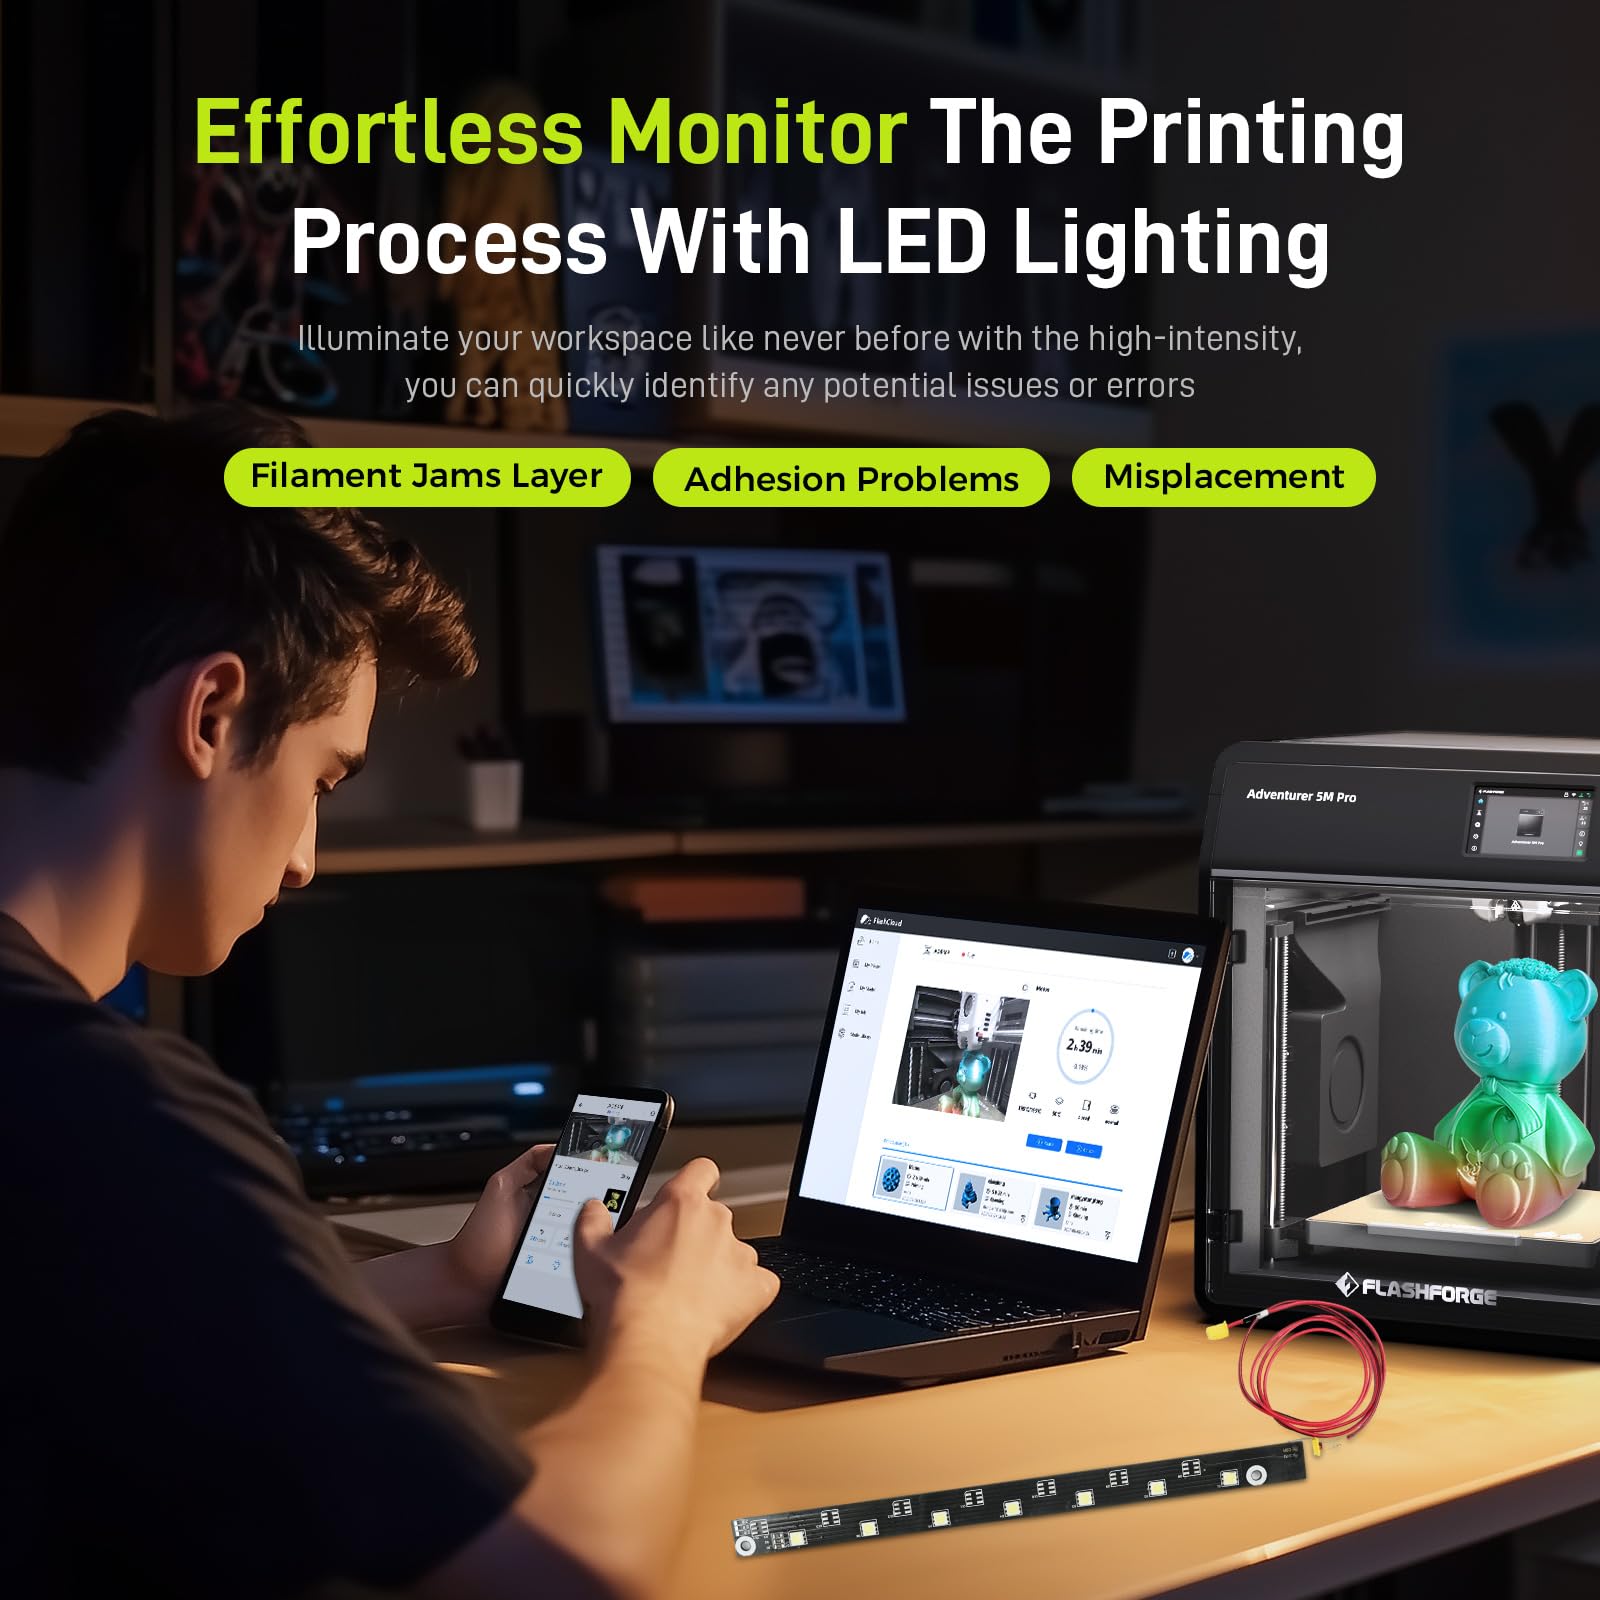
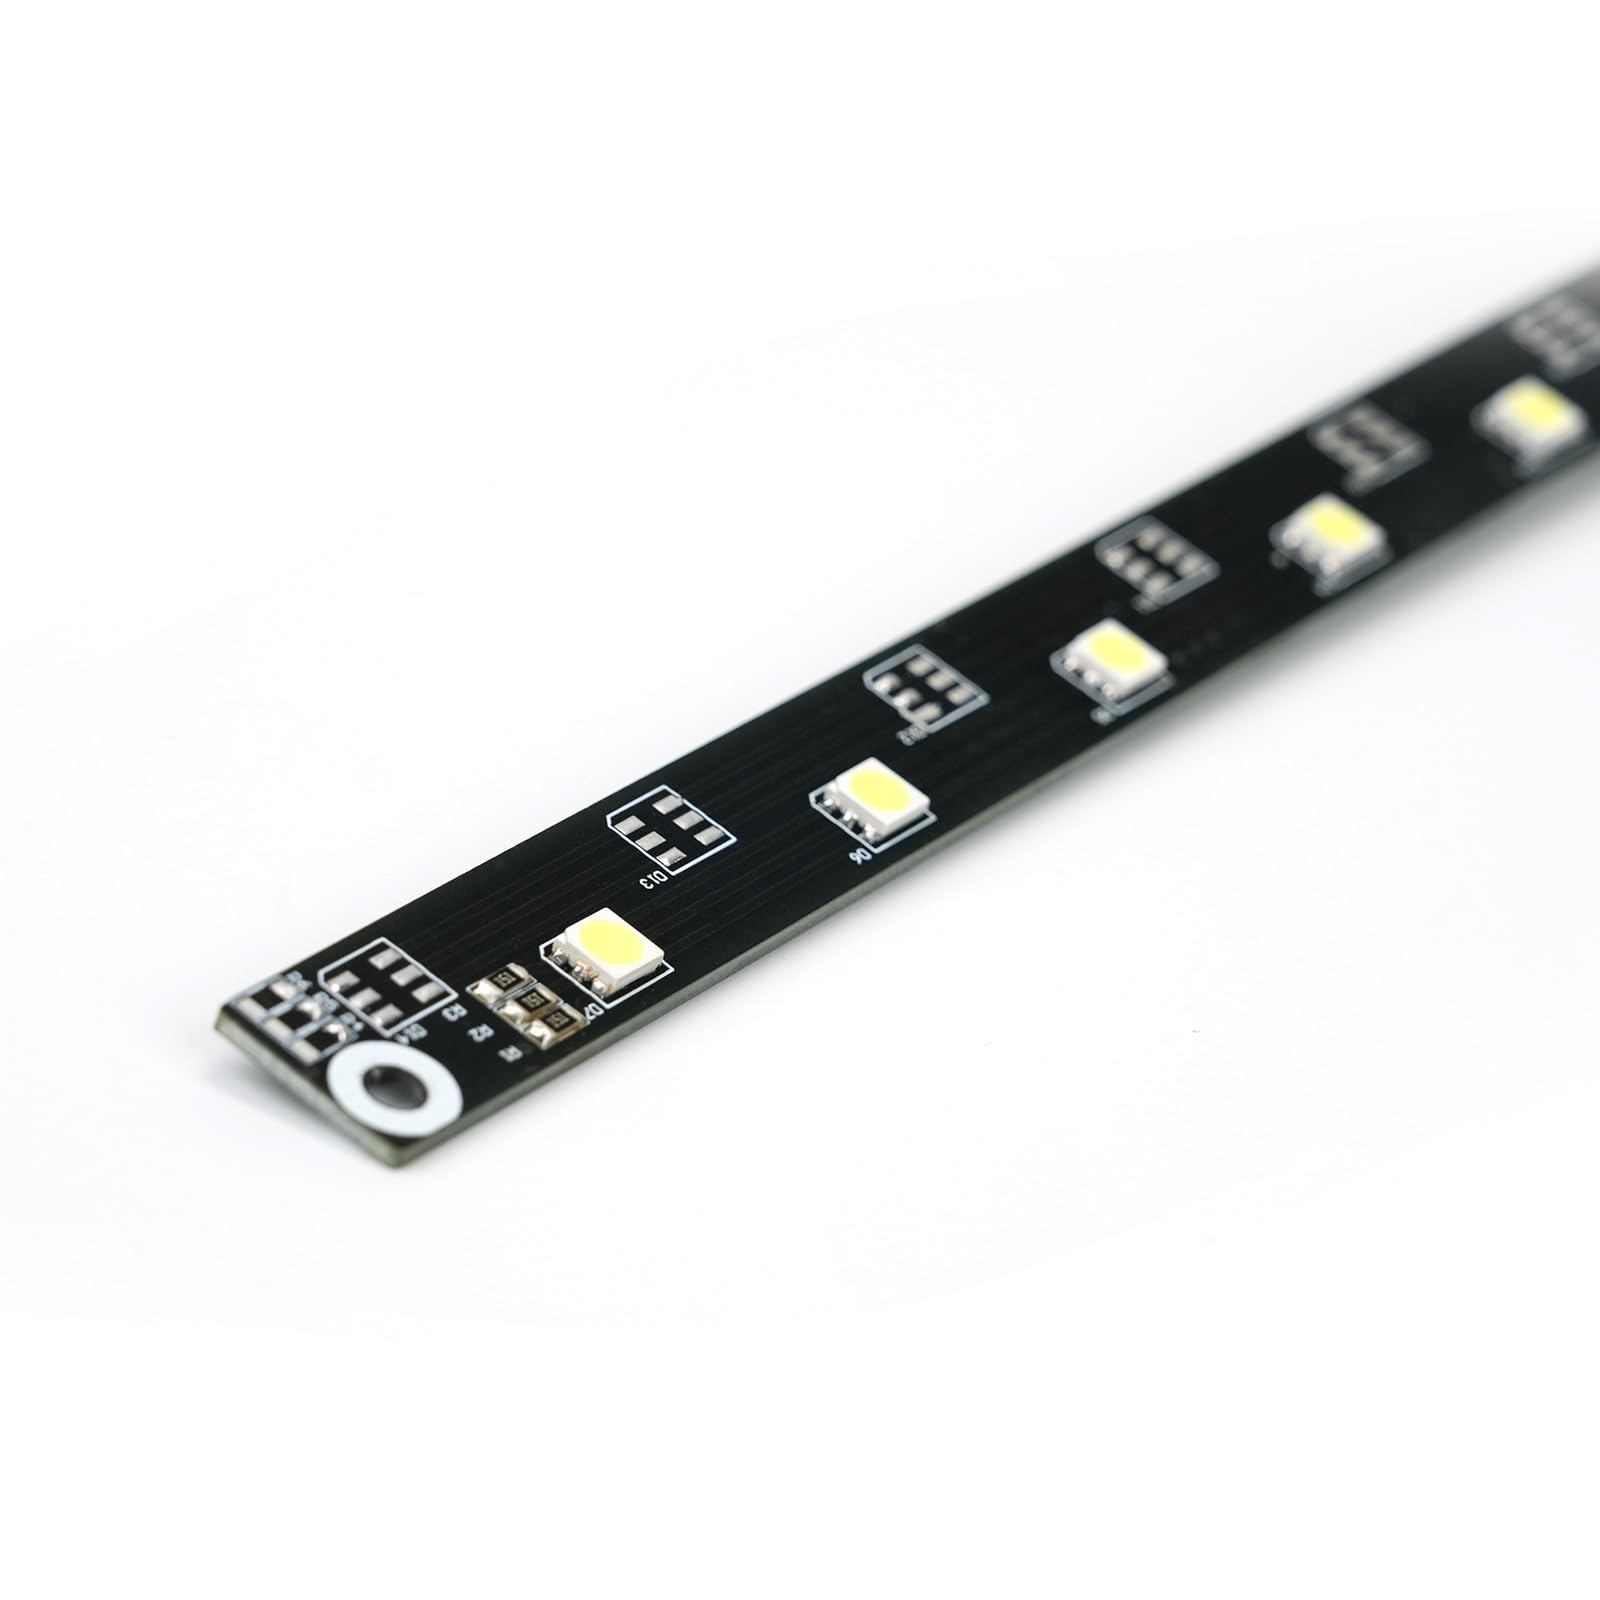
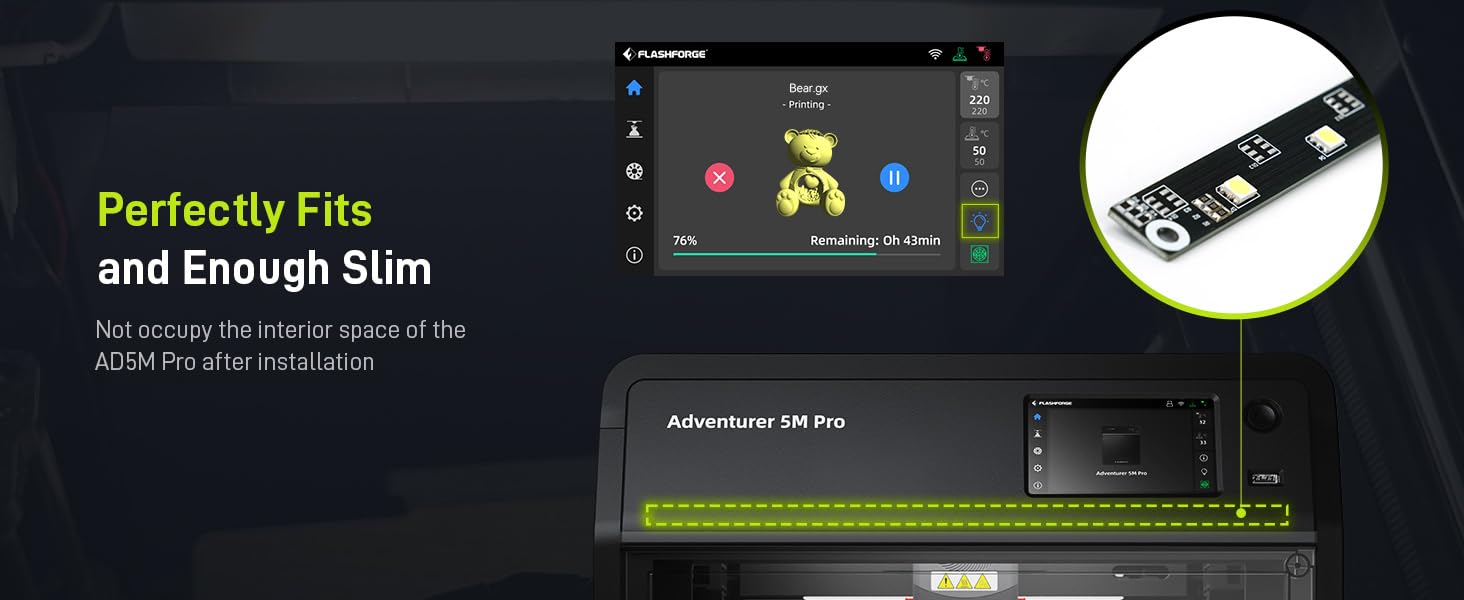
The Official Original Flashforge Adventurer 5M Pro 3D Printer LED Light Strip is a high-intensity lighting solution designed to enhance your 3D printing experience. Weighing just 6.4 ounces and measuring 3.54 x 2.75 x 1.57 inches, this LED light strip allows for effective monitoring of your printing process, ensuring you never miss a moment of creativity. Perfectly tailored for the Flashforge Adventurer 5M Pro, it’s a must-have for any serious 3D printing enthusiast.


| Brand | FilaBees |
| Manufacturer | Zhejiang Flashforge 3D Technology Co., Ltd |
| Item Weight | 6.4 ounces |
| Product Dimensions | 3.54 x 2.75 x 1.57 inches |
| Country of Origin | China |
| Assembled Height | 1.57 inches |
| Assembled Length | 3.54 inches |
| Assembled Width | 2.75 inches |
| Batteries Included? | No |
| Batteries Required? | No |
J**R
AD5M LED
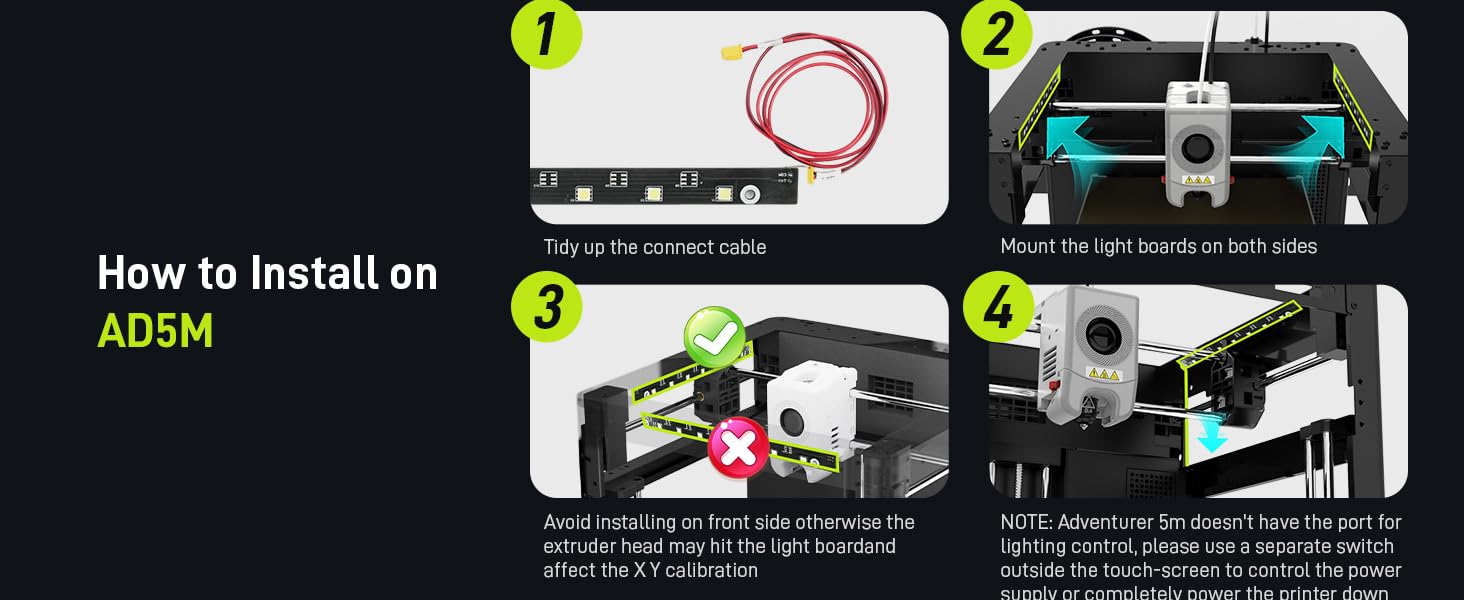
After 3D printing all the parts you need for the AD5M enclosure kit, I was able to mount the light on the inside of the top part that sits on the AD5M frame. It has a place to fasten the LED light strip. The wiring will reach all the back to where it connects on the motherboard.Great addition to be able to see your 3D printing at work. Also a must if you add the camera for the AD5M.
L**N
Great addition
Awesome addition. Directions, remove the 6 screws the hold the back plate on at the rear of the printer. On the front top support of the printer (where your screen is attached to) there are two holes. These two holes align with the holes on the LED strip. I used two 3mm x 12 mm screws and 3mm square nuts. Ensure the wire is facing the side where the screen is. The LED strip won't sit too flush on the screen side, yet that is ok. Run the wire in the channel where the ribbon wire is, out the back and attach it to the LED connector on the mother board. You can easily print little wedges that slide into that channel where the led wire is next to the ribbon cable to keep it secure.
H**N
Lights up my prints beautifully!!
10/10 recommended if you have the DIY enclosure for the 5m. Lights it up wonderfully and no issues installing with spare hardware the enclosure kit included. The best way I say to run the wire is find the lcd ribbon cable and run it in the same channel all the way to the back, keeps it tidy and out of the way neatly and doesn't interfere with anything and now I can see my prints better in the enclosure!!
Y**M
So good
We have used this non stop since we bought it! So good for my 11 year old
J**N
Works good
It works fine. I just wish it would have come with mounting hardware and maybe clips to help run the wire.
D**T
Nothing
Great
S**R
Instructions not included
Exactly what I paid for but no instructions included
T**K
Excellent addition to the FF AD5M if you’ve got the camera and enclosure.
Bought this light with the enclosure kit and camera kit. It works great and direct fitment on the factory enclosure’s lid. Ran the wire down the pillar and to the back board where there is a plug waiting. The light is always on when the AD5M is powered up, but I believe you can control it through some Gcode commands (haven’t tried this). Without the enclosure, placement on the non-pro model may be challenging.
Trustpilot
3 weeks ago
1 week ago